Evidentiary is a Mac app for presenting evidence at trial: exhibits on a jury display, deposition video clips cut to the page and line, and the courtroom tools around them — annotation, redaction, impeachment playback, and the paper trail the court expects. An entire case lives inside one file you can copy.
### What Evidentiary is
Evidentiary covers the work between the discovery folder and the courtroom monitor. It is a native Mac application, built around one idea: your screen is private, and the jury display shows only what you deliberately put there.
| Area | What the app does | Chapter |
|---|---|---|
| Exhibits | Import PDFs, images, video, audio, Office documents, and DICOM imaging. Number them, stamp Bates ranges, apply court stickers, run OCR, redact, and track admission. | Exhibits |
| Presentation | Stage an exhibit privately, then publish it to a separate jury display. Annotate live, save markups as snapshots, compare two documents side by side. | Presenting to the Jury |
| Depositions | Sync transcripts to video so every page and line maps to a timestamp. Click a line to play that moment; impeach a witness with video and text together. | Depositions and Transcripts |
| Clips | Cut designations, group them into lists and playlists, play them to the jury with captions, and export them as video or reports. | The Clip Editor |
| Trial day | Witness binders, batch file renaming, QR recall codes, Siri shortcuts, and a Pre-Trial Check that verifies the case is ready for court. | Playlists and Binders |
Everything runs on your Mac. Case files never leave your machine; OCR, speech recognition, transcript syncing, summarization, and semantic search all run on-device. Nothing requires an internet connection in the courtroom. See Privacy for the full accounting.
### What you need
- A Mac running macOS 26.4 or later.
- A second display or projector for the jury output. Evidentiary runs single-screen for preparation, and can take over the main screen for the jury view after an explicit warning — ⌘⎋ exits.
- An active Evidentiary Pro subscription.
- Free disk space proportional to the case. Exhibit files and deposition video volumes live inside the case package, so a case with hours of video is large.
A few features ride on Apple Intelligence and step down quietly without it: Ask Evidentiary falls back to chapter links, Smart Summary is not offered, and the clip editor omits its AI label suggestions. OCR, transcript generation, and keyword search never depend on it.
### Getting help
This guide covers every feature. If you only read one chapter, read Getting Started — it walks the whole core workflow in about five minutes. And if you would rather ask: Help → Ask Evidentiary answers typed "How do I…" questions from this guide, on-device, and links you straight to the section of the chapter that covers it. The section links appear the moment you ask; the written answer follows a few seconds later. When the guide has a walkthrough for that section, Show me in the app points at the real controls, step by step. Its footer states the boundary plainly — answers describe the software, not the law.
To see what changed in the build you are running, click See what's new in this version on the welcome screen, or choose Help → New Additions and Fixes. The Help menu also holds this guide (and Online User Guide for the same material on the web), the interactive tour, Ask Evidentiary, Keyboard Shortcuts, the Pre-Trial Check, Rate Evidentiary… (opens the App Store review page — only ever when you choose it; the app never prompts you for a rating), Third-Party Licenses, Terms of Service, and Export Diagnostics…, which writes the last hour of app logs to your Desktop for a support report.
Getting Started
Everything below assumes an empty screen and no case yet. There are two ways through: run the interactive tour on sample data, or follow the written walkthrough on your own files. Both land in the same place — evidence on a jury display, under your control.
### Start the interactive tour
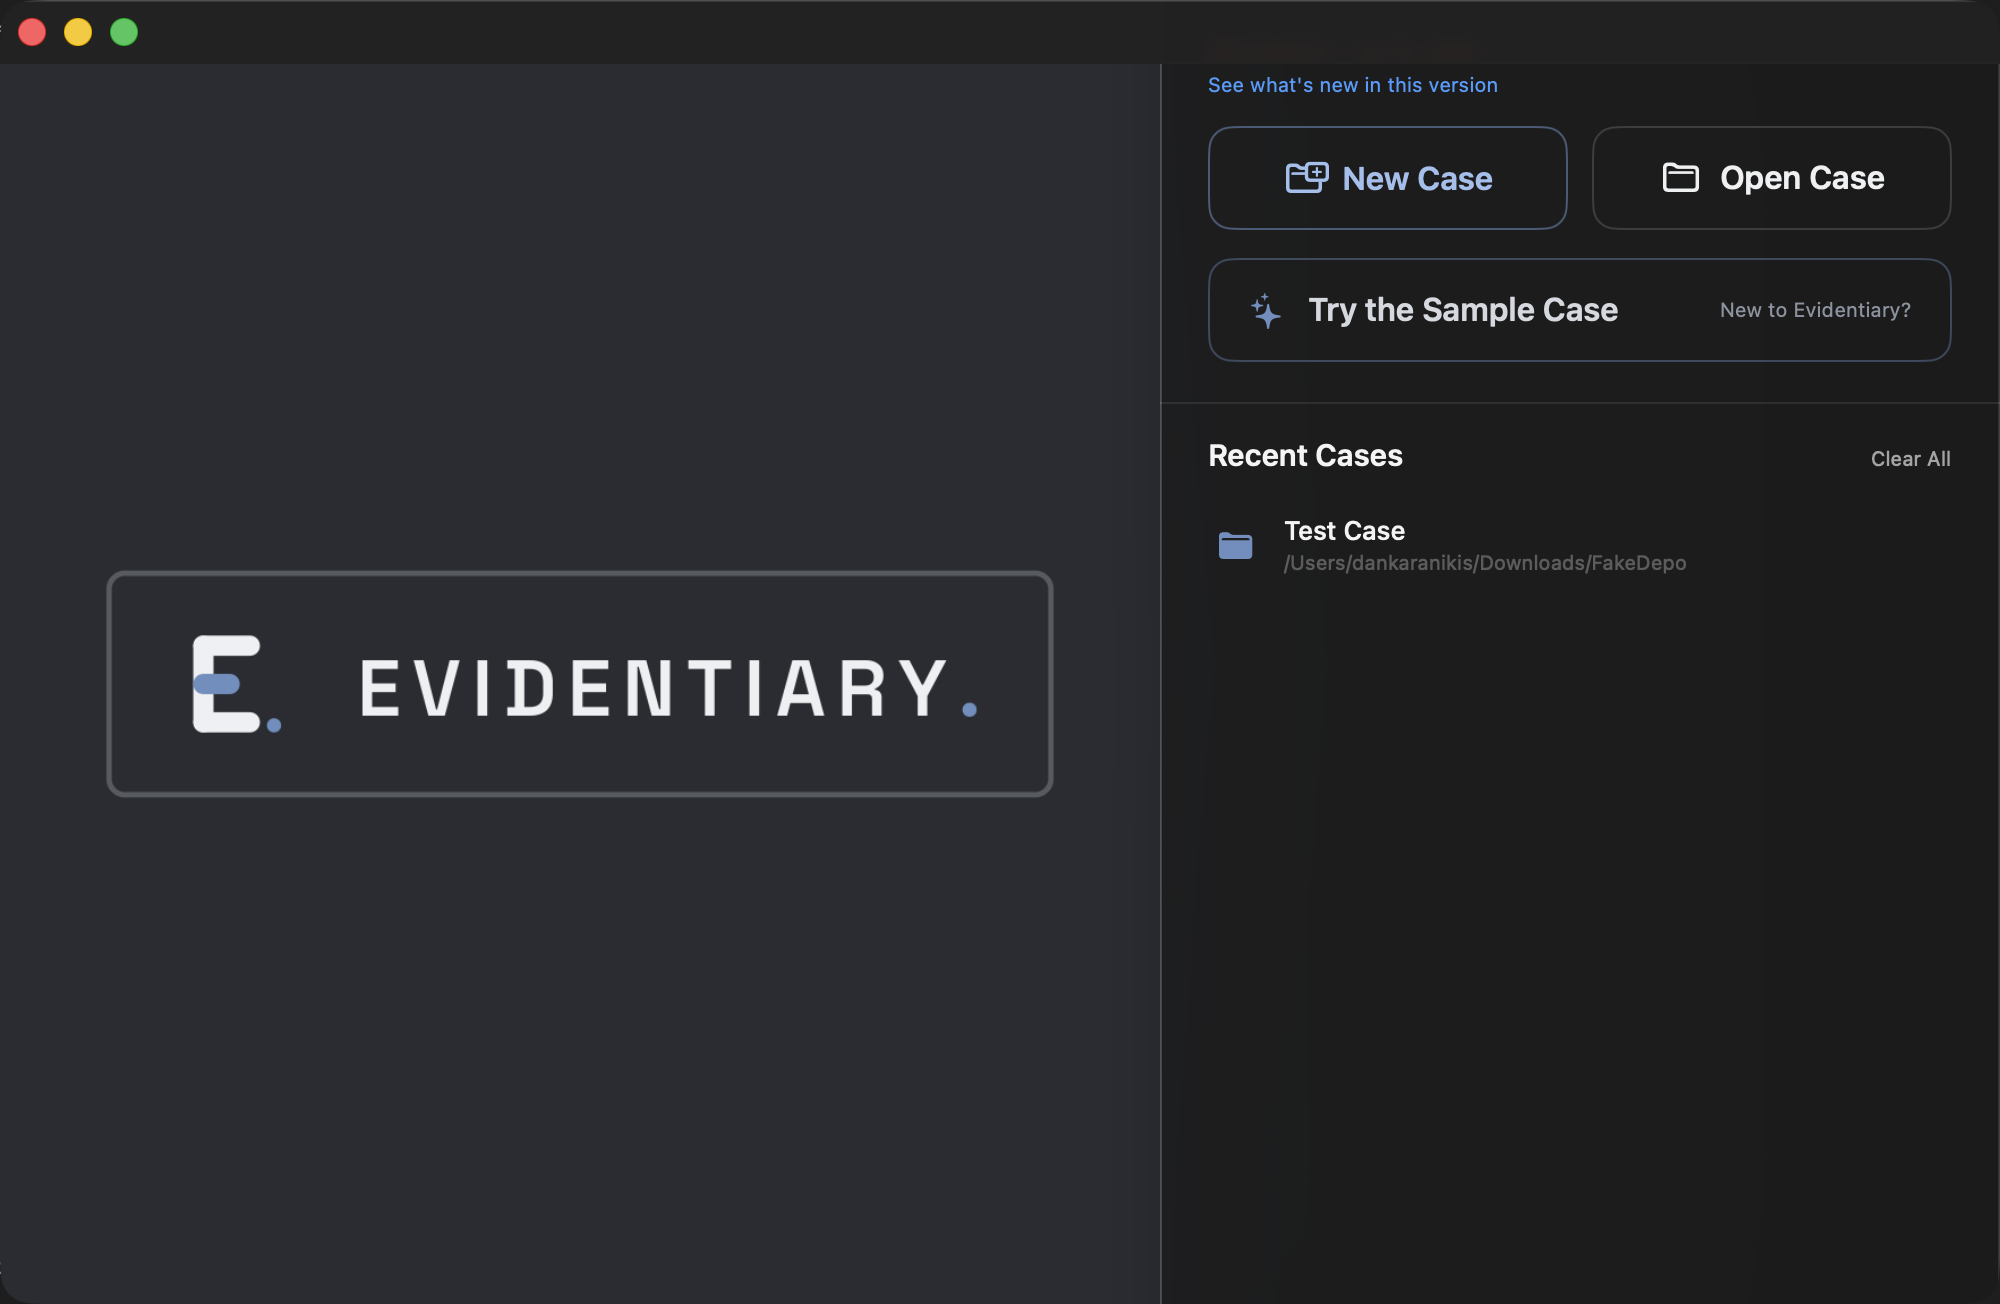
The fastest start is the interactive tour. Click Try the Sample Case on the welcome screen and, on your first run, Evidentiary walks you through the core courtroom loop on pre-populated data. Help → Start Interactive Tour re-runs it any time a case is open.
The sample case is Acme v. Apex Industries — exhibits P-1 "Contract (signed)", P-2 "Damages Chart", and P-3 "Incident Photo", a deposition of Sarah Apex with a matching transcript, and a binder called "Cross-Exam of Apex CEO". It is a real case, so experiments survive between visits.
Six steps cover the whole loop: staging an exhibit privately, opening the jury display with ⇧⌘J, publishing, marking up live, cutting the feed with blackout, and a wrap-up. The tour card sits in the bottom trailing corner and is never modal, so the app stays fully usable underneath it. Steps advance when you perform the real action rather than when you click Next — the card waits ("Waiting for a publish…") until you actually publish. Satisfied steps are skipped, Skip Tour leaves at any point, and progress is saved, so a half-finished tour resumes where it stopped. The last step offers Import My Case Files…, which ends the tour and opens the import panel.
### The same walkthrough, in writing
1. Create a case. Choose File → New Case… and pick a location. A case is a single .trialcase package holding your exhibits, depositions, clips, and annotations — copy that one file and you have copied the whole case. See Cases.
2. Import exhibits. Drag PDFs, images, video, or audio into the Exhibits sidebar, or use the toolbar's Import menu. Dragging them in opens the pending-import sheet, where you assign exhibit numbers and Bates ranges before anything lands in the case; the toolbar's Import Files… skips that step and commits them straight away. Office documents import too and preview inline. See Exhibits.
3. Connect the jury display. Plug in the courtroom display or projector, then press ⇧⌘J (or use the presentation bar) to open the jury window on it. What the jury sees is always exactly what the jury window shows — your workspace stays private on your own screen.
4. Stage and publish. Click an exhibit in the sidebar to stage it in your workspace. Press Return to publish it to the jury display. Arrow keys turn pages; typing a page number jumps straight to it. Return is the default publish key and is rebindable; Space never publishes — a single tap Quick Looks the selected exhibit (or plays and pauses a loaded video), and a double-tap opens Quick Search.
5. Annotate live. With an exhibit staged, use the annotation tools: highlight, callout, redaction, arrows, text labels, and a laser pointer that follows your cursor on the jury screen. Full coverage is in Presenting to the Jury.
6. Blackout. Press the blackout hotkey (or use the presentation bar) any time you need the jury screen dark — sidebars, objections, bench conferences. Press it again to restore the feed.
That is the core loop: stage privately, publish deliberately, blackout instantly. The three jury modes behind it — Blackout (⌘⇧B), Staged (⌘⇧S), and Live (⌘⇧L) — are covered in Presenting to the Jury.
### Finding your way around
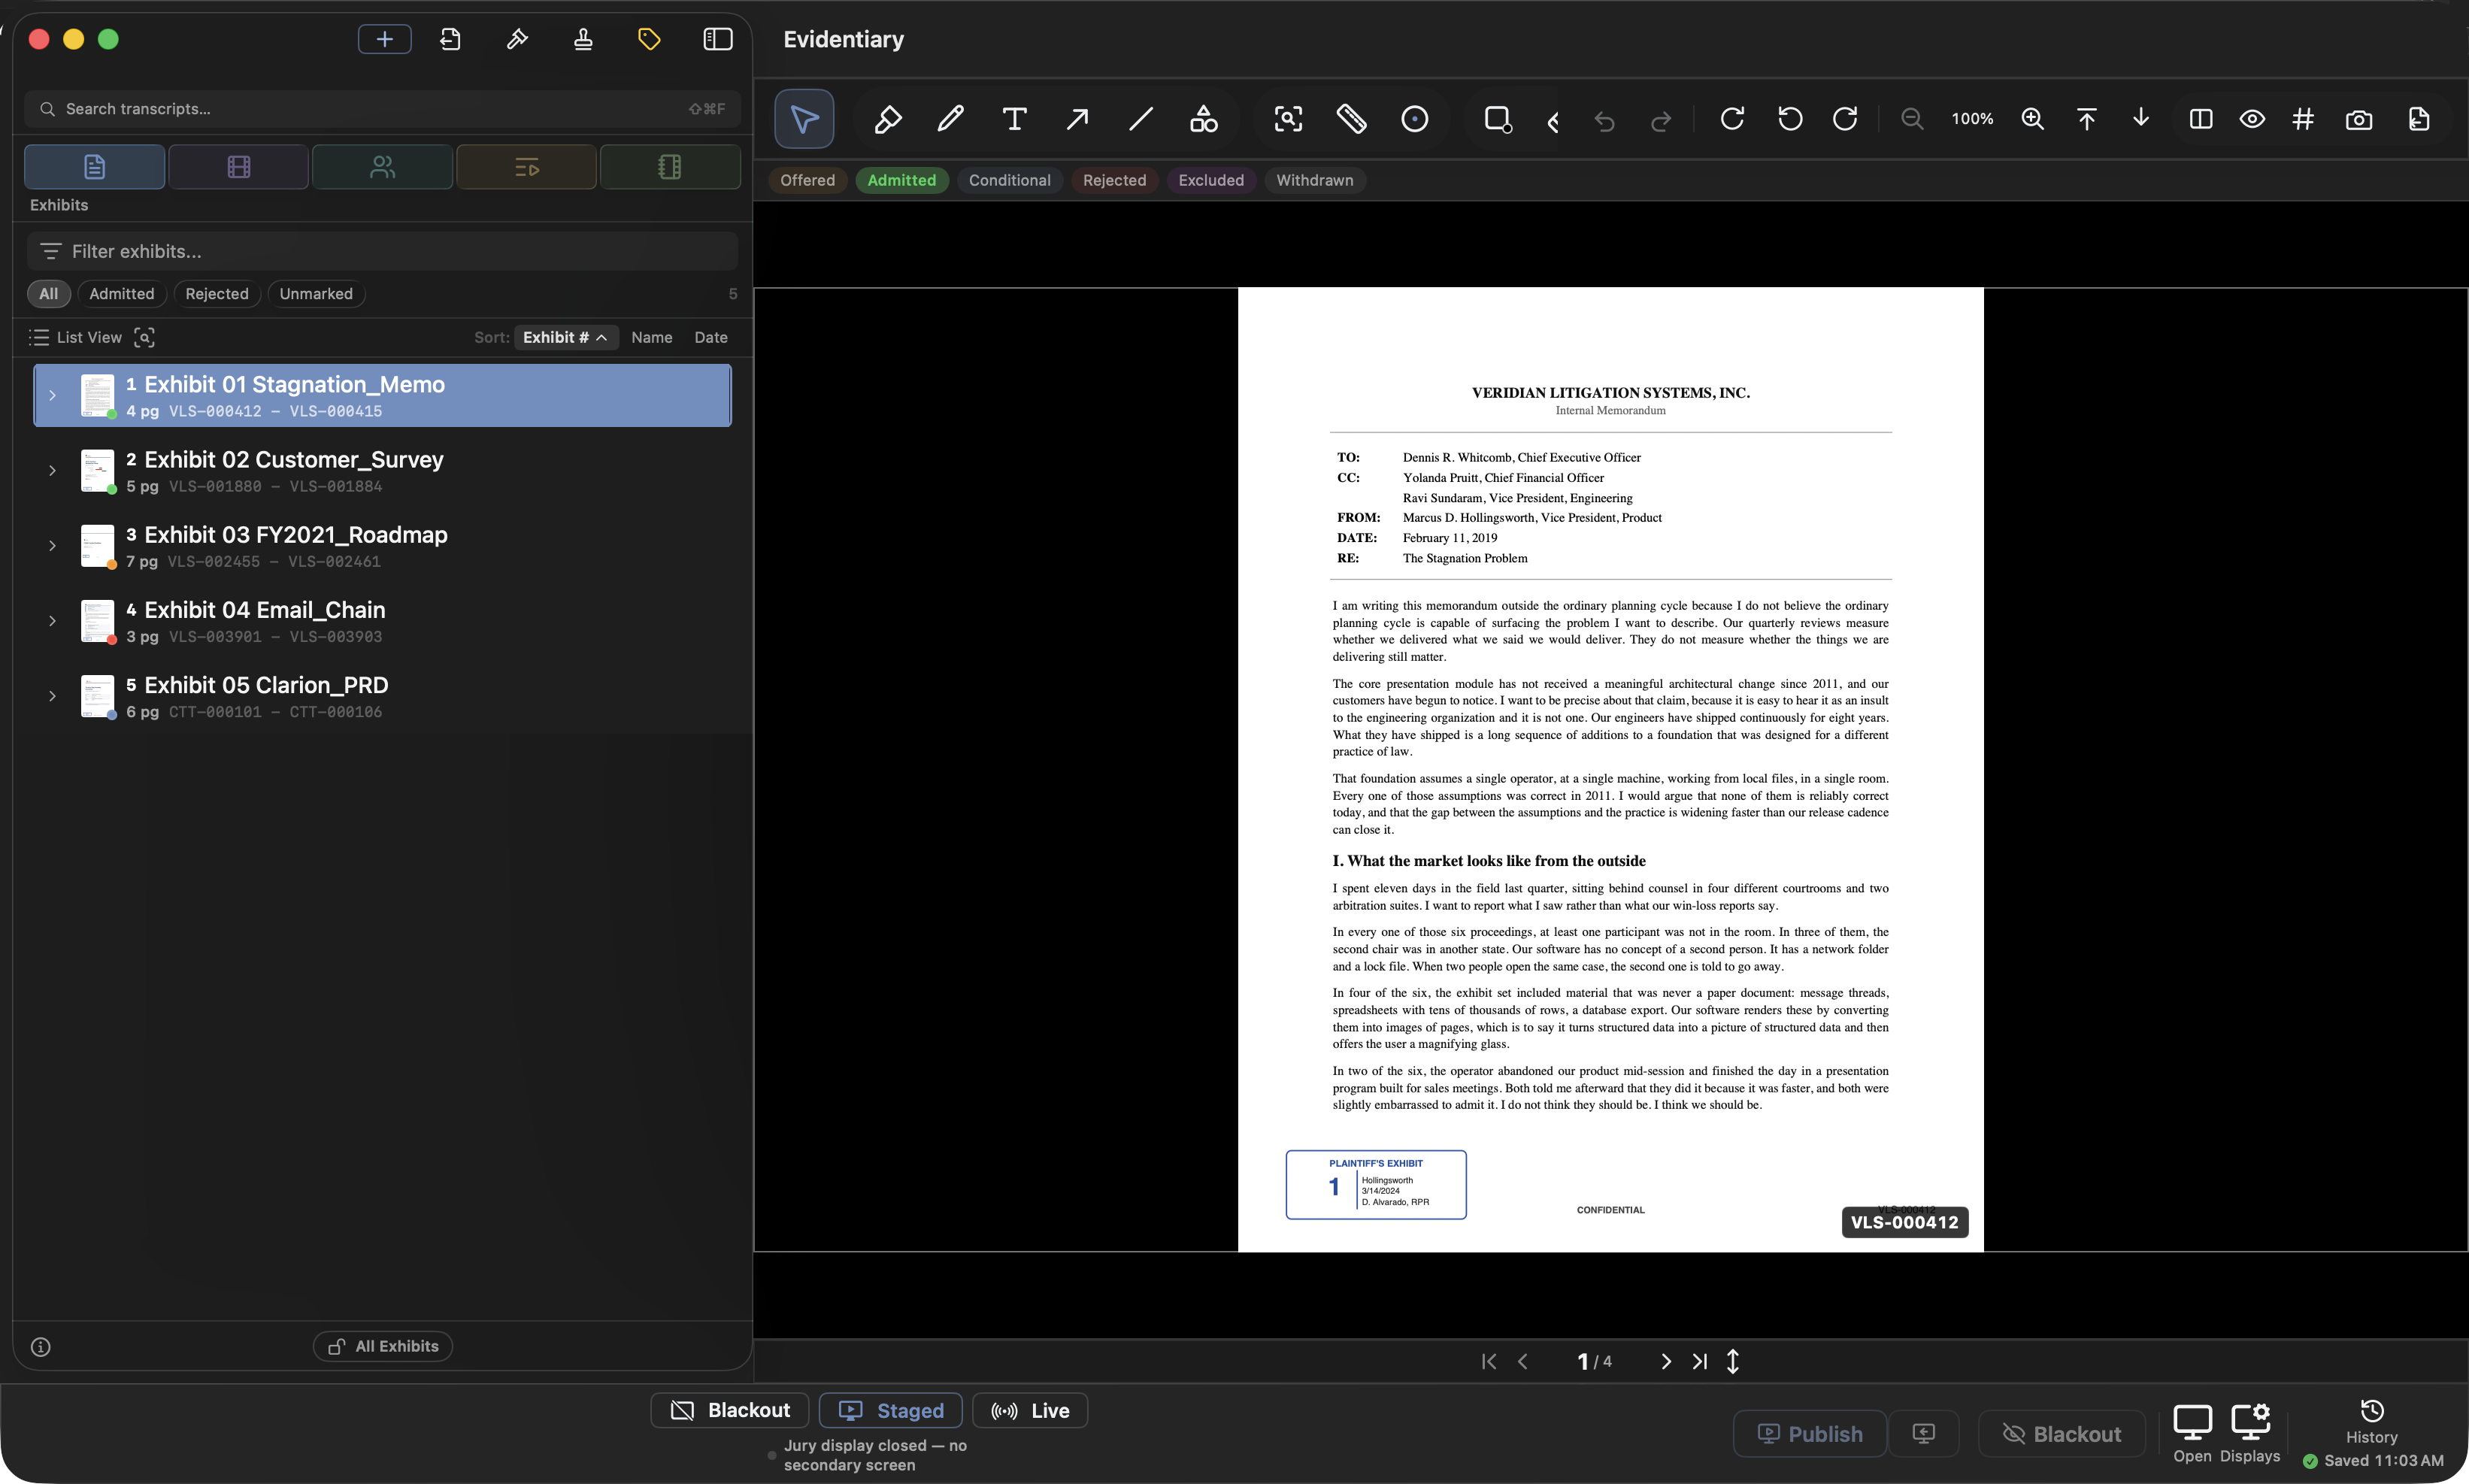
The sidebar's five tabs, each a glyph with its name beneath, switch with a click or a shortcut. View ▸ Hide Sidebar (⌃⌘S) folds the whole column away and brings it back; the button at the top of the sidebar does the same.
| Tab | Shortcut | Holds |
|---|---|---|
| Exhibits | ⌘1 | The exhibit list, filters, the ingest tray, and saved snapshots |
| Media | ⌘2 | Audio and video exhibits, on their own |
| Depositions | ⌘3 | Depositions, transcripts, and their clip lists |
| Clips & Playlists | ⌘4 | Designation lists, revisions, and exhibit playlists |
| Binders | ⌘5 | Witness and topic binders |
While dragging files from the Finder, hovering over a different tab for about half a second switches the workspace to it. Release on the Exhibits, Media, or Depos tab and the files go where that sidebar would take them — a deposition folder dropped on Depos becomes a deposition, files dropped on Exhibits or Media go to Pending Imports. Clips and Binders are waypoints only: carry the drag on into the list or folder the tab reveals.
The rest of the window: the title bar names whatever is staged — the selected exhibit, or the case itself when nothing is — tints while the jury display is presenting, and shows a badge whenever a long-running mode — designation playback, impeachment, a binder script — is driving the courtroom; click it to see and stop each one. A fixed case-name badge sits at the toolbar's trailing edge, beside the jury switches, so the case you are in is always in view no matter which exhibit the title shows; a long exhibit name in the title truncates before it reaches the badge. The detail pane shows whatever is selected and accepts dropped files. The inspector (⌥⌘I) reports the selected exhibit's status, labels, Bates data, and binders. Thin status bars stack above the presentation control bar while OCR, a background sync, or a playback list runs.
The window's own toolbar is customizable the Mac way: View ▸ Customize Toolbar… (or right-click the toolbar) opens a palette with the jury switches — Open / Close Jury Display, Blackout, Staged / Live — plus Import Files, Search and Lock, which you drag into the toolbar in any order. The case-name badge, Blackout, Staged / Live and Search sit there by default alongside the admission pill, the activity ring and Help, so the case name and the jury switches stay reachable even when the window's bottom edge is off the screen; drag the palette's default set back to start over. View ▸ Hide Toolbar tucks the whole bar away. The arrangement is remembered across launches. While the jury display is Staged or Live, the toolbar's controls, the case badge and the sidebar's Import button drop the blue accent for plain ink — black on a light window, white on a dark one — so they read at a glance; Blackout, or no jury display, brings the blue back.
Evidentiary is dark by design, on every Mac and in every system appearance: it is a media console that sits beside a projector in a dim courtroom, and a light chrome would glow. Its standard controls — toggles, pickers, list selection — follow the accent color you chose in System Settings; the navy is reserved for the surfaces the app draws itself.
Pop-up windows — Edit Deposition, Bates Stamp, Mass Add, and the rest — can scale their text and controls up by a quarter: View ▸ Larger Text in Panels (⌥⌘=). It is one setting for every pop-up: flip it once and they all follow, open or not, and it stays that way across launches. (The clip editor is already full-size and does not scale.)
### Tips, walkthroughs, and the menus
The first time you open a case, a welcome sheet tours the main areas with a Show me button that jumps to each, and a reminder that ⇧⌘J opens the jury monitor. As you work, one-time coach marks — small popovers headed Tip — surface the less-obvious features the moment each first becomes relevant. Each carries a Don't show me tips button that turns them off everywhere, and none ever fires during the tour. Four more are the Mac's own tips for features that arrived recently, shown once each on the control they describe and never while the jury display is open: B blacks out (on the mode control), double-tap Space searches (on the case search button), hold W for the tool wheel (on the annotation tools), and files can be dropped on the Dock icon (on the Import menu). Each shows exactly once, whether you close it or simply move on; a tip only returns when the feature it describes changes.
Several chapters of this guide carry a Show me in the app button, which drives the real app rather than describing it: the workspace switches to the right tab, an amber ring lands on the control being discussed, and a popover steps you through. Clicking the highlighted control advances the step. It appears only when a case is open and that chapter has a walkthrough.
The menus follow the obvious shape. File holds New, Open, and Close Case, Save Markup Snapshot… (⌘S), and File Renamer…. View holds the five sidebar tabs, the jury display, the three jury modes, Presenter Notes, and Trial Mode. Video holds play, shuttle, designation jumps, and rotation, enabled only with a video loaded. Help holds this guide, the tour, Ask Evidentiary, Keyboard Shortcuts (⌘/), and the Pre-Trial Check. Note that ⌘S is not "save case" — case data saves continuously. It saves a markup snapshot, and works only with a document on screen.
Cases
A case is one self-contained document. Every imported exhibit, deposition, clip list, binder, annotation, and saved position lives inside a single .trialcase package, which the Finder shows as one file, under an Evidentiary document icon, rather than as a folder to be opened. One case is open at a time.
### Create a new case
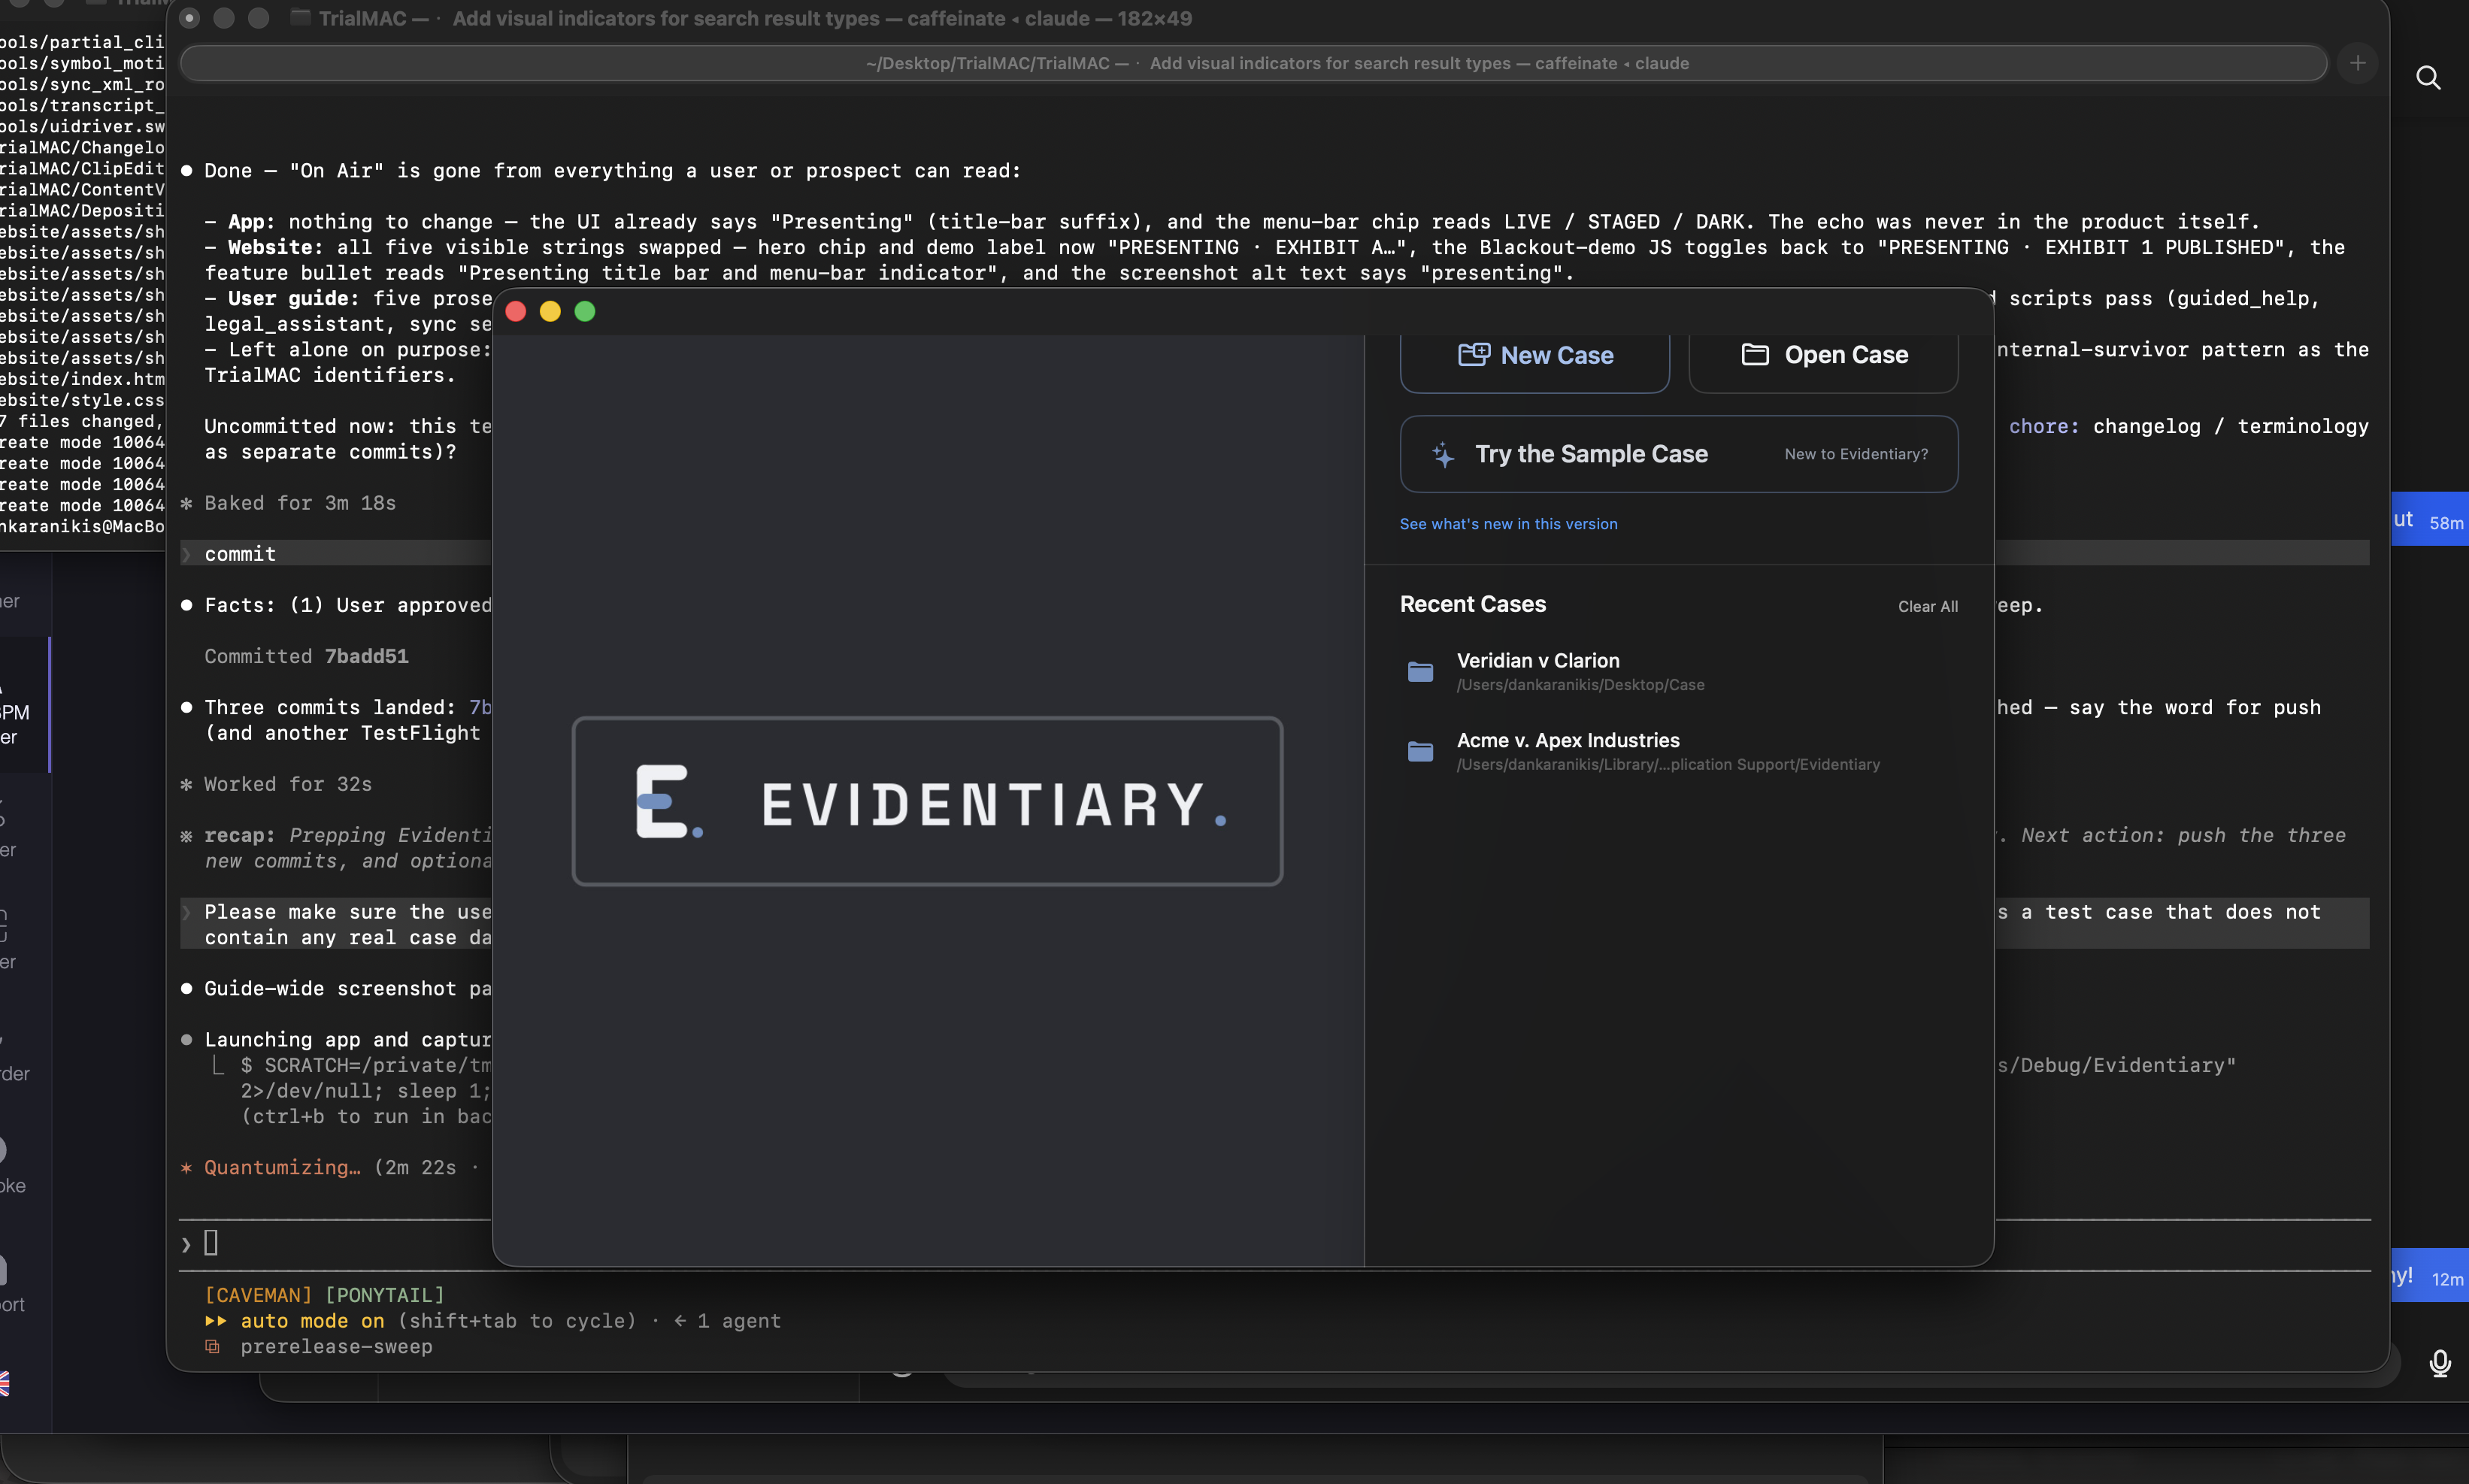
Choose File → New Case… (⌘N), or click New Case on the welcome screen. A save panel opens with the default name "Untitled"; the .trialcase extension is enforced by the panel, so the name you type is the name you get. Pick a location, create it, and the empty workspace opens. If the destination is not writable or the volume is full, an alert explains why.
Create the case on a local disk. Creating one inside iCloud Drive, Dropbox, Google Drive, or OneDrive is allowed but discouraged, for the reasons below.
### Open and close
File → Open Case… (⌘O) or a double-click in the Finder opens an existing package. Selecting anything that is not a .trialcase package raises "Invalid Case File"; a case that cannot be read raises a separate alert carrying the reason.
The welcome screen leads with a Continue card for the case you opened most recently — its name, when you last opened it, one click to pick up — and lists the other recent cases beneath it as cards with the case name, its enclosing folder (or Sample case for the sample case the app keeps for you), and when it was last opened. Hovering a card reveals a ✕ that removes the entry without ever touching the case file, and Clear All empties the list. A red Missing capsule marks a case whose file is no longer at the recorded path, and clicking such a row does nothing. To delete a case for good, delete the .trialcase package in the Finder.
File → Close Case (⌘⇧W) returns to the welcome screen. The case's Finder card — what a spacebar Quick Look or a Finder icon shows: the case name, how many exhibits and depositions it holds, and when it was last opened — is written when a case opens, after every import, and on close.
### What is inside the package
A .trialcase file is a macOS package — a directory the Finder presents as a single file.
| Component | Contents |
|---|---|
| Case database | Exhibits, labels, admission status, annotations, snapshots, designations, playlists, binders, and sync data |
Exhibits/ | The imported document, image, and media files |
Depositions/ | One directory per deposition, holding its transcript and video volumes |
Quarantine/ | Files you have quarantined, plus the record of what and when |
SessionState.json | The saved place for auto-resume |
Because everything is inside the package, copying the .trialcase file is a complete backup. Right-click it and choose Show Package Contents to inspect it, but do not rename, move, or delete anything inside from the Finder — treat it as one opaque file: copy it, move it, back it up whole.
### Auto-save and the save indicator
There is no Save button to forget. Case data saves continuously, and a readout at the trailing end of the presentation control bar confirms it: "Saved 4:12 PM", or "Save error" with a tooltip carrying the reason.
Warning: Do not keep presenting through a persistent "Save error". Changes made while saves fail are at risk. The usual causes are a full volume, a case package on an external drive that has been unplugged, or a cloud provider that has taken the package away. Read the tooltip, fix the cause, and confirm the readout returns to "Saved" before continuing.
### Pick up where you left off
With Settings → General → "Auto-resume where you left off" on, Evidentiary continuously records your position — sidebar tab, staged exhibit and page, playback spot — into the case package, and reopening the case restores all of it silently. It is off by default, deliberately: on a trial day, a case that always opens in the same known state is easier to work with than one that reopens wherever last night ended.
If a saved position is ever the problem — a slow exhibit, the wrong tab, an odd state after a crash — check Open case in safe mode on the welcome screen before opening. The case comes up cold, like a first load, for that one open. Nothing is deleted; your saved place is not applied. The checkbox appears only when auto-resume is on, because with it off there is nothing to skip.
### Moving files in, or copying them
On import, Evidentiary either copies files into the case — the default, leaving originals where they were — or moves them, leaving no duplicate behind. The master switch is Settings → General → "Move files into case instead of copying", and the pending-import sheet offers the same choice per batch as Move originals into case; the two mirror each other. Two rules hold regardless: a file that cannot be moved, on a read-only or network volume, is copied instead, and images converted to PDF during import always leave the original in place.
Warning: With moving on, imported files disappear from their source location. On a shared discovery volume, or anywhere another person or tool depends on, leave the setting off.
### Keep the case off cloud drives
Keep the package on a local disk, not in iCloud Drive, Dropbox, OneDrive, or Google Drive. Cloud providers can replace files with placeholders that stall when opened, and a placeholder that has to download in the courtroom can stall a publish with the jury watching.
Evidentiary warns once per open when it detects a case in a cloud-synced location, with a Don't warn again for this case checkbox. If the package is not fully local it pauses first on a download sheet showing byte progress; Cancel aborts the open and leaves the previously open case untouched. A case whose database itself has not finished downloading will not open at all. Before trial, force the whole package to download or pause syncing for the day, and run Help → Pre-Trial Check…, which checks for this.
### Quarantined files
Quarantine takes a problem file out of circulation without deleting it — for a document that crashes a viewer, refuses to render, or should not be openable until someone has reviewed it. Right-click the exhibit and choose Quarantine File…; the file moves into the case package's Quarantine folder, reviewable in the Finder. The sidebar row gains a red badge, and selecting the exhibit shows a gate instead of the document.
Mark as Safe… on that gate — or the same item on the context menu — returns the file to the case's exhibits. Nothing is deleted at any point, and the exhibit's numbering, Bates data, and admission record survive the round trip intact.
### Working across machines
A case is a single-operator, single-machine document. There is no shared or simultaneous editing.
Warning: Never open the same .trialcase package from two Macs at once, and never leave a case open on one Mac while a second Mac opens the copy a cloud service is syncing. The case database is not safe to edit that way, and doing so risks corrupting it. Close the case on one machine before opening it on another.
To move a case, close it and copy the whole package; an external drive is the most reliable transport. To collaborate, exchange the purpose-built files instead of passing a live case back and forth: a .dce clip list a colleague imports into their own copy, a .tws word-synced deposition that plays in the free companion player, or Sync XML for transcript timings. Changes made in two copies do not merge, so designate one copy as the master. See Reports and Exports.
Exhibits
The Exhibits tab (⌘1) is the master list of everything you might put in front of a witness or the jury: every PDF, image, scan, photograph, video, and audio file in the case. Selecting a row stages that document in your private detail pane, and nearly every exhibit operation — numbering, Bates stamping, OCR, redaction, stickers, admission status, binder filing — starts from a right-click on a row in this list.
### Import exhibits
Files reach the case through several doors, all of which funnel into the same review sheet before anything is committed.
| Entry point | Where |
|---|---|
| Import → Import Files… | The navy plus-icon menu in the Exhibits toolbar |
| Import → Capture from Camera… | The same menu — photograph a paper document with a nearby iPhone or iPad, a USB camera, or the Mac's own camera |
| Import → Import Exhibit List (CSV)… | The same menu, for migrating a list out of older software |
| Import → Watched Folders… | The same menu, below a divider |
| Drag and drop | The Exhibits or Media sidebar, the detail pane, the Mass Add sheet, or a binder folder row |
| Drop on the Dock icon | Any file Evidentiary accepts, dropped on its Dock icon or sent with Finder's Open With ▸ Evidentiary, lands in the open case |
| Share ▸ Evidentiary | The Mac's Share menu in Mail, Safari, Photos, Messages, Preview and Finder — an attachment from opposing counsel goes straight from the email into the case |
| Import Files… | Quick Search, typed as a command |
Evidentiary accepts PDFs; JPEG, PNG, GIF, and BMP images; plain-text transcripts; MPEG-4, QuickTime, and AVI video plus other system-recognized movie types; MP3, MPEG-4 audio, WAV, and AIFF; DICOM imaging (.dcm, .dicom, and whole discs through File ▸ Import Imaging Study…); Office and iWork documents; and 3D models — USDZ, USD, Reality, OBJ, STL, PLY, COLLADA, and Alembic. The entire sidebar is a drop target — a dashed ring appears while files hover, unsupported types are filtered out of the drop without an error, and everything dropped in one gesture arrives as a single batch. Dropping files onto a binder folder row files them into that binder as it imports them.
Images are converted to PDF as they import. The converted copy becomes the exhibit, and the original image file always stays where it was, even with Move originals into case turned on.
### Scanning a document with a camera
Import → Capture from Camera… opens the Document Camera: the picture fills the window and the controls float over it in a glass bar — camera picker, turn, the jury switch, an Auto switch beside a round shutter, the page count, and the send button — with a filmstrip of captured pages above it. A nearby iPhone or iPad (Continuity Camera — signed in to the same Apple Account, Wi-Fi and Bluetooth on) starts on its own the moment it appears, and its overhead Desk View is the one to pick for a stack of pages; a USB document camera just needs to be plugged in, and the Mac's built-in camera is in the picker if nothing else is. Put the phone on a stand and turn on Auto: each page is photographed at full resolution once it has held still for about half a second, a tick sounds, and the status line says *Captured page N — turn to the next page*. Turn the page and hold still again — the camera notices the page turning even in a bound transcript, where the book itself never leaves the frame — and wait for each tick before turning on. Nudging the book or the camera can photograph a page twice; that is by design, since a duplicate is easy to spot and a missing page is not. The shutter (⌘T) takes one by hand at any time — a "Captured N" pill pops out of it as the page lands — which is the way to go handheld — a camera in the hand drifts, and auto-capture waits for it to settle. Aim a phone straight down at the desk and its picture arrives sideways and re-shapes as you tilt — pointed at the floor, the phone can't tell which way is up — so the panel follows the page instead of the phone: a green outline marks the paper it has found — it is drawn only once there is actually a page in the picture, so an empty desk shows no box at all — and the picture turns to keep that page's text upright, on the preview, the jury feed, and every capture alike. Line up by putting the paper inside the green box. The turn button (⌘R) adds a quarter turn for a page with no text to go by; the panel remembers that turn for the camera.
Getting the whole page in without a boom arm. An iPhone's camera is cropped by Center Stage, which follows whoever is in front of it — that crop is why a letter page only fits from high above the desk. The Wide switch in the control bar turns that crop off so the camera gives its full field of view, and it starts switched on, because a page is not a face and does not want following. Wide appears only for a camera that has the crop to turn off. A Mac cannot zoom a Continuity Camera any further than that: the zoom control in AVFoundation is an iPhone-only feature, so the two levers are Wide and the phone's own overhead Desk View, which sees the desk in front of the phone rather than what the phone faces. When a page still runs past the edge of the picture, the status line names whichever of the two is available.
Warning: The iPhone's portrait effect blurs everything except the subject, and on a page that means a soft scan and a failed OCR. Only you can turn it off — in Control Center, under Video Effects — so the panel checks on start and says so in the status line if it is on.
Every still waits for the lens. Swapping one page for the next sends the camera back into a focus hunt, and a frame taken mid-hunt is the blurry page you would otherwise not notice until OCR ran; the status line reads *Focusing…* while it waits. The wait is capped at about a second, so a camera that never reports itself focused still takes the picture.
Every page is cropped and straightened to the paper's edges and turned upright from its text, so a page laid sideways to fill the frame, or with its top toward the camera, still comes out reading the right way. The strip above the buttons shows every page as it lands, numbered in order: hover one and click its ✕ (or right-click ▸ Remove Page) to drop a page that caught your hand, a blur, or a duplicate, then capture it again; the arrow beside it turns a page a quarter turn, for the rare page with too little text to orient itself. Add to Case (⌘⏎) makes one new exhibit of the stack — name it first or leave the field empty for *Scan* plus the date — selected and ready to number or Bates-stamp like any other. If nothing in the case can take the pages (the case was closed), they stay in the panel and the status line says so; closing the panel keeps them too.
The same panel also feeds the jury live. Open it from View ▸ Document Camera…, pick the device, and switch on Show on Jury; the feed fills the jury screen in real time — the way a courtroom document camera shows a page or an object — and Blackout takes it down instantly like any other source. Capture and live feed share one camera, so you can auto-capture a stack of pages and drop the live view on the jury from the same window. The first time you use it, macOS asks for camera permission — the camera runs only while the panel is open, and captured pages go nowhere but your case. If the iPhone or iPad never appears in the picker, turn Bluetooth off and back on on the Mac — not on the phone — and give it a few seconds: Continuity Camera finds the device over Bluetooth, and macOS sometimes stops advertising until the radio is cycled. The panel says so itself while it is waiting for a camera, and the Rescan button repeats it.
### Captions for media with no transcript
A deposition arrives with a certified transcript and a sync. A 911 call, a bodycam clip or a surveillance recording with audio arrives with neither. Right-click one in Media → Generate Captions… and Evidentiary transcribes it on this Mac, storing caption lines alongside the case.
Once an exhibit has been transcribed, its captions appear over the video on your own screen whenever you play it — that is how you read them before anyone else does. Nothing is captioned automatically, and captions never reach the jury until you ask for them: switch on Settings ▸ Jury Display ▸ Show media captions on the jury display, and an exhibit that has been transcribed will carry its captions in the same band the deposition designations use, in the same styling.
Generate Captions offers four ways to run it. *From the Audio As-Is* is the plain pass. *Clean Up the Audio First* runs the same noise reduction and levelling the playback filters use before the recognizer hears anything, which is the one to reach for on a phone recording or a room with air conditioning in it. *Separate Speakers* labels each line with the voice that said it — Speaker 1, Speaker 2, in the order they are first heard. It never claims a name: nothing in the app knows who is talking, only that the voice changed, and a caption asserting a name on a jury display would claim something it cannot know. The fourth does both.
An audio-only exhibit carries captions too, and there they matter most — a 911 call or a voicemail has no picture, so the caption band is the whole of what the jury sees while it plays.
Once an exhibit has captions, Export Transcript in the same menu writes them out — PDF… for the binder, or Plain Text… for anything you need to paste, diff or email. The text file is plain ASCII, so a curly quote out of the recognizer cannot turn into mojibake in someone else's software, and every line carries its timestamp. Both formats state on their face that the text is machine-generated and uncertified.
Warning: These captions are machine-generated. They are not a transcript of record, nobody has certified them, and a speech engine that mishears one word puts that word on the jury's screen over your evidence. Read them before you publish the exhibit — transcription happens ahead of time precisely so you can. If the audio has no intelligible speech, nothing is stored and the exhibit simply carries no captions.
### Importing a production
When the other side produces documents electronically they arrive as a folder: page images in numbered subfolders, plus a load file listing what each document is and which images belong to it. File ▸ Import Production… takes that folder whole.
Point it at the folder holding the load file — Concordance (.dat, with its .opt), IPRO (.lfp) and Summation (.dii) are all read, including several volumes' worth at once — and every document in the production becomes one exhibit: its pages assembled in order into a single PDF, named for its Bates number, carrying the production's own Bates prefix and start number rather than a new one. The pages are already stamped, so nothing is stamped over them. Where the production ships extracted text, that text comes with it, and those scanned pages are searchable without an OCR pass.
Documents are matched to their pages by Bates number, never by the order the files happen to be listed in: an image load file sorted differently from the metadata is ordinary, and matching by position would quietly give one document another's pages. Images are found whatever the folder capitalization, and with the old machine's drive letter or volume folder trimmed off the front, so a production that was repackaged on the way still resolves.
When it finishes, a summary says how many documents came in and lists everything that did not add up — an image the folder does not contain, a page count the load file and the images disagree on, a Bates range the page count cannot produce. Copy All Warnings puts the whole list on the clipboard. Nothing is renumbered to make a discrepancy go away: the exhibit imports, and the warning tells you what to check.
### The pending-import sheet
Files dragged into Evidentiary — onto either sidebar, onto a binder folder, or onto the staging area where a document is shown — stop in the Pending Imports sheet, titled with the batch size, before anything lands in the case. Each row shows a type icon, the file name, the document's page count, an editable Exhibit #, a Bates start field, and a ✕ that drops that file from the batch. Page counts fill in a moment after the sheet opens and read — for anything that is not a PDF.
Warning: The toolbar's + → Import Files… does not stop here. Files chosen that way commit straight into the case, unnumbered and unstamped, with no chance to set exhibit numbers or Bates before they land. Drag files in instead when you want the sheet, or number them afterwards with Batch Label.
| Control | What it does |
|---|---|
| Delimiter picker | Decides where the exhibit number sits in each file name |
| Strip leading zeros | Trims padding inside the numeric run, so P00525 becomes P525 |
| Re-apply | Recomputes every row from the current settings |
| Auto-detect Bates | Seeds each row's Bates start from a stamp-shaped token in the file name |
| Bates digits | Zero-pad width, 1 to 8. Width 6 gives B000002; width 1 gives B2 |
| Read from document | Reads the stamp off the PDF's first page instead of guessing |
| OCR scanned pages | Off by default. Lets the stamp be read off a scan, and makes every imported PDF searchable |
| Rename Files… | Opens the File Renamer on this batch, so names can be fixed before anything is imported |
| Move originals into case | Move rather than copy, for this batch |
| Import | Commits the batch. Return also runs it |
The Bates start field is always editable, whether or not Auto-detect Bates is on, so a range can be set by hand for any row: type the first number of the document — ABC000123 — and the pages after it are numbered up from there. A value you type is yours to keep; nothing re-derived from the file name overwrites it.
Rename Files… hands the batch to the File Renamer, opened on a Pending Imports source with the same rule chain and live preview as any other rename. Apply sends the new names straight back to this sheet — the rows take them, and the numbering re-derives from them — so a misnamed production is corrected before anything is copied into the case. Files on disk keep their own names; the new name is what the copy is called. To rename originals where they sit, use the renamer's Finder Folder mode and pick that folder.
Read from document stops at the page's text layer, which is instant. A scan has no text layer, so reading a stamp off one needs OCR scanned pages, kept separate because OCR is the slow half — minutes, on a large production. Turning it on does two things: the stamp read falls back to OCR where the text layer is blank, and every PDF in the batch is OCR'd after the import so its words are searchable from the sidebar and from ⇧⌘F. That pass runs in the background, one document at a time, with progress in the status bar; the import itself does not wait on it.
Space, Dash, and Underscore take everything up to that character's first occurrence as the number. For P-12 Smith Contract.pdf, Space yields P-12 and Dash yields P. Custom prefix… works the other way round: type the text that sits immediately *before* the number and the tag is whatever follows it, so Exhibit turns Exhibit 01 NAME.pdf into exhibit 01. The match ignores case, and a file that does not contain the prefix imports unnumbered. None imports every file unnumbered under its own name. Re-apply overwrites hand-edits in the Exhibit # fields, with one exception: Bates values read off the document itself outrank the file-name guess and survive it, keeping the stamp's own zero padding.
A pair of protections runs on every batch. Duplicates are skippable: each incoming file is hashed against the case, a match draws a "Duplicate of…" badge with an Import anyway checkbox, and duplicates you do not opt into are dropped while the rest of the batch imports. Conflicts are blockers: a duplicate exhibit number or Bates range flags its row, sorts it to the top, and keeps Import disabled until you edit the field or skip the row. There is no override for a conflict.
Committing assigns each exhibit its number and fans the Bates range across the document's pages as individual page stamps.
### Automatically import files from a folder
Import → Watched Folders… points Evidentiary at a scanner drop, a discovery folder, or a co-counsel share and imports whatever lands there. New files are copied into the case automatically; originals are never moved or changed — even with Move files into case instead of copying turned on in Settings, which applies only to files you import by hand, so a shared Dropbox folder never loses a file to the case.
Add Folder… adds a folder, the minus button stops watching one, and Scan Now forces an immediate sweep. Only the top level of each folder is watched — subfolders are ignored. A file's size and modified date must hold still for three seconds, timed by the Mac's own clock, before it is copied, so a transfer in progress is left alone even on a network drive whose clock disagrees with the Mac's; a copy that stalls for longer than that can still be caught part-way. Files already in the case are skipped by hash. In a Dropbox, OneDrive, or Google Drive folder, an online-only file is downloaded as it is copied; if the download fails — no network, sync paused — the scan counts it as failed, and Scan Now or the next arrival tries it again.
Auto-imported files bypass the pending-import sheet, so they land unnumbered and unstamped in a From Watch Folder section pinned to the bottom of the Exhibits and Media lists, below a divider, each flagged with an INGEST capsule. The section starts collapsed to a single header showing the waiting count — click it to expand the list and again to fold it away. They stay out of the main list until you review them — open one like any exhibit to look it over. Right-click → Mark as Reviewed (File from Ingest) clears the flag on one exhibit or a whole selection and lifts it up into the main list; assigning a number clears it as a side effect. Working that section down to empty before each session is the intended trial-day routine.
Import Exhibit List (CSV)… is the other bulk path: it reads a list exported from previous trial-presentation software and creates numbered exhibit records from it. Point Link PDF files from folder at the production folder and the import brings in the documents too; without it, rows arrive as placeholders with no file, and cannot be staged or OCR'd until a document is attached.
### Browsing, filtering, and sorting
The filter field matches display names, exhibit numbers, Bates prefixes and ranges, per-page Bates labels, file names, and OCR'd body text, with the text pass running off the main thread so typing stays responsive in a case with thousands of documents. A status menu at the field's right end — All, Admitted, Rejected, or Unmarked, each with its count — narrows it further by writing a status: scope into the same field, so a typed type:video and Admitted compose; Batch Admit… lives in that menu too. One Clear filter button resets text and status together. (Watch-folder auto-imports aren't a chip; they live in the From Watch Folder section at the bottom of the list.)
The Sort chips order the list by Exhibit # (numeric-aware, so P-2 sorts before P-10), Name, or Date added; clicking the active chip reverses direction, and the choice is saved with the case. Beneath any sort the list keeps a manual order — drag rows to rearrange — and that manual order is what auto-numbering walks when it assigns numbers, so arrange first and number second.
Warning: Drag-reordering does nothing while any filter is active. The drag appears to succeed and leaves the order unchanged. Clear the filter first.
A four-way switch above the list picks how it draws: List (compact rows, the default so large cases stay fast), Detailed (page-1 thumbnails, hover buttons for Send to Jury, Mark Admitted, Reveal in Finder, Edit Labels, and Delete, and the full context menu), Grid (thumbnail cards, the view for a photo-heavy case), and Table (click a column header to sort by number, name, pages, or date added). Beside it, a density button switches compact and comfortable rows — compact rows carry the admission status as a thin colored bar on their left edge, and any row whose exhibit has been ruled on carries a wash of that status's color off its leading edge — green for admitted, red for rejected or excluded, amber for offered — so the state of the evidence reads down the list without opening anything — and a group button folds the list under sticky headers by status, type, or binder, each with its count; click a header to collapse it. The tab strip above the list wears a count dot when work is waiting behind a tab: exhibits awaiting Ingest review on Exhibits, sustained objections on Clips & Playlists. Compact rows deliberately carry a reduced menu: PDF Tools, OCR, and the binder commands are in Detailed View only, so switch views when a command is missing. Suggest Redactions… is in both. Admission Status is on every row's menu too, so an exhibit can be marked admitted without opening the inspector. Either way a row shows its type glyph, an admission status dot, a quarantine or INGEST badge when either applies, a small purple link glyph when some transcript links the exhibit, the page count, and the Bates range. The inspector's Where Used section lists every binder, transcript, clip list, and snapshot that references the exhibit; click a transcript to open Link Exhibits on it, or a clip list to open it in the clip editor. Clicking a row never scrolls the list — the row you clicked stays where you clicked it, so a shift-click range selection does not move the list out from under you. The list only repositions itself when something else has to bring a row into view: the arrow keys walking the cursor, or a Quick Search result, a snapshot, or the Locate button routing an exhibit here. Finder habits work here: choose Rename from a row's menu to rename it in place (Return keeps it, Escape drops it), double-click a row to send it to the jury (the first click stages it, the second publishes), and tap Space once — or press ⌘Y, or choose Quick Look from the row's menu — to open the file in the system preview without leaving the case, exactly as Finder does. Space still plays and pauses when a video is loaded, and a second tap within half a second opens Quick Search instead. The one Finder habit that gives way is typing a name to jump to it: plain letters and digits are the workspace's tool, jury, and page keys (H highlights, B blacks out, digits jump to a page), so they go to those shortcuts rather than the list — find a row by name with the filter field above the list, or with Quick Search. A row's menu also carries Share, which hands the underlying file to AirDrop, Mail, or Messages — AirDrop being the way to get a document onto co-counsel's Mac or iPad across the table with no network at all.
The list navigates like the Finder: ↑ and ↓ walk exhibits and their page sub-rows, → expands a multi-page exhibit and then dives into page 1, ← collapses, and expanding also lists each page's saved snapshots. Selection follows the cursor, so the staged page tracks whichever row is highlighted. Every row drags out of the app as its underlying file — into the Finder, into Mail as an attachment, into Keynote onto a slide — handing out a copy, with the file inside the case package untouched.
### Selecting and acting in bulk
⌘-click toggles individual exhibits in and out of a selection and ⇧-click takes a range. Multiple selected rows float an action bar over the list — a live count, then one button each for admission status, binder, sticker, playlist, and delete (each names itself on hover), and an ✕ that clears the selection — and switch the right-click menu to its batch form, which sets admission status, marks exhibits demonstrative or substantive, files them into a binder, clears ingest flags, or deletes them together. Deleting is guarded by time rather than a second dialog: a toast reading "Deleted N exhibits" carries an Undo link for six seconds, and nothing is removed until it expires. After the toast is gone the delete is committed, and the Edit menu offers no second chance.
### Exhibit info
⌥⌘I — or the Exhibit Info button at the bottom left of the exhibit sidebar, beside the Evidence Lock — opens the inspector for the selected exhibit: everything the record will ask you about, in one column. The Exhibit Sticker button opens the sticker panel in the same column, so one replaces the other. Settings ▸ General ▸ Staging Area ▸ Info and sticker panels chooses where that column sits: Beside the staging area, the default, narrows the staging area to make room; Over the staging area leaves the page exactly where it is and lays the panel on top of it. Over keeps the page from resizing but can cover the right edge of a wide page, so drag the panel's left edge to narrow it, or use Beside when you are placing a sticker on a landscape page. Read-only readouts give the display label, file, page count, date added, and First shown, the first time it was published to the jury. Then the admission status pills, the Basis picker, Through witness, a Record note, and the Demonstrative toggle. Then the editable exhibit number and name, the Bates prefix, start, and computed range, whether a sticker is placed, whether OCR has run, and which binders it is filed in. The Edit Labels… popover on the row itself is the quick version; changes take effect when it closes.
### Assign Bates numbers
Evidentiary tracks a pair of labeling systems for every document: the exhibit number the court calls it by, and the per-page Bates stamps applied to it. Three tools manage the second, and a case-wide duplicate guard runs underneath all of them.
Batch Label (the stamp icon in the toolbar) numbers the whole case in one sitting. Auto-Number Exhibits takes a prefix (default "P-") and a start value and walks the list in its current manual order. Auto-Number Bates walks the same order, advancing the running number by each exhibit's page count so ranges tile continuously with no gaps or overlaps. The table beneath is for manual touch-up.
Warning: Both Apply buttons and Clear All Labels act on every exhibit in the case, not on a selection, and none of them is undoable. The only bulk restore is re-running the auto-numbering.
Bates Stamps put the numbers on the pages. Right-click a document → PDF Tools → Add Bates Stamps… (Edit Bates Stamps… when stamps exist) and set a Prefix, a Start number, a Zero-pad width (width 6 gives 000123), and a page window; preview cards show the first and last stamp the settings produce. The sheet seeds itself from the exhibit's stored values and the full page range, so the common case is open, glance, Apply. Stamps are drawn at the bottom-right of each page and are non-destructive — the underlying PDF is never modified — and applying writes the prefix and start back to the exhibit's metadata so the sidebar and the filter field agree with the page.
Detect Bates Number reads a stamp already applied to the document: it searches the bottom edge of page 1, text layer first and OCR for scans, concentrating on the bottom-right corner and ignoring stray tokens like PAGE, EXHIBIT, and VOL. It either sets and stamps the value, tells you the exhibit already carries it, offers to Replace a different stored value and re-stamp every page, reports a collision with another exhibit, or reports finding nothing.
Underneath all of this runs one rule: no page in a case may share a Bates stamp with another, because a duplicate makes a page unfindable by citation. The guard is case-wide and page-level, runs wherever stamps are created, and blocks rather than warns. The fix is always the same — change the prefix, the start number, or the page range. When a document was genuinely produced twice under separate productions, change the prefix rather than the range so each copy stays independently citable.
Warning: PDF Tools → Remove Bates Stamps acts immediately, with no confirmation and no undo, and Clear All Stamps in the stamp sheet says so plainly. Restoring stamps means re-running the sheet.
### Run OCR on a document
A scanned document has no text layer until you run OCR. Right-click the exhibit → PDF Tools → Run OCR (the item reads Re-run OCR when text is stored). Pages that already carry real text are read from that layer instantly; a page whose only text is a sticker or Bates stamp (a few dozen characters) counts as a scan and is OCRed like one. The scan runs in the background at low priority, page by page, with progress in a thin status bar — "OCR: Contract — page 4 of 22", or "OCR: 3 exhibits — 18 of 96 pages" when several run together. There is no cancel and no completion alert; keep working, and the inspector's OCR readout flips from Not run to Done when the text lands. Select several exhibits and right-click → OCR N Exhibits reads them one after another, skipping any that already have text. File → OCR Unread Exhibits does the same for every document in the case that has no text yet. Either way the reading runs in the background while you keep working — a readout beside Displays on the bottom bar shows which document is being read and how far along the run is, and the activity tray in the toolbar lists every running task with a stop button — and it is never started for you: a long sweep can make the Mac breathe harder, so it waits to be asked.
OCR is per-document by design — nothing is scanned automatically on import — so you choose what gets read and a case with thousands of documents stays fast. Scan what you expect to search or redact rather than the whole production. Running it unlocks the filter's text search, ⌘F find-on-document, keyword and semantic results in Quick Search, the OCR fallback used by Bates detection, and the Redaction Assistant, which refuses to run without stored text.
### Redact an exhibit
Redaction is how you hide privileged information on an exhibit before it reaches the jury: black bars over confidential material — a Social Security number, a bank account, a name under seal — drawn over the page rather than into it. The Redact tool in the markup strip draws them by hand; drag a rectangle over the material to cover, and click the tool a second time to pick the fill: the classic black bar, white, grey, or a blur that obscures a face or a logo without the hard rectangle. The tools themselves are covered in Presenting to the Jury.
Suggest Redactions… finds them for you. Right-click the exhibit → Suggest Redactions… (in Detailed View it sits under PDF Tools), or select several exhibits and press Redact in the selection bar to scan them all into one review list, each row naming its exhibit, and Evidentiary scans the stored text for Social Security numbers, emails, phone numbers, birth dates, and account numbers (including card numbers written in groups, such as 4111 1111 1111 1111, when the check digit is valid), then proposes one redaction box over each hit; an SSN is never listed a second time as a phone number. Every row shows a checkbox, a type capsule (SSN, Email, Phone, DOB, Account #), the matched text, and its page. Click a row and the page appears beside the list with the proposed black bar drawn exactly where Apply would put it, padding included, so you can see what a box covers before you accept it. Nothing is selected to begin with — these are guesses over the stored text, and a misplaced box hides evidence — so tick the ones you want and press Apply. Select All and None beside the count take the whole list either way. Chips above the list narrow it to a single kind, each with its count, and where the same text turns up repeatedly an All N button on its rows ticks every one of them. The boxes become ordinary redaction marks you can move, resize, or remove, and they appear on the jury display in the same instant if the exhibit is live. A clean scan reports No PII found. When a selected document has no OCR text, the assistant offers a Run OCR button right there (beside the Skipped note when only some were skipped); it reads every selected document that lacks text and rescans by itself once the last one lands.
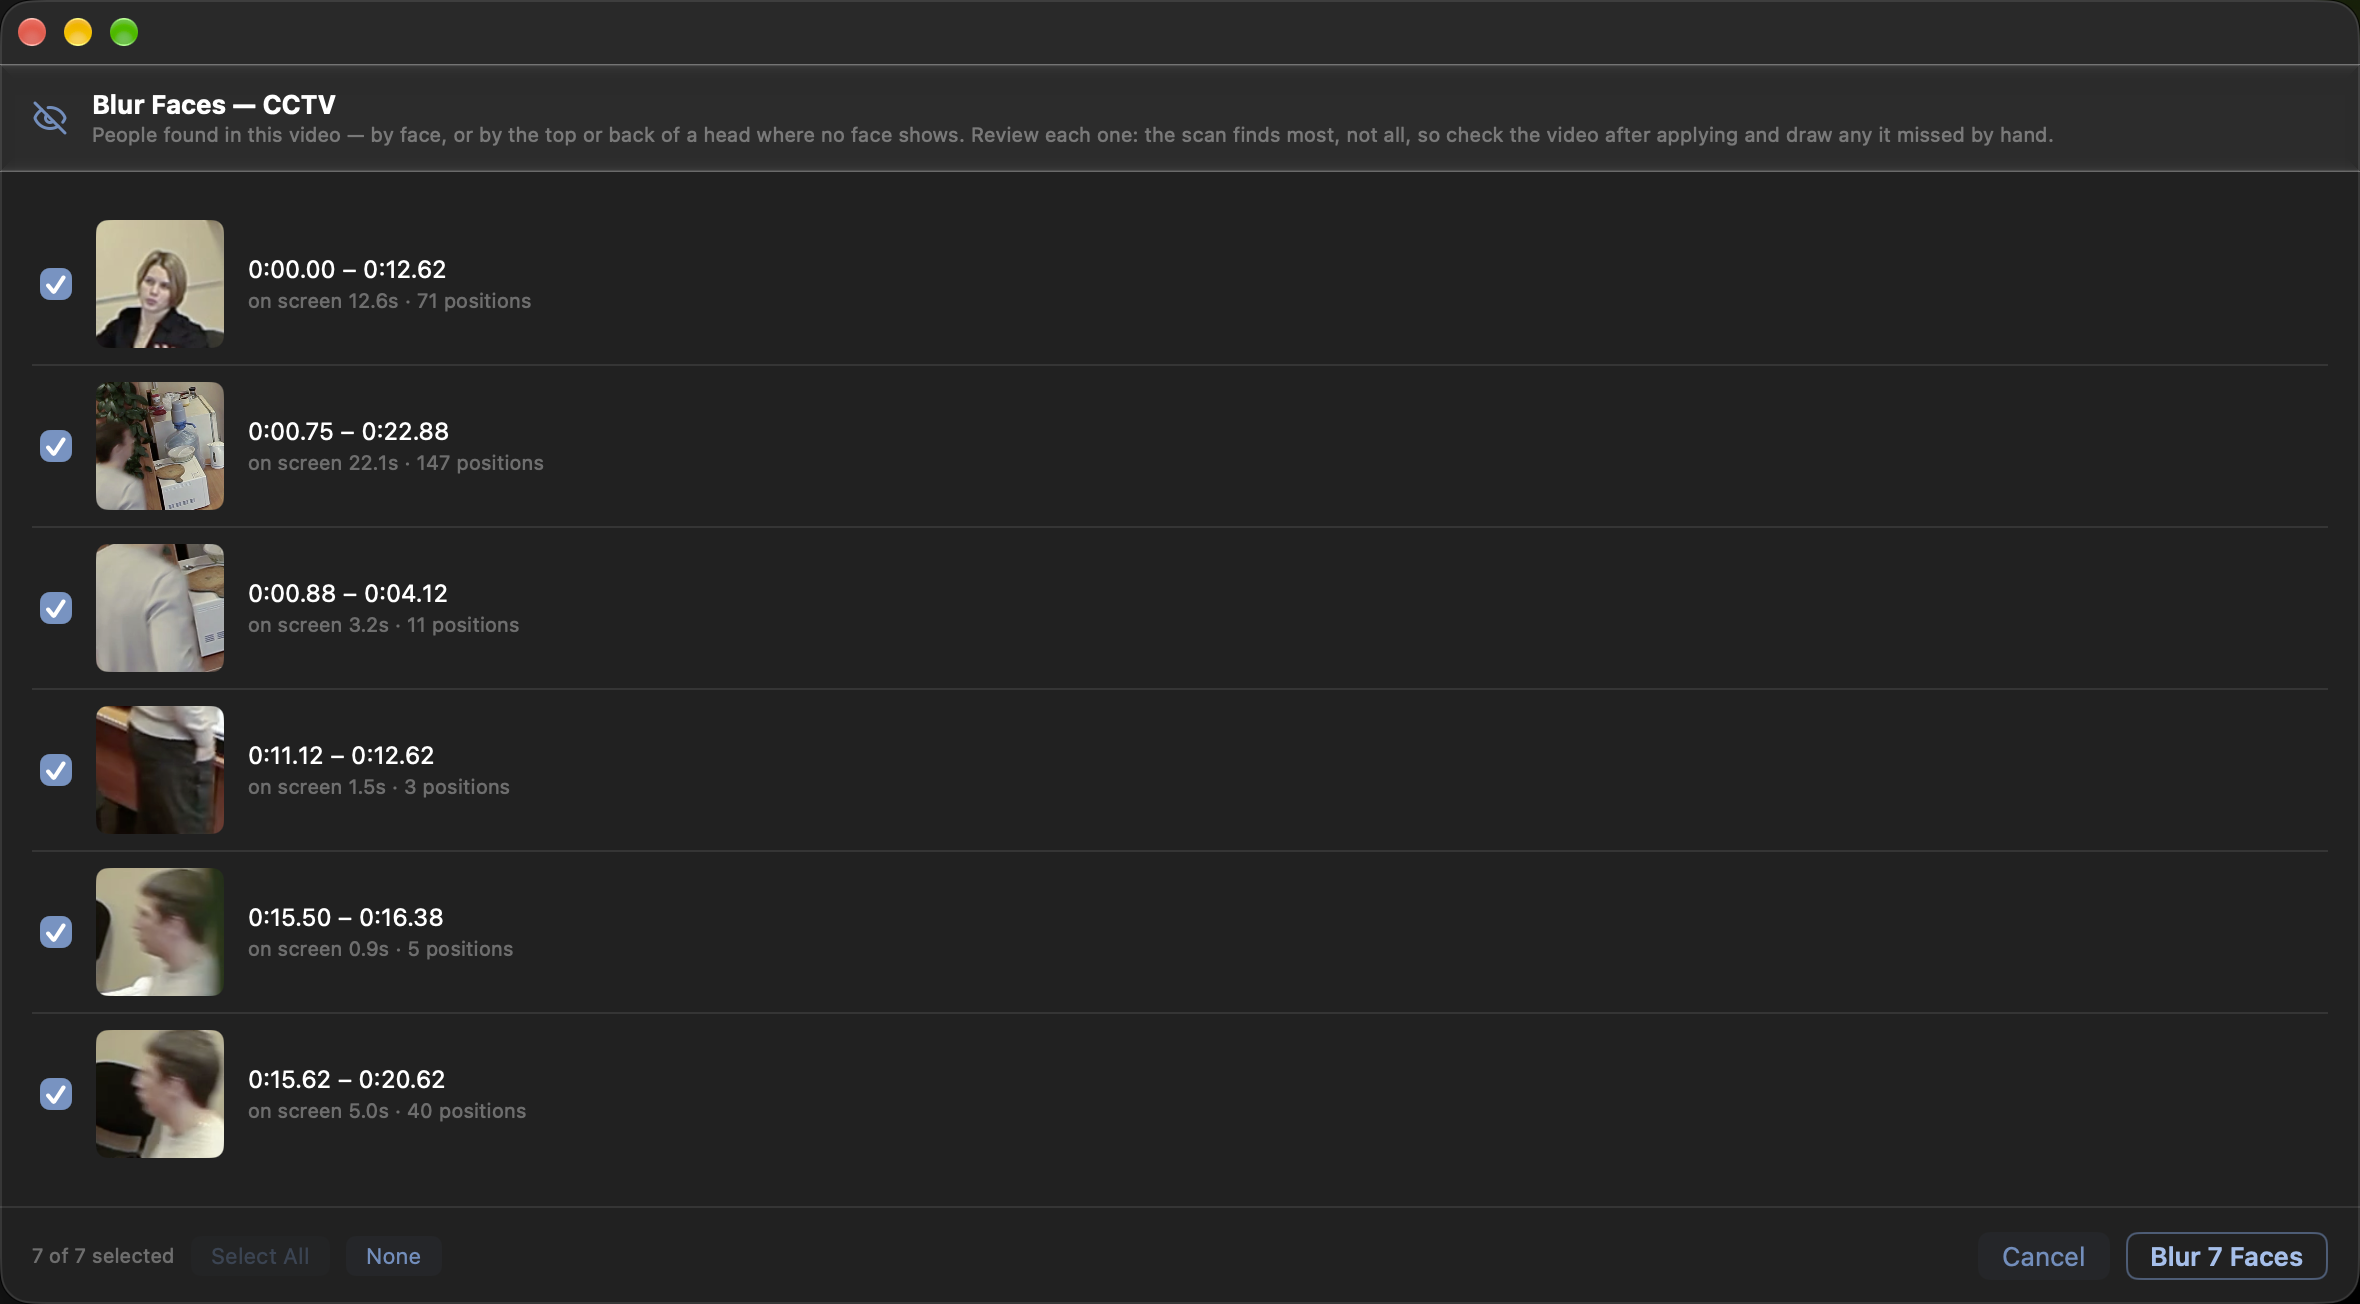
Blur Faces… is the same idea for video. Right-click a video exhibit → Blur Faces… and Evidentiary scans it for faces — and for people whose face it cannot see, someone walking away or seen from a camera mounted high, where it masks the head instead — following each person as they move, then lists everyone it found with a thumbnail and the stretch of the clip they appear in. Tick the ones to hide and press Blur N Faces, which counts what you ticked; Select All and None set every box at once. Accepted faces become redaction marks that carry the person's path, so the mask travels with them instead of sitting in one place, and it is burned into the frames themselves — the operator screen, the jury display, and anything you export all show the same blurred pixels rather than a box drawn on top.
Masks live on the exhibit, not on the file. Share and Reveal in Finder hand over the original video with every face in it — which is right, because that is the evidence as filed — so when you need to give someone the masked version, use Export Blurred Copy… in the same menu. It writes a new movie with the blur burned into the picture and leaves the exhibit in your case untouched. It only appears once a video actually carries masks.
A second, optional layer sits behind the scan. Settings ▸ General ▸ Blur unreviewed faces while a video plays looks a second ahead of the playhead while a video is up and blurs any face nothing is covering yet. It is a net for video you have not had time to review: it only sees what the scan's detector sees, it only reaches as far as playback has got to, and a jump to an unplayed part of the clip lands somewhere it has not looked. It also stands down completely on a video whose faces you have reviewed — there, a face left unblurred is your decision, and the net will not overrule it. Blurs it adds are for this session only and are never written into the exhibit.
Face masks are burned into the picture rather than drawn on top of it, so they have no handles to grab and the eraser ignores them — Remove Face Blurs in the same menu is how they come off, all at once. Your other markup on that exhibit is untouched, and the video counts as unreviewed again afterwards.
Warning: The scan finds most people in frame, not all of them. Someone in shadow, behind rain, or very small in a wide shot can still be missed — on the overhead warehouse footage it was tuned against it covered about two-thirds of the time a worker was on screen — and a face it misses is a face the jury sees. Watch the video through after applying and cover anything left over with the Redaction tool in annotation mode. Treat the scan as a first pass that saves you the tedious part, never as a guarantee that the clip is clean.
Warning: These are heuristic suggestions, not a privilege review. Review every row before applying, and remember the assistant can only find what OCR read — handwriting, poor scans, and untagged images produce no hits at all. Nothing in this tool certifies a document as clean.
Redactions are treated as privilege marks, not as drawings, so they are durable in a way ordinary markup is not. They survive turning the page, closing and reopening the exhibit, and both Erase All Annotations commands on the tool's menu, and restoring an older snapshot grafts them back on — a snapshot taken before the redaction cannot un-redact the page. Clicking a bar directly with the rubber tool removes it.
Warning: ⇧E (Clear Annotations on Page) is the exception — it removes redactions along with everything else on the page. Do not use it to tidy a page that carries privilege redactions. Face blurs from Blur Faces are the one thing it leaves; only Remove Face Blurs takes them off.
Inside the case, redactions stay editable overlay marks and the underlying PDF is untouched, so anything leaving the case must go out through a path that burns them in. Export Flattened PDF, on the presenter toolbar, writes a rasterized copy in either of these variants — Published Marks Only…, the version of the page the jury has actually seen, and All Marks (Including Drafts)…. A blur is written as real pixelation, so the obscured content is gone from the output and cannot be recovered from it. That makes flattening the correct hand-off for the court and for opposing counsel. The QR-code commands burn redactions in the same way, so a paper copy can never show what the screen hides — see QR / Barcode Recall.
### Split a production PDF into separate exhibits
When discovery arrives as one giant PDF, right-click it → PDF Tools → Split into Exhibits… to carve it into separate exhibits without leaving the app. Choose At page ranges and type the ranges from the production log — "1-4, 5-12, 13-30", where gaps are fine when you need only some of the documents — or choose Every N pages for a fixed interval.
Name parts sets the base name for the new exhibits, First number optionally assigns sequential exhibit numbers from a starting value like "P-12" (trailing digits increment, and zero padding is preserved), and Read Bates ranges from the pages reads each part's stamp off its own pages. Malformed input is caught before anything is created, and a live plan summary reads back what will happen — "4 exhibits · uses 28 of 30 pages".
The split is additive: the parts arrive as ordinary exhibits at the end of the list, and the original stays in the case with its numbering, stamps, and markup intact. Deleting it, if the parts replace it, is a separate and deliberate step.
### Fix a slow PDF or a video that stutters
Right-click → PDF Tools → Optimize PDF… repairs a document that scrolls slowly, renders wrong, or refuses to open. It offers three methods, in the order you should try them.
| Method | Effect |
|---|---|
| Repair (re-save) | Lossless. Rewrites the file structure without touching content and keeps text selectable. Start here |
| Compress images | Recompresses and downsamples embedded images. Shrinks a huge scan while keeping it searchable |
| Rasterize (flatten to images) | Renders every page to an image at 150, 200, or 300 DPI. The last resort for a PDF that will not render |
Back up the original first is on by default, and the result panel reports the page count, the size before and after, and where the backup went. Your markup is stored separately and are not affected. Re-open the exhibit to see the optimized version.
Warning: Rasterizing destroys the text layer. Find-on-document, OCR-based search, semantic matches, and the Redaction Assistant all stop working on that exhibit until you run OCR again. Work down the list — repair first, compress second, rasterize only when the earlier methods fail.
A video exhibit gets Optimize Video for Playback… in the same position instead. It re-encodes the file in place to a clean H.264 MP4, which fixes video that scrubs slowly, stutters, or fails during clip export — and clip times and transcript sync are preserved, so nothing downstream shifts. Cancel aborts safely, because the original is not swapped out until the new file is finished. The same sheet reaches every volume of a multi-volume deposition from the Edit Deposition sheet.
A run refuses rather than risk the case when the source cannot be decoded at all, when there is no video track, when free space is under roughly three times the original, or on duration drift — a re-encode that came out a different length. That last one is a safety refusal, not a bug: a length change would silently invalidate every clip time and sync point on the volume, so Evidentiary keeps the original instead.
If a file misbehaves badly enough to be a hazard, Quarantine File… takes it out of circulation without deleting it. See Cases.
### Swap a file for an updated version
When a corrected version of a document arrives, right-click the exhibit → PDF Tools → Swap File for Updated Version… and choose the replacement. The exhibit keeps its number, sticker, markup, admission history, and place in every binder and link that points at it. When the page count matches, nothing is lost: Bates stamps and the sticker re-apply to the new file.
Warning: When the page count differs, Evidentiary asks first, and proceeding clears the per-page Bates labels, the saved page orientation and deskew, and the stored OCR text — all three are keyed to page numbers that no longer line up. Markup is deliberately kept, because redaction work is too expensive to discard silently, but they may now sit on the wrong pages. Re-stamp, re-run OCR, review the marked pages, and re-check any Bates citations already circulated.
### Ignore a cover sheet
Productions often arrive with a cover sheet nobody wants the jury to see. Right-click the exhibit → PDF Tools → Ignore Cover Page and the first page is set aside: page 2 becomes page 1 everywhere — presenter, thumbnails, search, Bates detection, print, and export — and the sidebar's page count drops by one. The page is parked inside the case, so Show Cover Page on the same menu puts it back. Bates labels, page orientation, OCR text, markup, and binder or playlist page jumps all shift with the pages, so each stays on the same physical page. A multiple selection gets Ignore Cover Pages / Show Cover Pages under its Cover Page section; single-page files and media are skipped.
### Court stickers
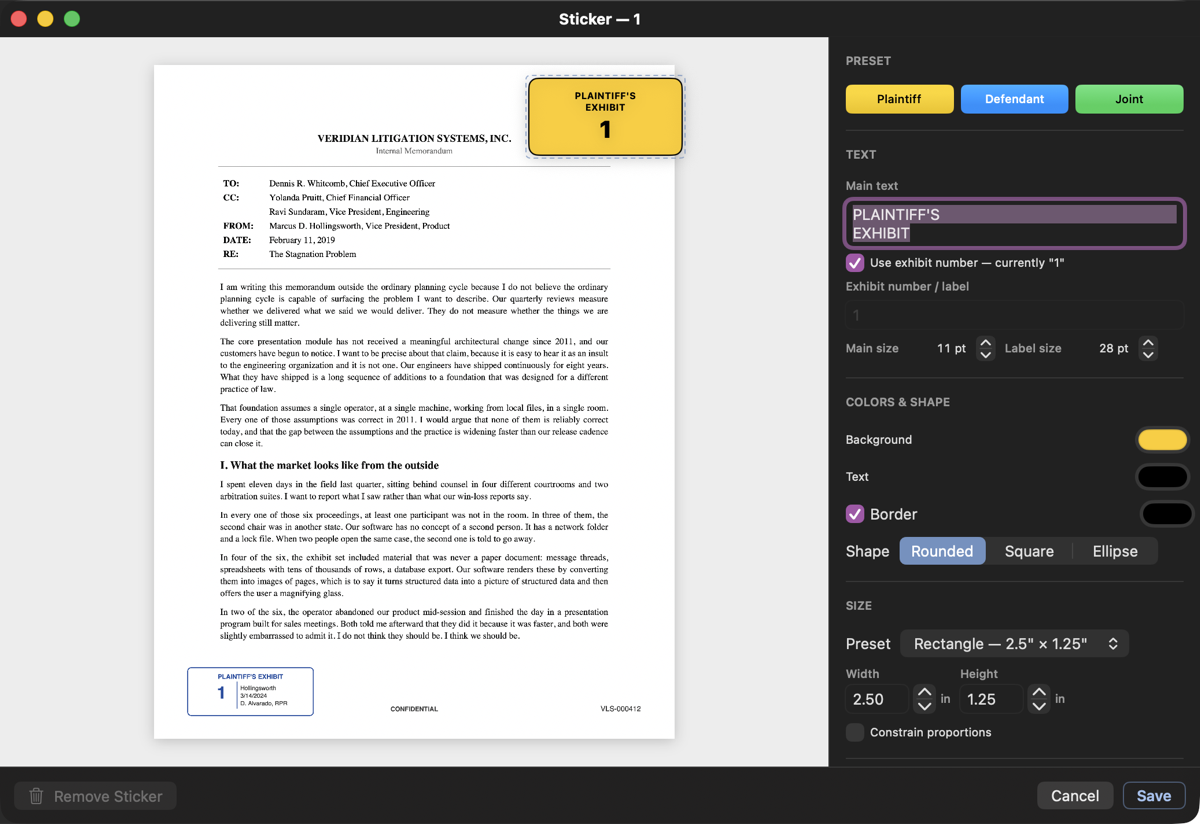
An exhibit sticker is the digital equivalent of the colored label a clerk sticks on a paper exhibit. The Exhibit Sticker button in the sidebar toolbar — or right-click → Add Exhibit Sticker… (Edit Exhibit Sticker… when it has one) — slides the sticker panel into the inspector column on the right, for the staged document. There is no separate preview: the sticker sits on the staged page itself, outlined while the panel is open, and every change in the panel redraws it there. Drag the card on the page to position it, clamped so it cannot leave the page. A new sticker starts at the bottom-right corner of the page with a quarter-inch margin, where a clerk's label usually lands, measured against that document's real page size — so it sits correctly on Letter, Legal, and landscape alike. Edits are saved when you close the panel or move to another exhibit — no button press needed; Save writes them right away if you want the confirmation, and Revert puts the saved sticker back while the panel is still open. Save & Next (⌘⏎) saves and stages the next document in the list with the panel still open, which is how you walk a whole set fixing placement one document at a time; it is absent on the last document, and media is skipped, since a sticker draws on a page. Press the button again to put the panel away; it shares the inspector column with Exhibit Info, so opening one replaces the other. While either panel is open the annotation bar above the page tucks away, and returns when the panel closes. Because the panel edits the staged document, sticker in Staged mode — in Live the jury watches the card move. Stickers are drawn over the document and never into it, they render on page 1 above your markup, and they appear on the jury display and on any paper or exported copy — what the jury sees is what the page carries. No markup tool can grab or remove one mid-session; only the panel makes it movable. The panel's Saved Presets row keeps a design per party in its Presets menu: Save Current as Preset… stores the current sticker with a label prefix such as P-, a preset under Apply dresses the open exhibit in it, Stamp a Binder applies a preset to every exhibit in a binder, and the action bar's sticker menu applies one to whatever you have selected in the list — each numbering with the prefix and a running count that the preset remembers for next time.
| Preset | Look |
|---|---|
| Plaintiff | Yellow background, black text, no border |
| Defendant | Blue background, white text, white border |
| Joint | Green background, white text, white border |
Each preset's main text sits on a second line — "PLAINTIFF'S" over "EXHIBIT", and so on — and applying a preset keeps the size, position, shape, rotation, and visibility you already dialed in, changing only the colors and the wording. Set the geometry a single time for the case, then switch presets freely.
Beyond the presets there is full control: the main text and its point size, the label point size, background, text, and border colors, the shape (Rounded, Square, or Ellipse), a size preset or an exact width and height with optional Constrain proportions, rotation from −45° to 45°, and a Visible on page switch that hides a sticker without deleting it. Sizes are physical inches, so a sticker stays the same real size on Letter, Legal, and oversized pages.
Use exhibit number is on by default and ties the drawn label to the exhibit's number, live — renumber the exhibit anywhere and the placed sticker follows, with no visit to the panel. Turn it off to type something else. Number your exhibits before you sticker them; a sticker on an unnumbered exhibit draws a blank label until the number arrives, then fills in on its own.
With several exhibits selected, the action bar's tag button opens the batch stamper, and it works two ways.
Label from each exhibit's number stamps Plaintiff's, Defendant's, or Joint on every selected document, each sticker carrying that exhibit's own number. Documents that already have a sticker are left alone — their placement is your work — so this is the safe pass to run on a set you have been building up. A saved preset is the exception, and replaces what is there.
Number the set in order stamps the same palette but numbers the selection itself, in list order, and the row shows the exact run it would assign (P-4 … P-22). Numbering starts one past the highest label already in use under that prefix, so a second batch continues the series instead of colliding with it, and it does replace existing stickers — a run with gaps in it would not be a run. Remove Stickers clears the selection's stickers outright.
Any design you saved in the panel appears in both of those sections too, under the three built-in ones, so a whole set can be stamped in the look the case already uses rather than in the stock palette. Picked under Label from each exhibit's number a preset carries each document's own number; picked under Number the set in order it counts with its own prefix and its remembered number, and the row shows the run before you click. A preset replaces a sticker a document already has, in either section — asking for your design is a request to make the set look like it, which is worth nothing if it skips everything already stamped, and it is what Stamp a Binder has always done. The three built-in palettes still leave a stickered document alone. The report says which happened: "Stickered 4 · Restyled 9". That count is app-wide and travels between cases, so it is held to whichever is further along — the number the preset remembers, or one past the highest label already stamped in this case. A gap in the run is better than two documents reaching the jury under the same label.
Every choice reports what it did over the list — "Stickered 9 · skipped 2", "Stickered 19 as P-1 … P-19" — because the work itself lands on page 1 of each document, where the sidebar cannot show it. Media is never a target: a sticker draws on a page.
Save and Remove Sticker push straight into the live presenter, so an exhibit already on screen updates without reloading. Edit stickers in Staged or Blackout mode if you would rather the jury not watch you work.
### Track admission
Every exhibit carries an admission status, a colored dot on its row, and a timestamp for when that status was last set. Batch Admit, the checkmark-seal button at the right end of the status chips above the list, takes the clerk's ruling as written, "P-1 through P-14 admitted. D-3 excluded.", previews what it understood, and sets every status in one pass. Ranges expand over a prefix, "Plaintiff's 14" reads as P-14, a bare number counts only when one exhibit carries it, and the later sentence wins when they disagree.
| Status | Dot | Meaning |
|---|---|---|
| Offered | Orange | Offered into evidence, awaiting the court's ruling |
| Admitted | Green | Admitted into evidence |
| Conditionally Admitted | Navy | Admitted subject to connecting up |
| Rejected | Red | Rejected by the court |
| Excluded | Purple | Excluded by court order, as on a motion in limine |
| Withdrawn | Gray | Withdrawn by the offering party |
In evidence means Admitted or Conditionally Admitted. Only those statuses expose the Basis picker — Without Objection, Over Objection, or By Stipulation, the objection posture the record needs for appeal — and only those statuses pass the Evidence Lock described in Presenting to the Jury. Separately, any exhibit can be marked a demonstrative: an aid shown to the jury but generally not sent to the jury room.
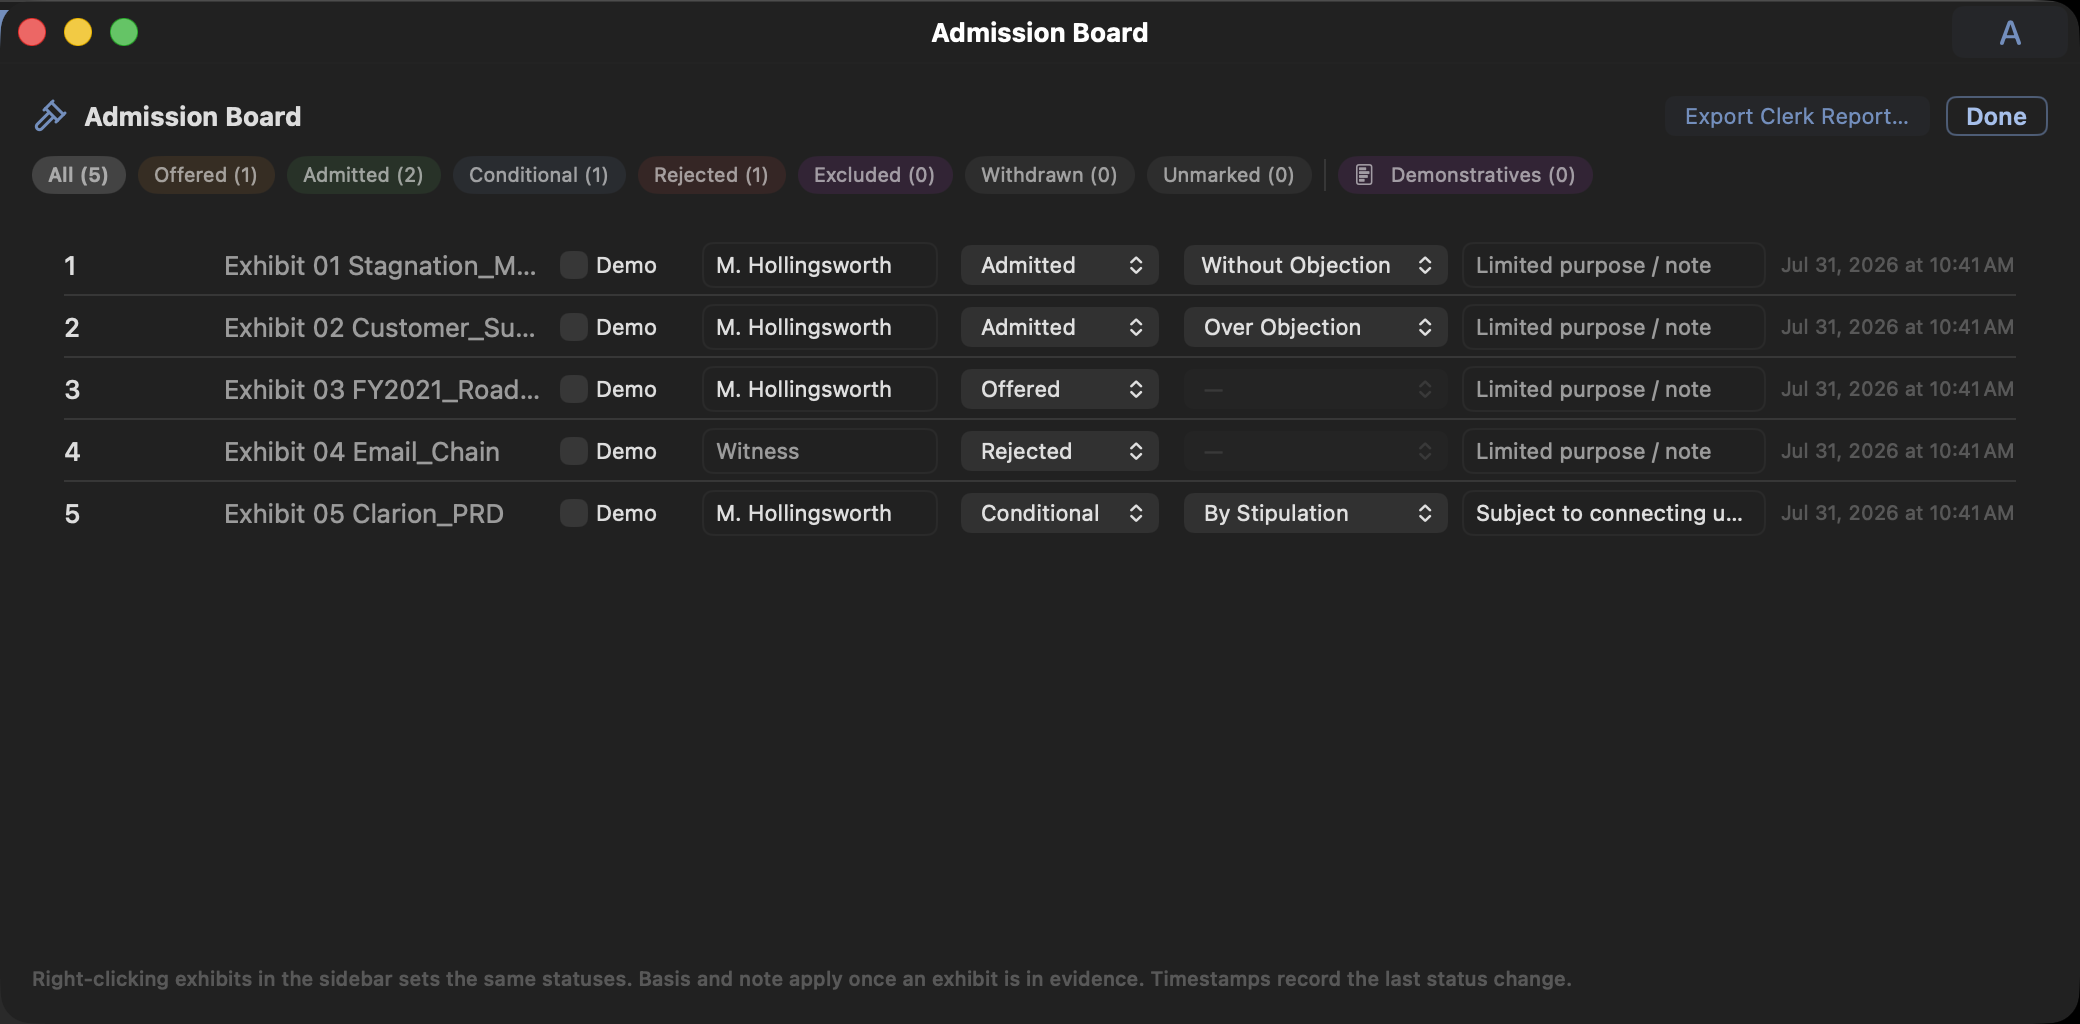
The gavel button in the Exhibits toolbar opens the Admission Board, the trial-day tracker: every exhibit as one editable table row, with a Demo checkbox, a Witness field, a status picker, a basis picker that dims until the exhibit is in evidence, a limited-purpose or connect-up note, and the timestamp of the last change. Filter chips carry live counts for each status, plus a Demonstratives chip for aids only.
The same statuses can be set from three other places, and all four write one record per exhibit: the inspector's pill grid, a right-click on one or many sidebar rows, and — for the exhibit on screen — the status pill at the leading edge of the title bar, which opens the same choices and an Unmarked entry to clear. The rhythm during an evidentiary session is stage, publish, set the status from that pill as the court rules, then name the sponsoring witness.
Conditional admissions are flagged in the Pre-Trial Check so you remember to connect them up. The board's Export Clerk Report… is covered in Reports and Exports.
### Markup snapshots
Working markup does not survive closing an exhibit, or even navigating away from the page. Only page orientation, page adjustments, and redactions persist on their own, so snapshots are the save mechanism for markup you intend to keep.
⌘S (File → Save Markup Snapshot…) saves the exhibit's current markup under a name, with a preview of exactly what you saw. Snapshots appear as sub-rows under the exhibit's pages and in Quick Search; clicking one restores it. Right-click a snapshot to Restore, Rename…, Duplicate, Update with Current State — offered while that exhibit is staged — or Delete. Side-by-side captures restore the full split-pane comparison. Mark up tonight, save the snapshot, restore it in front of the jury tomorrow.
### Rename many files in one pass
File → File Renamer… batch-renames files on disk, with or without a case open. Point it at Case Exhibits — the files backing the open case, with an optional Update exhibit names to match — or at any Finder Folder, which is handy for tidying a production before import. A third source, Pending Imports, appears while a batch is waiting in the import sheet; it is the one source that renames nothing on disk, setting instead the name each staged file will carry into the case (see The pending-import sheet).
Rules apply top to bottom, each working on the result of the one above it, so order matters: Find & Replace (with optional regex and $1 capture references), Insert Text, Sequence Number, Change Case, and Set Extension. Drag rows to reorder them. The preview table shows every file as Original → New Name and recalculates as you edit, flagging rows it cannot rename — an empty or illegal name, a name a second file would also take, a name already taken. Conflicting rows are skipped rather than blocking the batch.
Warning: In Case Exhibits mode the rename rewrites files inside the case package. Revert Last Rename undoes the most recent batch only, so check the result before running a second batch — the first can no longer be reverted after you do.
### Search, export, and other file types
The sidebar filter is the fast local search. When it matches text inside a document, expand that exhibit and every matching page carries a yellow dot; open one and it lands with the hits highlighted, the same yellow boxes the find field draws. Inside a staged document, the find field beside the page controls (⌘F puts the caret in it) searches the whole document, or only the page on screen when its This page box is checked; the yellow hits are private to your screen and never reach the jury, ⏎ steps to the next hit, and ⎋ clears the field. A scan with no text layer says so in the field: the OCR button beside the box recognizes the whole document, or just the open page when This page is checked, so one page of a thousand-page scan is searchable in seconds, hits and all. Highlight, beside OCR, turns the hits on the page you are looking at into real highlight marks in the Highlight tool's color, one undo step, published like any mark, and the search clears so they show through. Its menu offers Highlight This Hit Only, which marks just the outlined hit and steps to the next, so repeated presses walk through the page marking the ones you want. For everything else in the case in a single search — document text, transcripts, snapshots, and app actions — see Quick Search and the Command Palette.
The share button in the Exhibits toolbar exports the full list as PDF, plain text, or Excel-ready CSV, with toggleable sections and columns — exhibit number, Bates range, date added, date first shown to the jury — plus optional QR recall codes on the PDF. Every choice persists for the next export. See Reports and Exports.
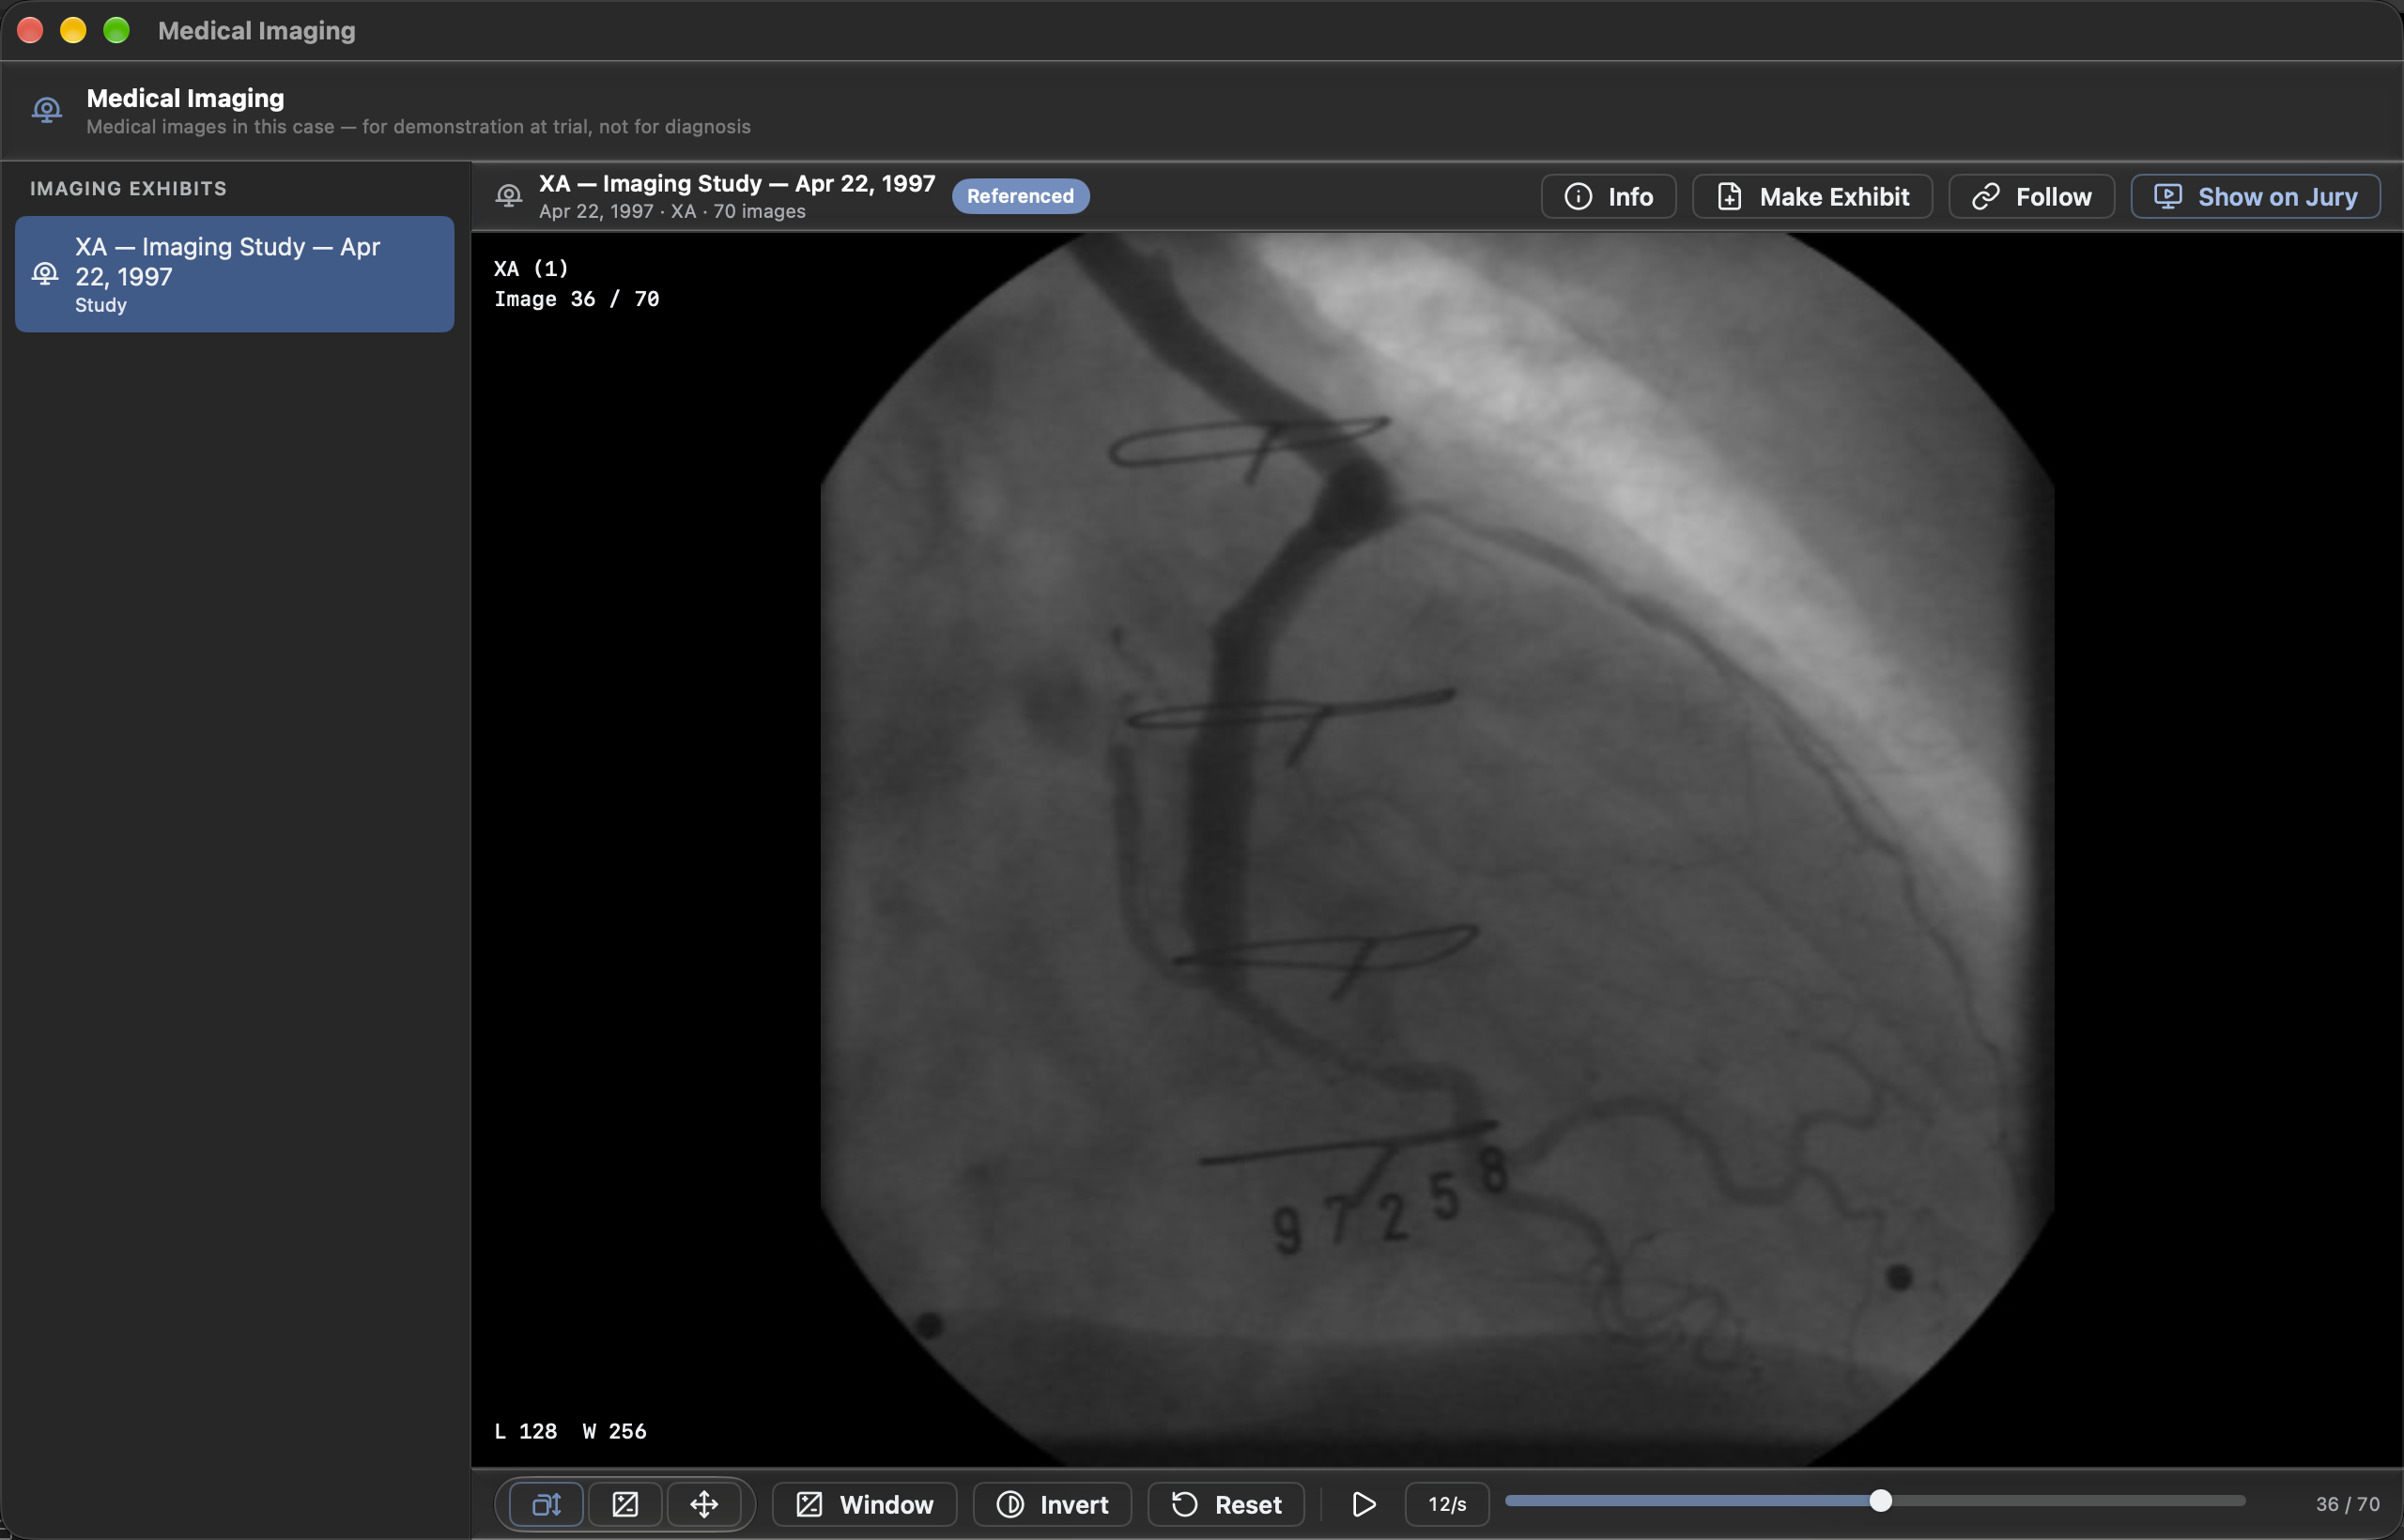
A couple of file types get their own surfaces rather than the PDF presenter. DICOM medical images open in an imaging viewer with series, window/level, playback, and Show on Jury — see Medical imaging below. Office and iWork documents preview inline with an Open in button for the native app. Annotate renders the document to a PDF beside the untouched original and turns the exhibit itself into an ordinary markable PDF — every tool, the jury feed, OCR, search, snapshots, and PDF Tools included — and the bar above it keeps an Original button that brings the source file back, with Open in and Reveal. Word files go through Pages, spreadsheets through Numbers, and decks through Keynote — on every Mac, keeping the original's pagination, headers and footers, with every sheet and slide coming across; without the Apple app, a Word file renders inside Evidentiary and a spreadsheet or deck falls back to Excel or PowerPoint. RTF renders inside Evidentiary; Pages, Numbers, and Keynote files use their own app. Convert to PDF is the other route: it adds the PDF as a separate exhibit and leaves this one as it is. Until one of the two is used, Office documents have no markup, no snapshots, and no PDF Tools.
Media
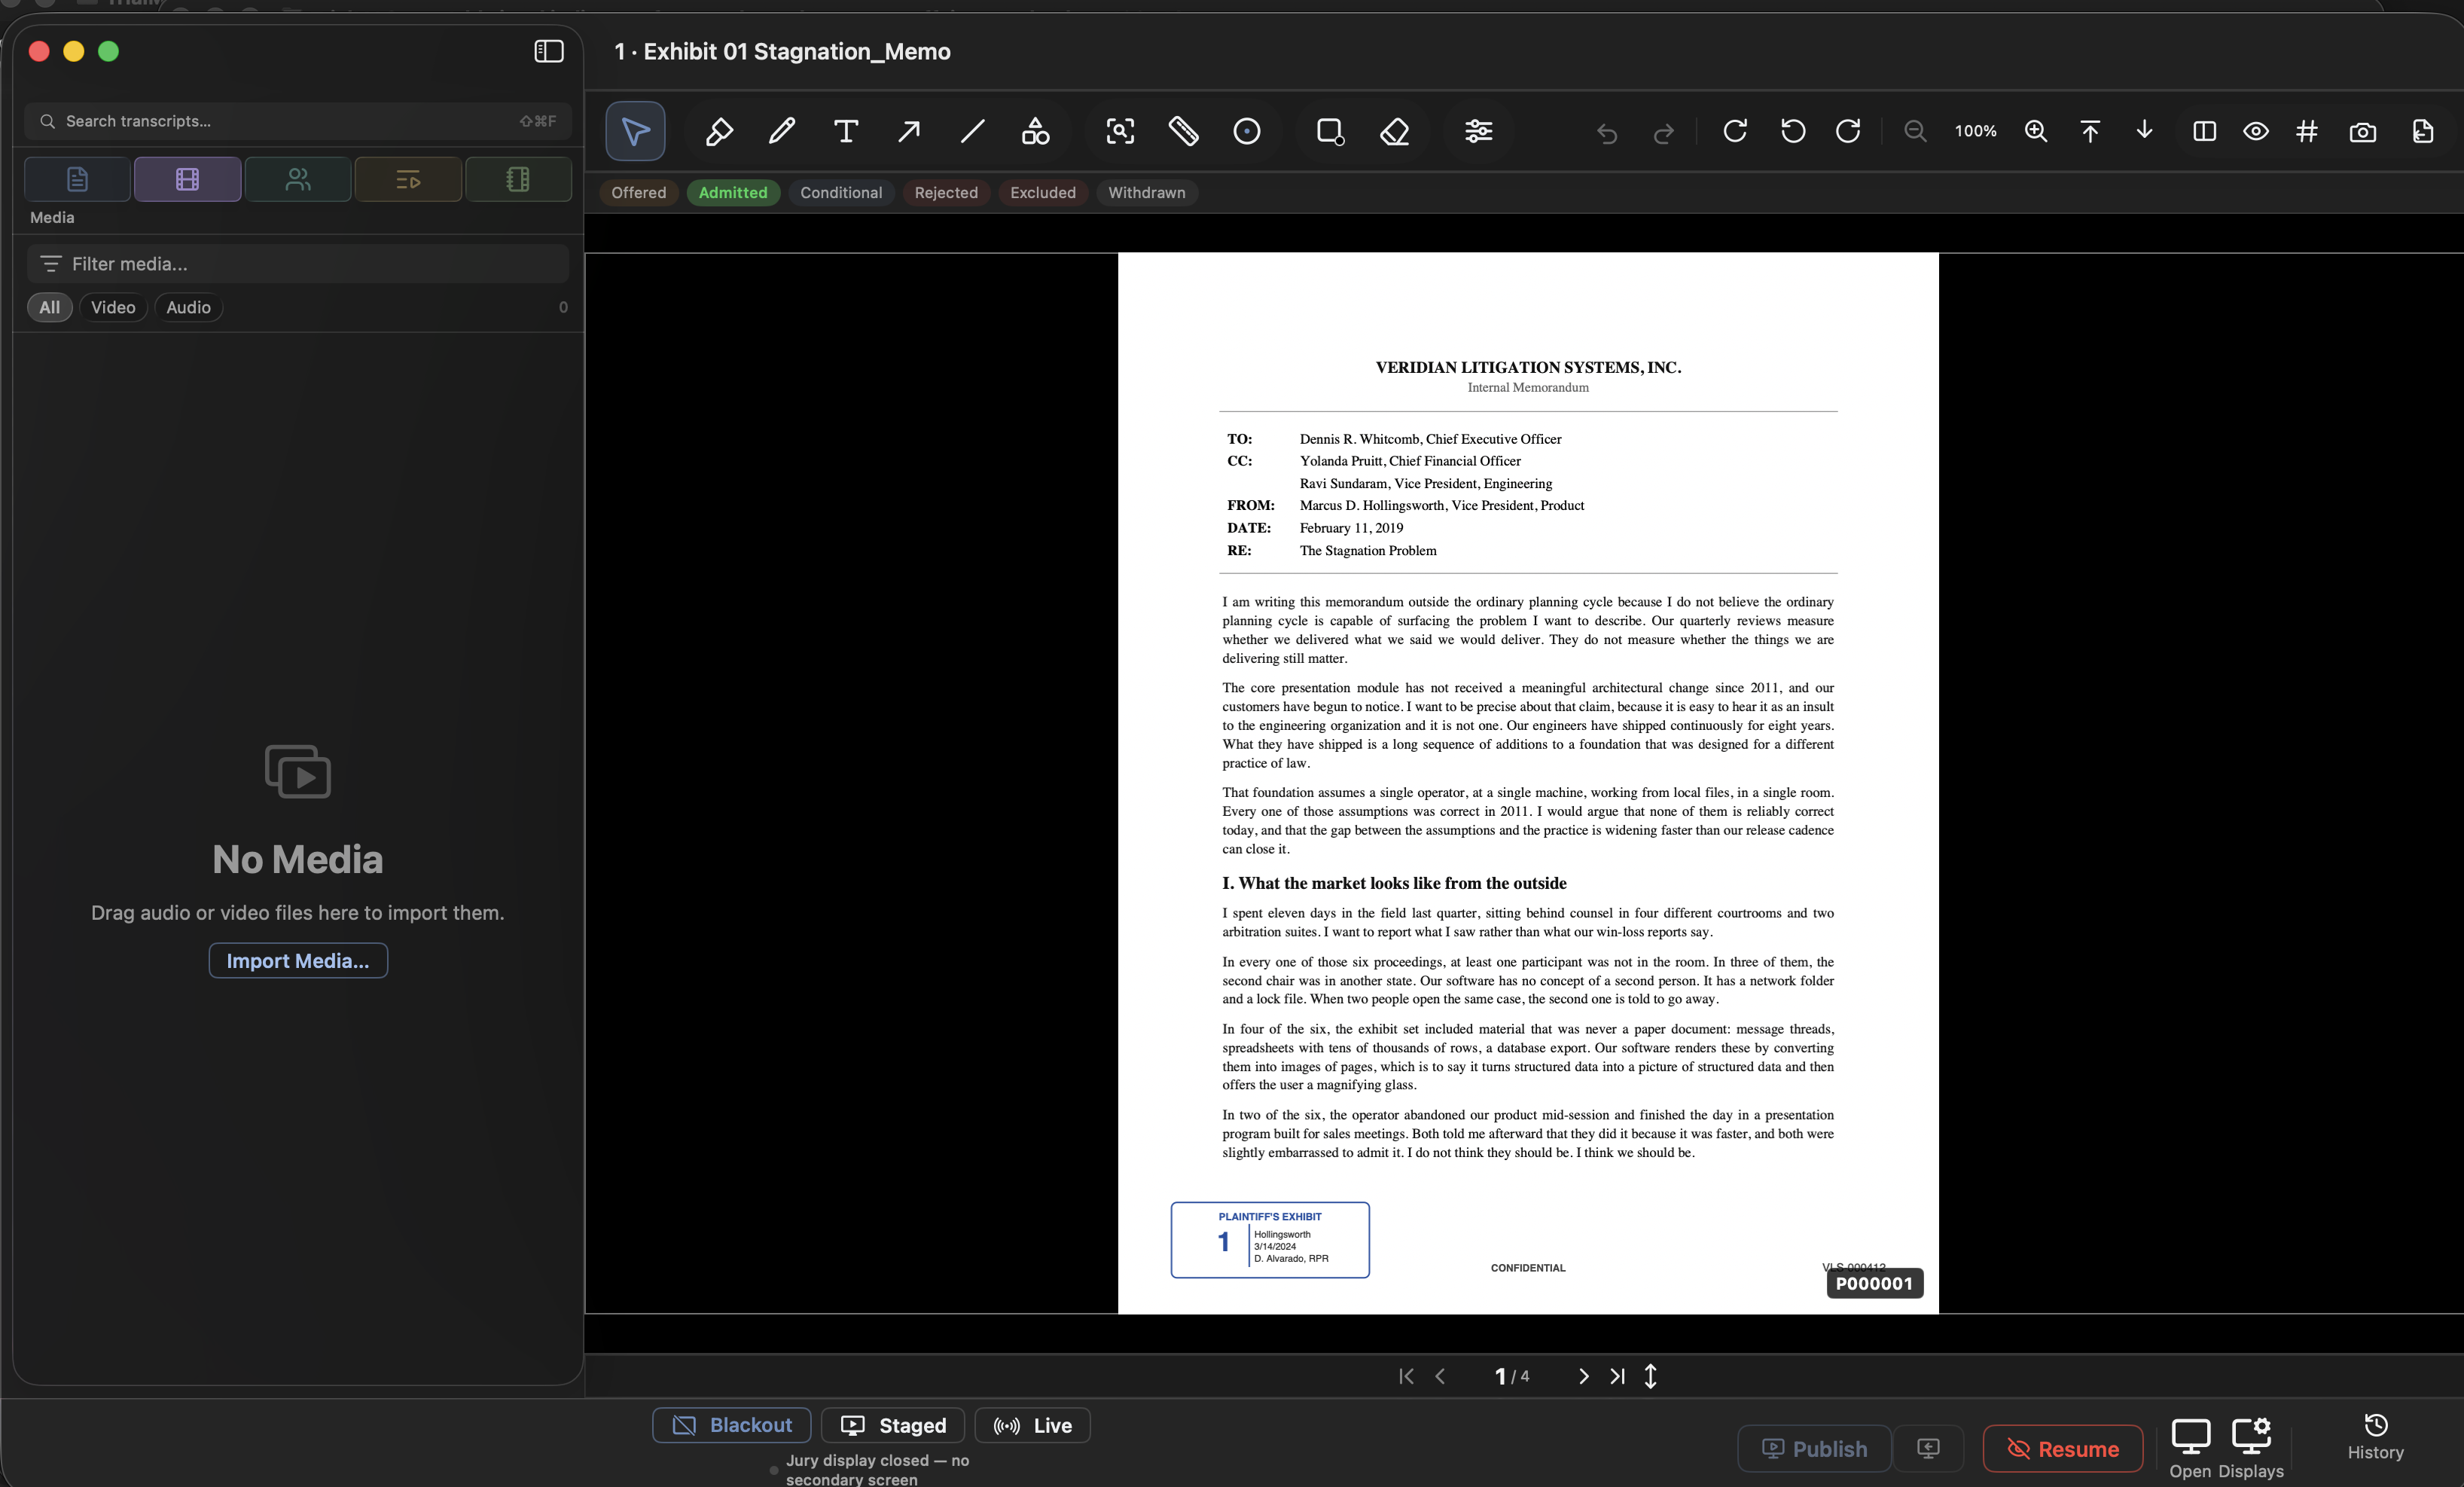
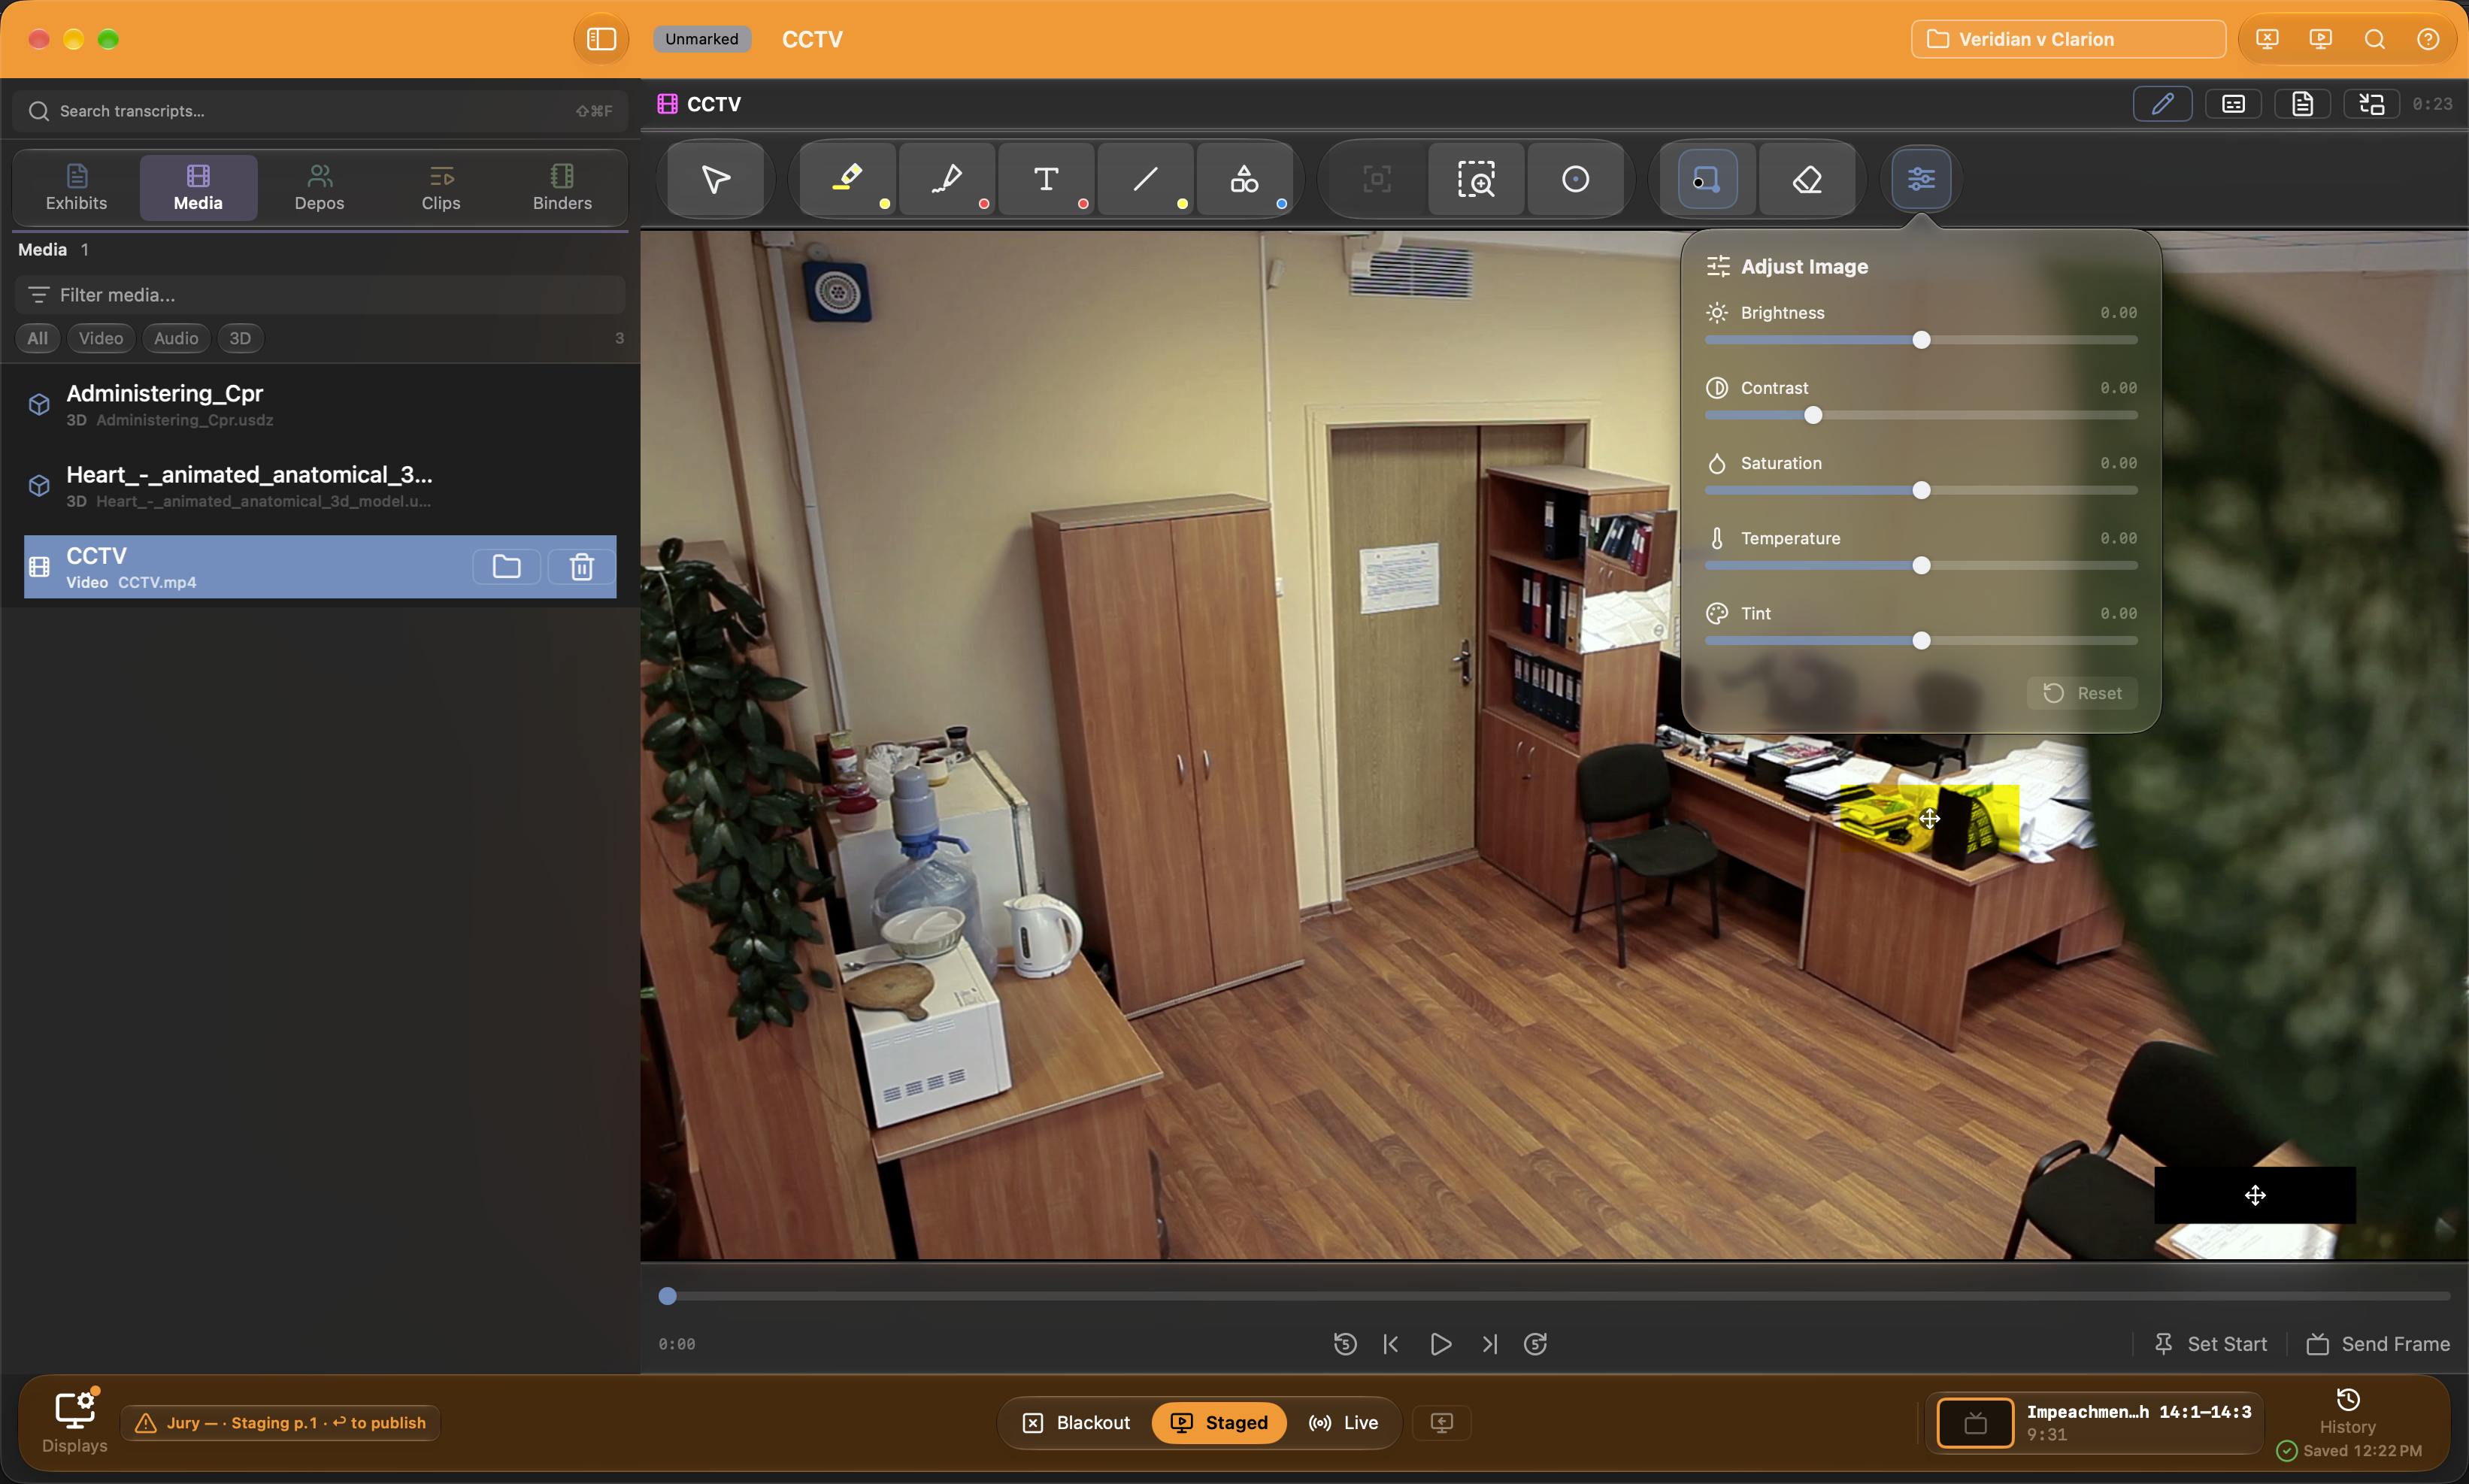
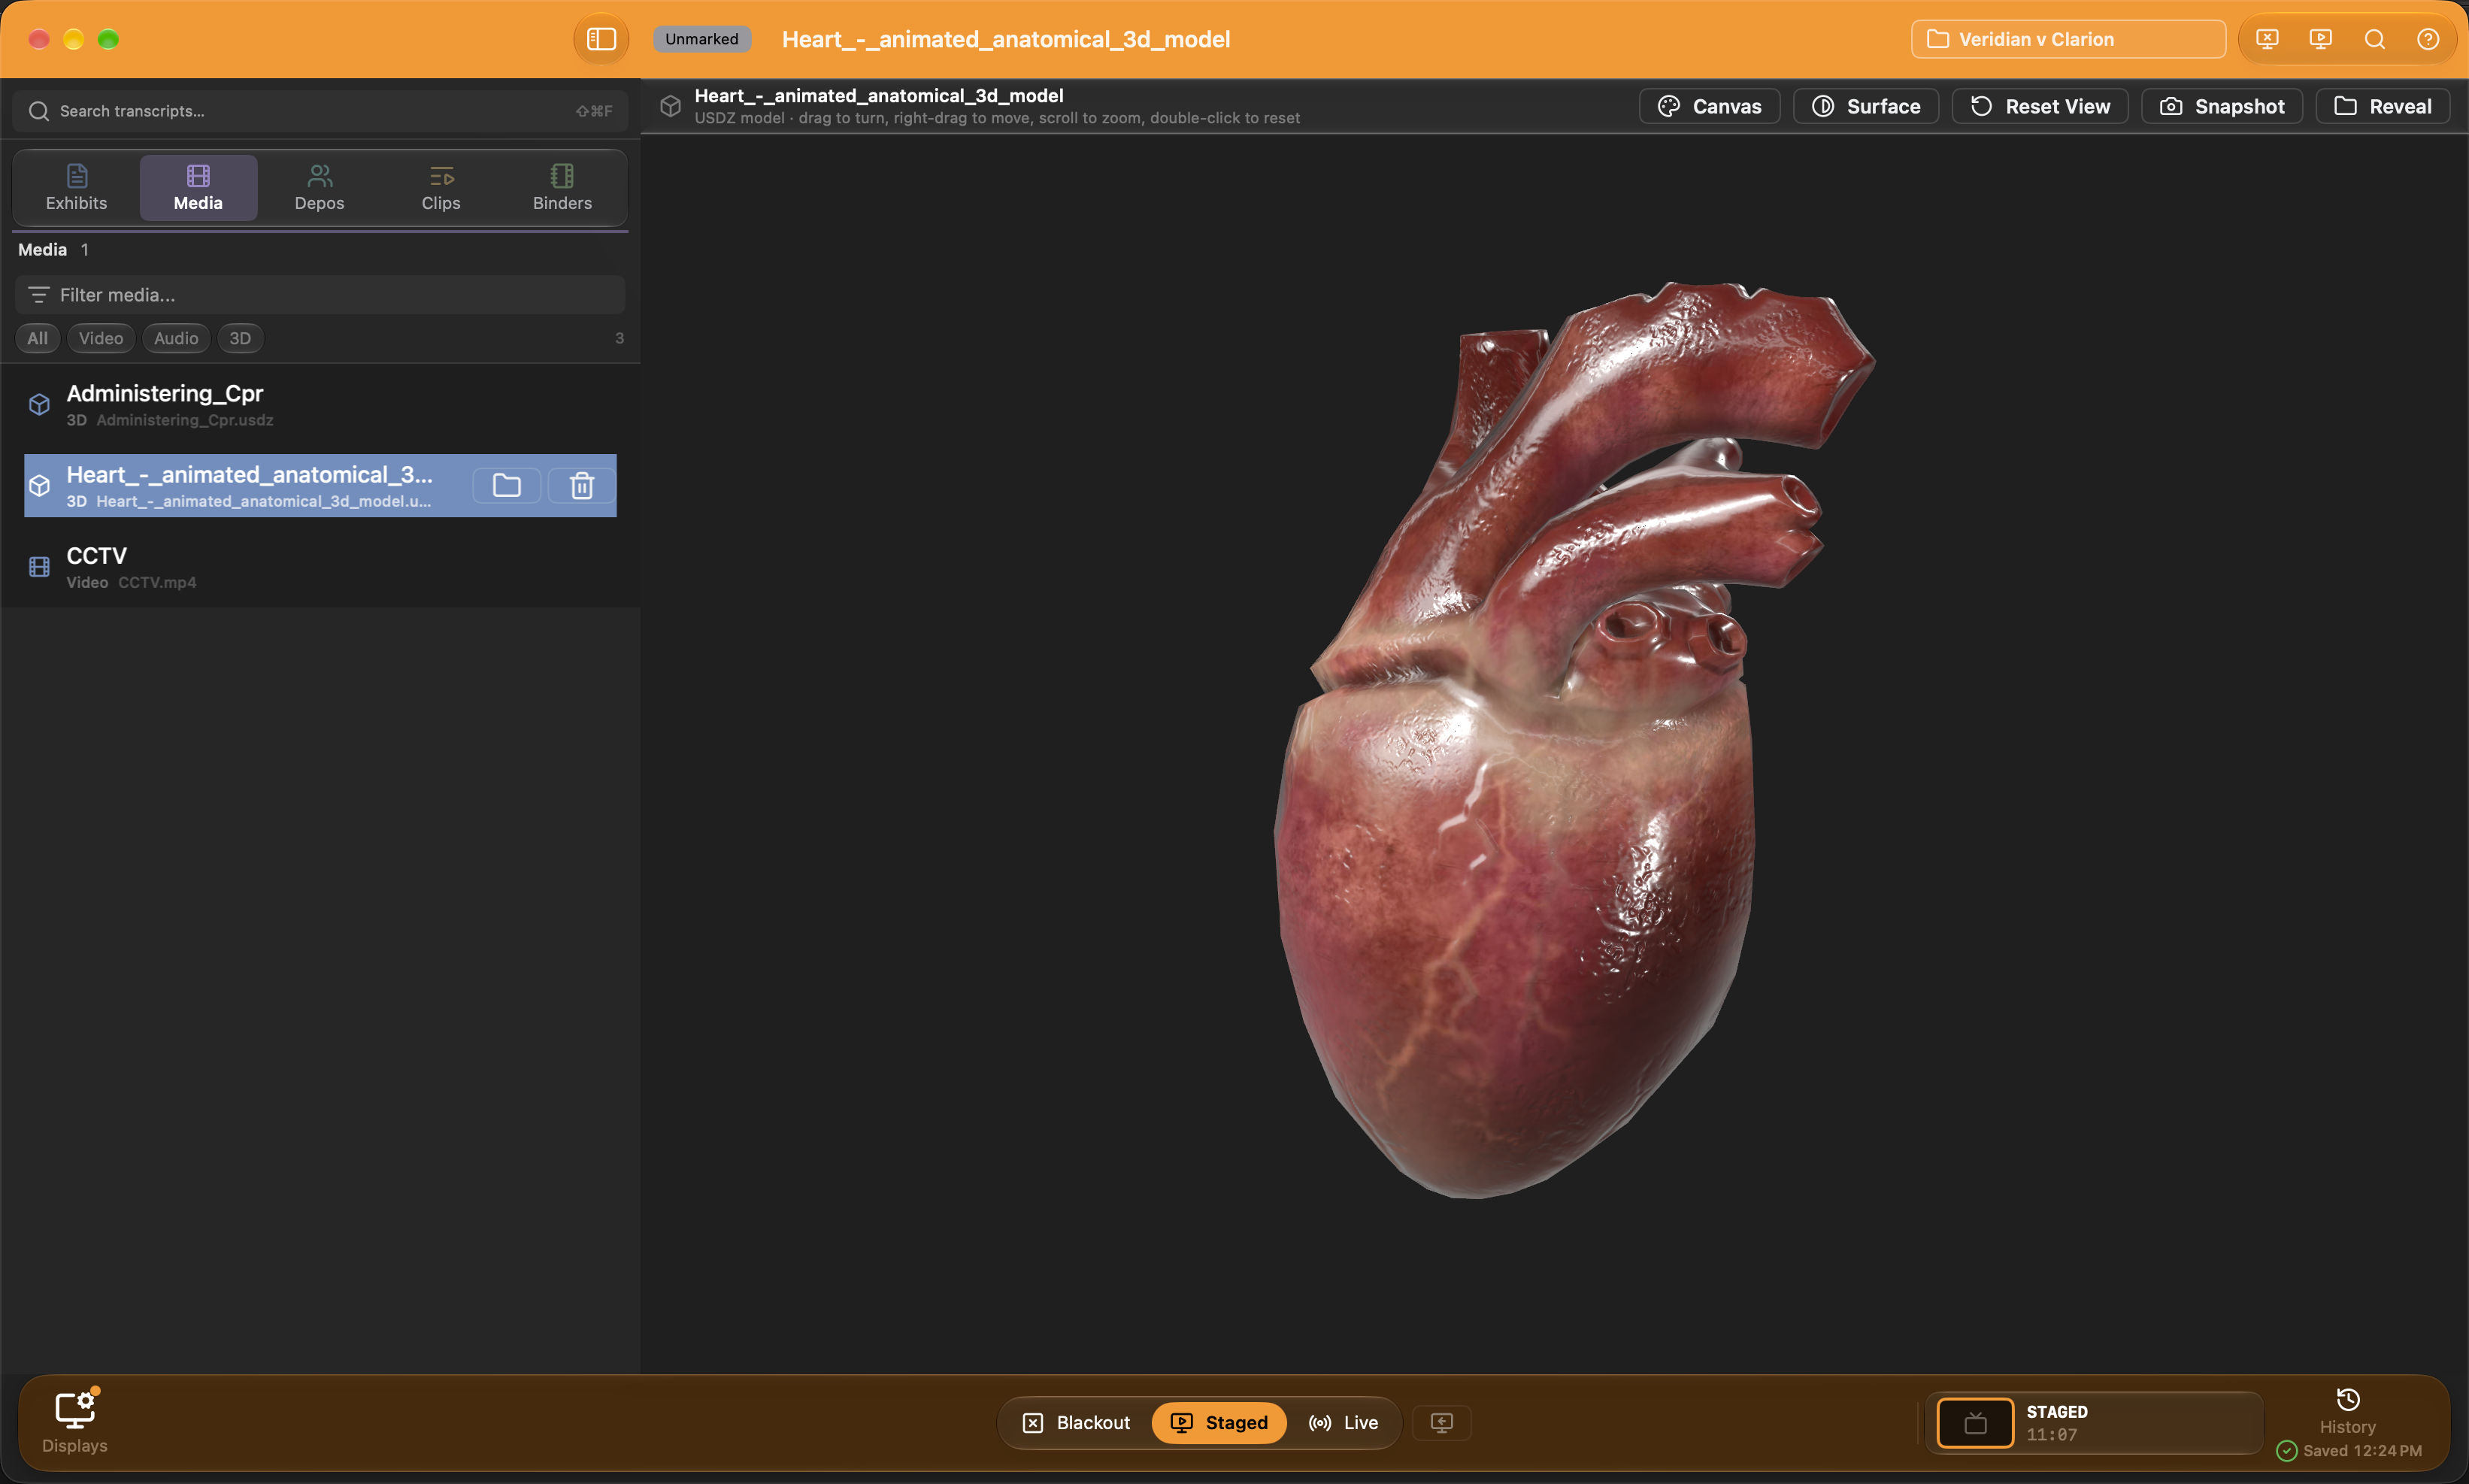
The Media tab (⌘2) is the same master list as Exhibits, filtered to just the audio and video that stands as evidence in its own right — a 911 call, surveillance footage, a recorded interview — so you can find and stage it without scrolling past every document. These are the same exhibit records seen through a narrower lens, not a separate library. (Deposition video lives on the Depositions tab instead.) Rows carry the same admission wash and status dot as the Exhibits list, and the right-click menu's Admission Status sets it. 3D models live here too, under their own 3D filter: USDZ, USD, and Reality files open as they are, and OBJ, STL, PLY, COLLADA, and Alembic files are written out once as a USD copy beside the untouched original. The model opens in a viewer: drag to turn it, right-drag to move it across the view, scroll or pinch to zoom, double-click to reset the view, and the jury display shows the same view as you move it, under the usual Staged and Live rules. The model is lit from above and to the left with soft shadows, so its form reads wherever you turn it. Canvas picks the colour behind the model — Black, Charcoal, Grey, Light, or White — on both screens; a pale model reads best on a dark canvas and a dark one on light. Surface starts on Automatic: the model's own colours and textures when it carries any, and a matte Clay finish when it has none, so a scan whose plain white mesh hides its detail still shows its form. Original, Clay, Bone, and Slate override that for the model in front of you, and the choice lasts while it is open rather than carrying to the next model. Flat, at the bottom of the same Surface menu, turns the model's shine off and on over whichever finish is showing: its colours and textures stay and the highlights go, for a glossy scan that reads better matte on a courtroom screen. Canvas, Surface, and Flat all show on the jury display; only Canvas is remembered for the next model you open. There are no marks in 3D; Snapshot adds the current view as a one-page PDF exhibit beside the model, which takes every annotation tool and presents like any other page. A model that carries an animation — a USDZ or USD with a clip — shows Play, Restart, and Loop in the viewer header: Play runs the clip here and on the jury display in step, Restart goes back to its first frame, and Loop starts it over when it ends or, off, holds the last frame; Snapshot captures whatever frame is on screen. Textures that an OBJ keeps in separate files, and any animation in a COLLADA or Alembic file, are not carried into the copy; glTF and FBX are not read — for textures or animation, supply USDZ.
### The list
| Control | Function |
|---|---|
| Filter media… | Matches name, exhibit number, or file name |
| Clear ✕ | Empties the filter; appears when there is filter text or the type chip is not All |
| All / Video / Audio chips | Restrict the list by kind — video tinted purple, audio orange. Clicking the active chip returns to All |
| Count | Live count of matching media |
Each row carries the exhibit-number capsule, the name, the kind, the file name, and the admission status dot. Hovering reveals Reveal in Finder and Delete; a swipe deletes, and deletion asks first. The list is single-selection, unlike the multi-select Exhibits list, and rows drag straight out to Finder, Mail, or Keynote when you need the underlying file. Typing jumps to a name, double-click sends the clip to the jury, and a single tap of Space, ⌘Y, or Quick Look in the row's menu previews the file. Share in the same menu AirDrops or mails the file. Dropping files anywhere on the sidebar imports them the usual way.
Note: Media exhibits have no Bates fields, no exhibit sticker, and no PDF Tools submenu. In that position the Exhibits-tab context menu offers Optimize Video for Playback… instead. Everything else — importing, admission status, binders, snapshots — works exactly as it does for a document, because these are exhibits.
### The video player
Click a row and the detail pane becomes a player: a toolbar across the top, the picture in the middle, a transport bar beneath, and — on demand — a transcript panel beside it and a caption band under it. Publishing a video to the jury works exactly as it does for a document, so nothing here is a separate presentation mode; see Presenting to the Jury.
The toolbar names the exhibit — a purple film glyph for video, an orange waveform for audio — and holds five toggles: the annotation overlay, the caption band, page:line numbers on those captions, the transcript side panel, and Picture in Picture. That last one floats the video in the Mac's own small always-on-top window so it keeps playing while you browse other exhibits; click it again, or close the floating window with its ✕, to bring the picture back. Once you have moved on to another exhibit, closing the floating window stops the video, and opening another video or closing the case closes it for you. macOS opens that window in the top-right corner, over this very toolbar, so drag it wherever suits before reaching for the buttons underneath. It is the same player, so the jury feed does not change. A red LIVE pill appears while the video is streaming to the jury, and a Clip n/N counter with previous (P), next (N), and stop (Esc) joins it while designations play. There is deliberately no "stream to jury" button: in Staged mode Publish mounts the video like any other exhibit, and in Live mode selecting it does.
### Transport
Designation ranges draw on the timeline as party-colored bars — solid for included, faint for excluded — with the start-point marker as an orange bar and flag. Click the track to seek, press and drag to scrub.
The keyboard's play/pause key drives Evidentiary's playback once a clip or a video has played here, and the app appears in the Now Playing control. Before, that key had no owner in the app and macOS handed it to Music.
| Button | Key | Action |
|---|---|---|
| Jog back | J | Back 5 seconds |
| Frame back | — | One frame back |
| Play / Pause | Space | Toggles playback |
| Frame forward | — | One frame forward |
| Jog forward | L | Forward 5 seconds |
| Set Start | I | Marks the playhead as this exhibit's start point |
| Play from m:ss | — | Jumps to the start point |
| Send Frame | — | Publishes the current frame as a still |
Note: Space is owned by the global key monitor and toggles playback whenever a video is loaded. While a video is mounted, J, K, L, I, N, and P shadow the annotation-tool keys that otherwise own K and L — the tools return the moment no video is loaded. K pauses only; it never resumes.
A start point (I, also Video ▸ Set Start Point) cues a long video to the passage you intend to publish so the jury never sees the run-up; it is stored with the exhibit and survives closing and reopening it. Send Frame publishes the current frame as a still image, freezing the picture while you scrub on your own screen, and is disabled unless the jury window is open and the mode is not Blackout.
Playback speed runs from 0.5× to 2× in seven presets. The rate is app-wide and persists across launches, so setting 1.5× in the clip editor means playback opens at 1.5× everywhere. Return it to 1.0× before broadcasting to the jury.
### Transcript panel and captions
The transcript toggle opens a side panel — the lightweight transcript for a plain video or audio exhibit, an interview recording, a 911 call, body-cam footage. Import takes a single plain-text file, Paste parses transcript text off the clipboard, and Draft (AI) writes one from the recording itself: the audio is transcribed on this Mac by the same on-device recognizer that generates deposition transcripts, and lands as timestamped lines the panel can seek by, under a first line that reads DRAFT. It runs in the background (the activity ring and the Dock icon show progress) and replaces any transcript already attached, after asking. Nothing leaves the Mac.
Warning: A drafted transcript is speech-recognition output, not a record. It is for finding a passage and cueing a clip, not for reading to the jury or citing; check anything that matters against the recording. The search field navigates rather than filters: the transcript stays on screen, hits highlight in place, and Return and Shift-Return step forward and back with wrapping. Clicking a row sets the selection start and seeks the video to that line; Shift-clicking sets the end, and Create Clip builds a designation from that line range and its timestamps. The panel follows the playhead as the video plays.
The caption band under the picture shows the previous, current, and next lines at once. It draws only the lines the current playback context admits, so testimony outside the designated or admitted range cannot leak into the captions while the jury is watching. Its styling is the same control set used for clip subtitles; see The Clip Editor.
### Audio exhibits
An audio exhibit has no picture, so it gets its own surface: a large pulsing waveform disc, the name, the file name, and a big monospaced running clock. Its transport is built for listening — a scrubber with no designation bars, jogs of 5 and 10 seconds each way, and the same start-point controls. There is no annotation overlay and no Send Frame, because there is no picture to mark or to send.
### Annotating video
The annotation toggle drops a transparent canvas over the player with its own tool strip. The video is the page here — there is no layer beneath the marks — and drawing works over the moving picture as well as a paused frame. The tools, gestures, color wells, stroke widths, and text sizes match the document tools described in Presenting to the Jury, and the tool wheel (hold W) works here too — only Callout is greyed, and the laser's Magnifying Glass mode is left off its menu, because both magnify a page and a video has none. The eraser removes the marks you drew; face blurs from Blur Faces come off with Remove Face Blurs instead, and the eraser says so if you click one. Highlights and redactions, blurs included, are drawn into the picture itself, so they look the same on your screen, on the jury display and in an exported copy. Adjust works here as it does on a page — brightness, contrast, saturation, temperature and tint correct every frame, on both screens, and the setting is saved with the exhibit. Focus zones fly the jury's picture the same way a page's do (with Wait to Zoom on, draw the zone, then click it). The jury sees the marks over the same playing video by the same rule as a page: in Live they appear as you make them, in Staged they wait until you Publish, and switching Staged to Live releases whatever you drew while staged.
Note: Video annotations persist with the exhibit in full, so a marked-up video reopens with its marks intact. This differs from the PDF presenter, where working marks are discarded when you turn the page or close the exhibit.
Warning: The overlay's Erase All Annotations clears every frame of the exhibit, not only the current one. Its only undo is the standard undo stack — leaving the overlay is not a way to get the marks back.
### Fixing a sideways video
Portrait phone footage that presents on its side is the usual case of missing or wrong orientation metadata. Video ▸ Rotate Video Clockwise and Rotate Video Counterclockwise turn the picture 90° each. The correction is stored per exhibit and honored by every player in the app — the workspace player, the clip editor, designation playback, the impeachment player, and the jury display — and the change remounts the video in place, keeping the playhead and the play or pause state.
Warning: This is a playback correction only. It is not written back into the source file and it does not carry into exported clips — exported video follows the file's own orientation metadata. If a sideways video has to leave Evidentiary right-side up, correct the source file and re-import it before exporting.
### Repairing a video that will not play
Re-encoding fixes files that scrub slowly, stutter, or fail during clip export. Right-click a video in the Exhibits tab and choose Optimize Video for Playback…, or use the sparkle button on a volume row in Edit Deposition (with Optimize All Volumes for a multi-volume deposition). The result is a clean H.264 MP4 with clip times and transcript sync preserved. Back up the original(s) first keeps the backup next to the video inside the case. Cancel aborts the encode in flight, and the original is untouched until the finished file is swapped in.
| Failure | Meaning |
|---|---|
| Unreadable or undecodable file | macOS cannot decode the source at all |
| No video track | The file carries audio only |
| Not enough disk space | Roughly three times the original size must be free |
| Encoder unavailable | The system H.264 encoder could not be acquired |
| Duration drift | The re-encode came out a different length, so the swap was refused |
| Destination occupied | A file already sits where the optimized copy must go |
Note: The duration-drift refusal is a safety measure. A re-encode that changed length would silently invalidate every clip time and sync point on that volume, so Evidentiary keeps the original instead.
### Office documents and medical imaging
Word, Excel, PowerPoint, Pages, Numbers, Keynote, and RTF files open in a Quick Look viewer with three buttons: Open in <app> launches the original in its native application, which is how you screen-share the host app's own window; Convert to PDF exports a PDF copy and adds it as a new exhibit, leaving the original untouched; Reveal shows the file in Finder. Office exhibits publish under the usual mode rules, but they carry no markup — annotation tools, snapshots, page adjustments, and the file-rewriting PDF tools all need a rendered PDF, so convert first if you need any of them.
Medical imaging. A CT, MR, X-ray, or ultrasound disc comes in whole through File ▸ Import Imaging Study…: choose the disc or its folder and Evidentiary reads every image's header (never running the disc's own viewer program), groups the images into series in anatomical order, and shows what it found — the patient, the study date, how many series and images, the size, and any files that are not images and will be left out. Choose Copy into the case (the default) and the case keeps its own copy, each image checked against the original's SHA-256 fingerprint as it is copied, so the study works long after the disc is gone; or Reference in place for a study too large to duplicate — nothing is copied, the case remembers where the images are, and every image is checked against its recorded fingerprint as it opens, so a file that changed shows Changed in the viewer rather than quietly becoming different evidence. A referenced study whose drive is not connected says so, and Locate Folder… points it at a moved copy — accepted only when the files there are the same, byte for byte. Empty files, which is how Dropbox and iCloud keep files that are not downloaded, are left out with a warning; make such a folder available offline before importing. A single .dcm or .dicom file imported like any other file opens in the same viewer. The whole study is one exhibit in the list, marked Imaging.
The viewer shows the series down the side, each with a thumbnail, and the image on black with the series, image number, and window in the corners — on your screen only. Scroll or use the arrow keys to move through the images; Play runs through them at 4 to 24 images a second (Space starts and stops). The three mode buttons set what a drag does — Scroll through images, Window (across for contrast, up and down for brightness), or Pan — and a right-drag always windows, as radiology viewers do; pinch or ⌘-scroll zooms and a double-click refits. Window offers the file's own settings and, for CT, the standard Soft Tissue, Lung, Bone, Brain, Liver, and Mediastinum windows; Invert swaps black and white; Reset returns to the file's window, unzoomed. Info lists the patient, dates, series, format, and where the images are kept; it never reaches the jury. Show on Jury puts the image, exactly as windowed, on the jury display (it is disabled when the jury display is closed or in Blackout), and Follow keeps the jury display on whatever image you move to. In Live the jury follows on its own — opening a study, scrolling, windowing and picking a preset all reach the jury as you do them, with no Show on Jury or Follow needed. Make Exhibit adds the current image, as windowed, as a one-page exhibit that takes every annotation tool and presents like any other page; its page note records the study, series, image number, window, source file, and fingerprint it came from. If the file says its pixels carry burned-in patient text, Show on Jury and Make Exhibit ask first, and Follow and Live pass over that image with a note saying so rather than sending it. Open Window (or Window ▸ Medical Imaging) opens the Medical Imaging window, with every imaging exhibit in the case down the side and the same viewer beside it — useful on a second screen.
Evidentiary reads DICOM uncompressed or compressed as RLE, JPEG (baseline and lossless), JPEG-LS, or JPEG 2000, at the full bit depth of the scan, with its own decoders — nothing is downloaded and no other app is needed. High-Throughput JPEG 2000 and MPEG video files say so by name. The viewer is for demonstration at trial, not for diagnosis.
Quick Search and the Command Palette
Tap Space twice to open Quick Search from anywhere in the workspace — one box that searches everything in the case: exhibits by number, name, Bates, or file name, the text inside documents (typed PDFs and OCR'd scans), every synced transcript line, saved markup snapshots, transcript links (an exhibit's number finds "linked at 10:2 · Hollingsworth", and picking it opens Link Exhibits on that line), and the app's own commands. It is the fastest way to get an exhibit on screen without touching the sidebar, and the fastest way to run a command whose shortcut you have not memorized.
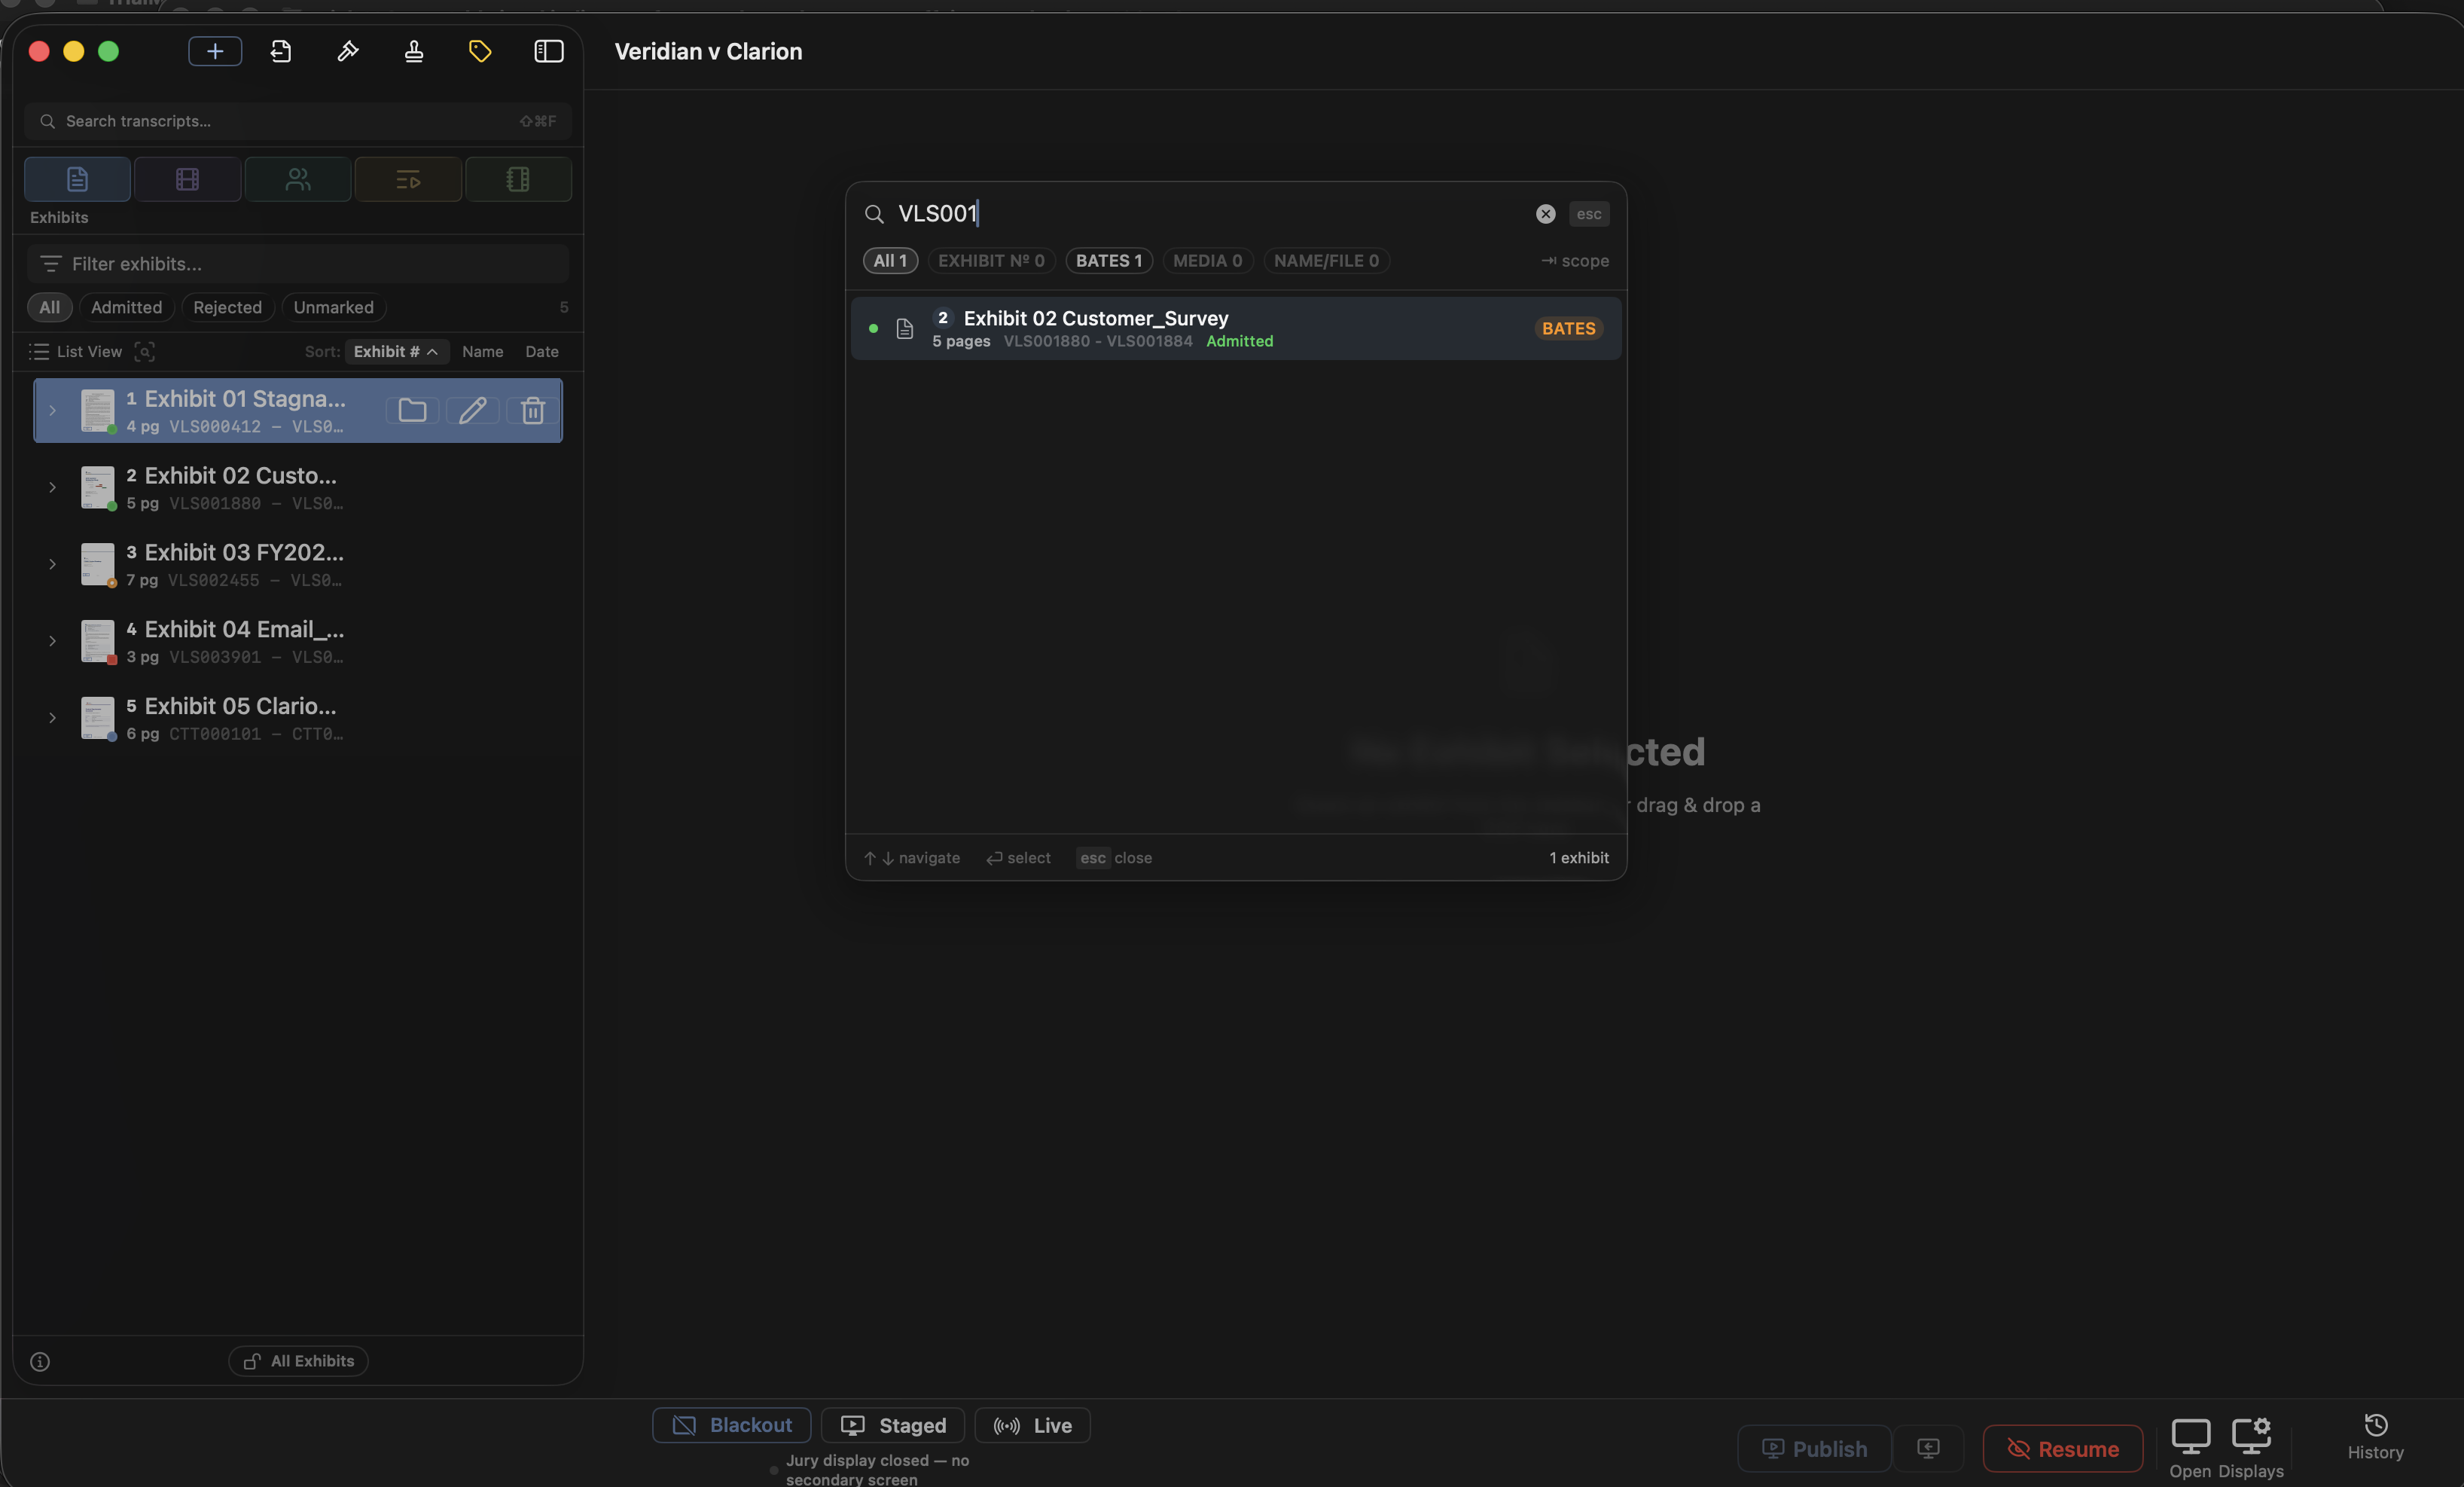
### Working the palette
The search field takes focus immediately. Type to filter, ↑ and ↓ move the selection, ⏎ activates it, and ⎋ — or a click on the backdrop — closes. A ✕ clears the field, and the footer restates the keys beside the result count. With nothing matching, the palette reads "No matching exhibits or actions".
Document-text results are ordered by how well the page answers what you typed, not by where the exhibit sits in the sidebar, and you can type a phrase rather than hunting for the exact wording. Searching letter terminating the sales agency agreement finds the letter even though no page contains that sentence; a run of words that does appear verbatim still comes first, so a literal lookup behaves as it always did. The rarer a word is in the case, the more it counts — which is why a party name, a product code or a Bates number pulls its document straight to the top. The same ranking feeds the ⇧⌘F Search window.
Leading zeros are padding, not part of the number: typing d5 finds D005, and 1 finds 01 Memo before 10 Invoice. The letters still have to match, so a Bates lookup like b2 never lands on p2. The exact number always leads its variants: 152 lists exhibit 152 first, then 152B and any prefixed twin such as PTE-152, and typing 152b goes straight to the variant. The same rule applies in the sidebar filter. Saying the word is fine too: Exhibit 1 or Ex. 1 ranks exhibits as 1 does, so Exhibit 1 leads rather than names that merely begin "Exhibit 1…", while document and transcript text still search for the whole phrase. A deposition's own transcript file and video volumes are not trial exhibits: they stay out of the exhibit results here and in the ⇧⌘F Search window, as they do in the Exhibits list, and the testimony itself still turns up as transcript lines.
Note: A single tap of Space is Quick Look, as in Finder: with no video loaded it waits half a second for a second tap, then previews the selected exhibit. With a video loaded, the first tap of the double-tap toggles play or pause before the palette opens. Publishing is never on Space.
### Background work
Work that runs while you carry on — an OCR pass, a transcript sync, a batch import, a clip export — shows as one small ring in the toolbar, filling as it goes, with a count when several run at once. Click it for the list: each job's progress and a Cancel button where the job can stop (a transcript sync or a clip export can). It disappears when nothing is running.
The same progress sits on the app's Dock icon as a bar along the bottom, so you can watch an export from Mail or Safari. When a clip export or a transcript sync finishes while Evidentiary is in the background, a Notification Center banner says so; click it to reveal the file in Finder. macOS asks once whether Evidentiary may post notifications. Nothing appears while Evidentiary is frontmost, where the finished export is revealed in Finder anyway.
### Finding an exhibit
The filter field composes: free words match the name, number, Bates range, file name, and OCR text, and the tokens status:admitted, type:video (also audio, demonstrative, office, dicom, pdf), and binder:opening narrow by field — status:admitted type:video together is exactly that. The status chips under the field write the status: token for you, so a tapped chip and a typed token compose the same way.
Exhibit results rank by how directly the query hits the exhibit's identity, in this order:
- Exact or numeric exhibit-number match — "12" finds P-12
- Exhibit-number substring
- Name prefix
- Name contains
- Bates number
- File name
- Admission status text — typing "admitted" lists the admitted exhibits
Each row shows the status dot, type icon, number capsule, name, size ("N pages", "Audio", or "Video"), Bates number, and admission status. ⏎ stages the selection.
Note: A Bates query lands on the exact page carrying that stamp, not merely on the exhibit — type a Bates number read off a paper copy and the corresponding page opens directly.
### Semantic matches
Below the exact results, a SEMANTIC MATCHES section lists pages whose meaning matches the query even when no word does: "vehicle collision" surfaces a page about a truck accident, and "the email about delaying the shipment" finds it even though those words never appear. Each row shows the exhibit label, "p. N", and a snippet of the matched page; activating it opens that page.
Semantic matches need at least three characters, appear about a third of a second after typing pauses, and show up to eight pages that clear a fixed relevance floor — weak matches are suppressed rather than shown as noise. The section covers only exhibits that already carry OCR text, and it never runs OCR itself.
### Running a command
Actions appear alongside exhibits, each with its live hotkey chip, so the palette doubles as a command palette.
| Action | Shortcut chip | Function |
|---|---|---|
| Blackout Jury Display | Current blackout binding | Cuts the jury feed |
| Publish to Jury | Current publish binding | Publishes the staged view |
| Toggle Side-by-Side Split | Current split binding (\ by default) | Enters compare with this page left and the next page right, or leaves it |
| Toggle Multi-View | Current binding (⇧\ by default) | Enters Multi-View with this exhibit in section 1, or leaves it |
| Pre-Court Check | — | Opens the readiness check |
| Search Transcripts | ⇧⌘F | Opens the global search window |
| Import Files… | — | Opens the import file chooser |
| Keyboard Shortcuts | ⌘/ | Opens the shortcut sheet |
Type a few letters of what you want — "blackout", "publish", "split", "import" — and press ⏎.
### The wider search window
⇧⌘F — or the sidebar's Search transcripts… pill, or the palette's Search Transcripts action — opens a resizable Search window that reaches further than the palette. Results update about a fifth of a second after typing stops; ⎋ closes it. Exhibit and Bates hits always lead the list — an exhibit you can name outranks an action or a deposition that merely contains the same characters — and the page shorthand works here too: 95 p 5 opens exhibit 95 at page 5.
- Exhibit page jump. An exhibit query with a page after it,
12 p5orP-12 page 5, pins a Go To row that opens page 5 of Exhibit 12 directly; ⏎ takes you there. Up to five matching exhibits get a row each, and an exhibit without that many pages is left out. - Verbs. Type the action the way you would say it:
stage P-14 p3,show 12, oropen P-2search the exhibit after the verb, andplay clip 7opens Playback Mode on the first clip list with that many clips and starts clip 7. - Recently shown. With nothing typed, the list opens on RECENTLY SHOWN, the last ten distinct things that went to the jury, newest first. ⏎ puts one back on your screen, ready to publish, which is how cross-examination's "put that back up" takes one keystroke and a click.
- Page:line jump. A query like
45:12pins a Go To & Actions section at the top with one jump row per deposition, opening that transcript at exactly that page and line — the fastest way to reach a citation called out by opposing counsel. - Quick actions. Blackout, Staged Mode, Live Mode, Open Jury Display, and Enter or Exit Trial Mode appear in the same pinned section, so presentation state can be changed from the keyboard alone.
- Depositions match by deponent, with an "Open transcript" action.
- Exhibits match on label and file name, capped at ten rows.
- OCR content fills the exhibit section out to that cap, shown with a short excerpt around the match. These are exact text matches, not semantic ones.
- Snapshots match by name, capped at eight. Opening one restores it; a side-by-side snapshot restores the full two-pane comparison.
- Transcript hits come last, grouped by deponent with a count, each row showing the page:line reference, the synced timestamp, and a snippet with the matched words bolded. Results are capped at 500 — narrow the query rather than paging through a broad one.
Note: Only synced depositions are searchable here. A deposition with a transcript attached but no sync is invisible to this search until you sync it.
### From other apps
Evidentiary adds two entries to the Mac's Services menu, which every app has under its application menu (and in the right-click menu on a selection). Both work offline.
- Add to Evidentiary — select one or more files in Finder and they import into the open case as exhibits, the same as dragging them in.
- Search in Evidentiary — select a Bates number or a phrase anywhere, in Mail, Preview, Safari, a Word document, and the palette opens with it already typed.
Nothing happens if no case is open. If the entries are missing from another app's menu, launch Evidentiary once and reopen that app — macOS refreshes its Services list when an app that offers them runs.
Evidentiary is also in the Mac's Share menu — the arrow-in-a-box button in Mail, Safari, Photos, Messages, Preview and Finder. Choose Evidentiary and the shared files are copied into the open case and reviewed in the usual pending-import sheet, so an exhibit attached to an email from opposing counsel goes from the message into the case without touching the Desktop. Several attachments share as one batch. With no case open, Evidentiary comes forward and asks you to open one, then share again. If Evidentiary is missing from a Share menu, turn it on under System Settings ▸ General ▸ Login Items & Extensions ▸ Sharing.
The Dock icon is a door too. Drop PDFs, images, video or audio on it and they import into the open case exactly as Mass Add would; Finder's Open With ▸ Evidentiary does the same from a right-click. Sync (.tws) and clip-list (.dce) files carry an Evidentiary icon in Finder, and a double-click or a Dock drop imports them into the Depositions or Clips tab. With no case open, a drop reminds you to open one first. Right-click the Dock icon for the recent cases and, once a case is open, Blackout, Staged, Live and Open / Close Jury Display — the same switches as the control bar, reachable while another app is frontmost.
### How semantic search works
Meaning-based search runs entirely on the Mac, on Apple's English sentence-embedding model. Nothing is uploaded and nothing is persisted: the index builds on the first search, rebuilds when the OCR'd corpus changes, and is released when the case closes, so on a large case the first semantic search after opening can take a moment. If the macOS English embedding asset is not present, semantic features hide themselves silently and keyword search is unaffected. Semantic matching is available in this palette and in the clip editor's "Find testimony about…" toggle; the global search window and the on-document find bar are exact-match only.
Presenting to the Jury
The jury display mirrors nothing automatically — you control every pixel that reaches the courtroom. You publish an exhibit to the jury when you are ready, you freeze the jury display on what it already shows while you work ahead in private, and you black out the screen the instant something goes sideways. This chapter covers second monitor setup, the three presentation modes, the annotation tools you mark up with, the snapshots that save that markup, and the trial-day lockdown that protects the whole thing.
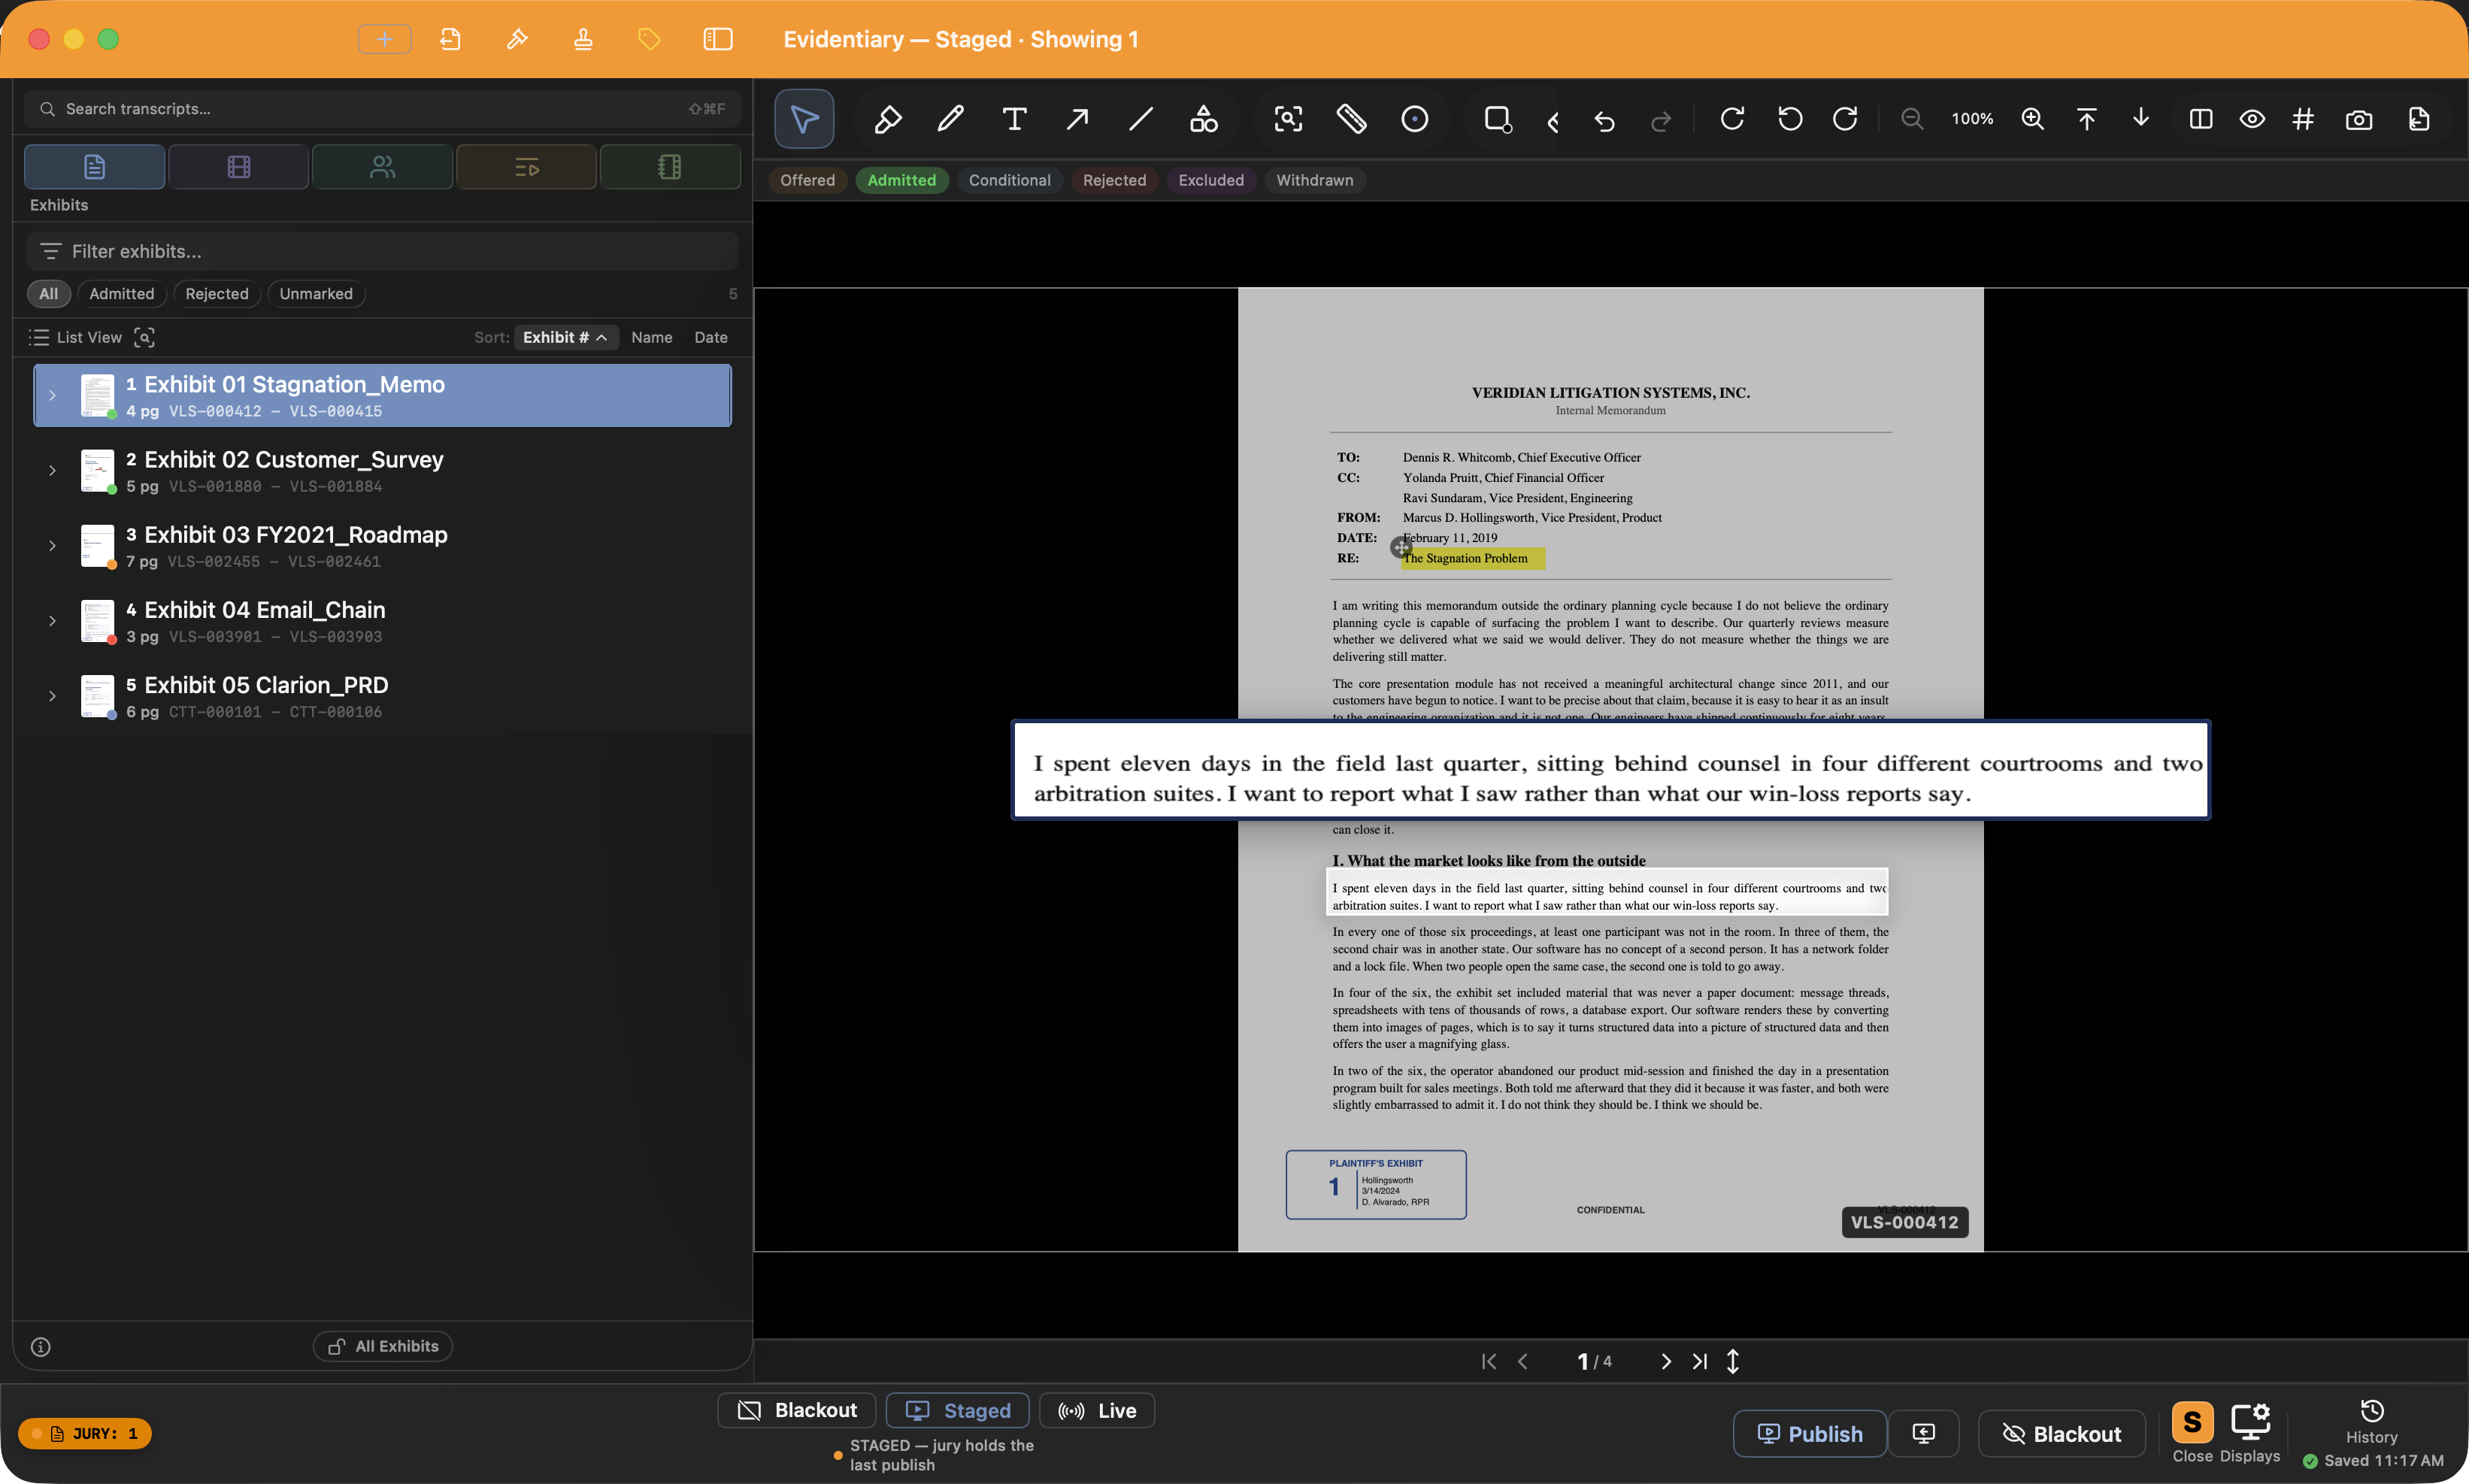
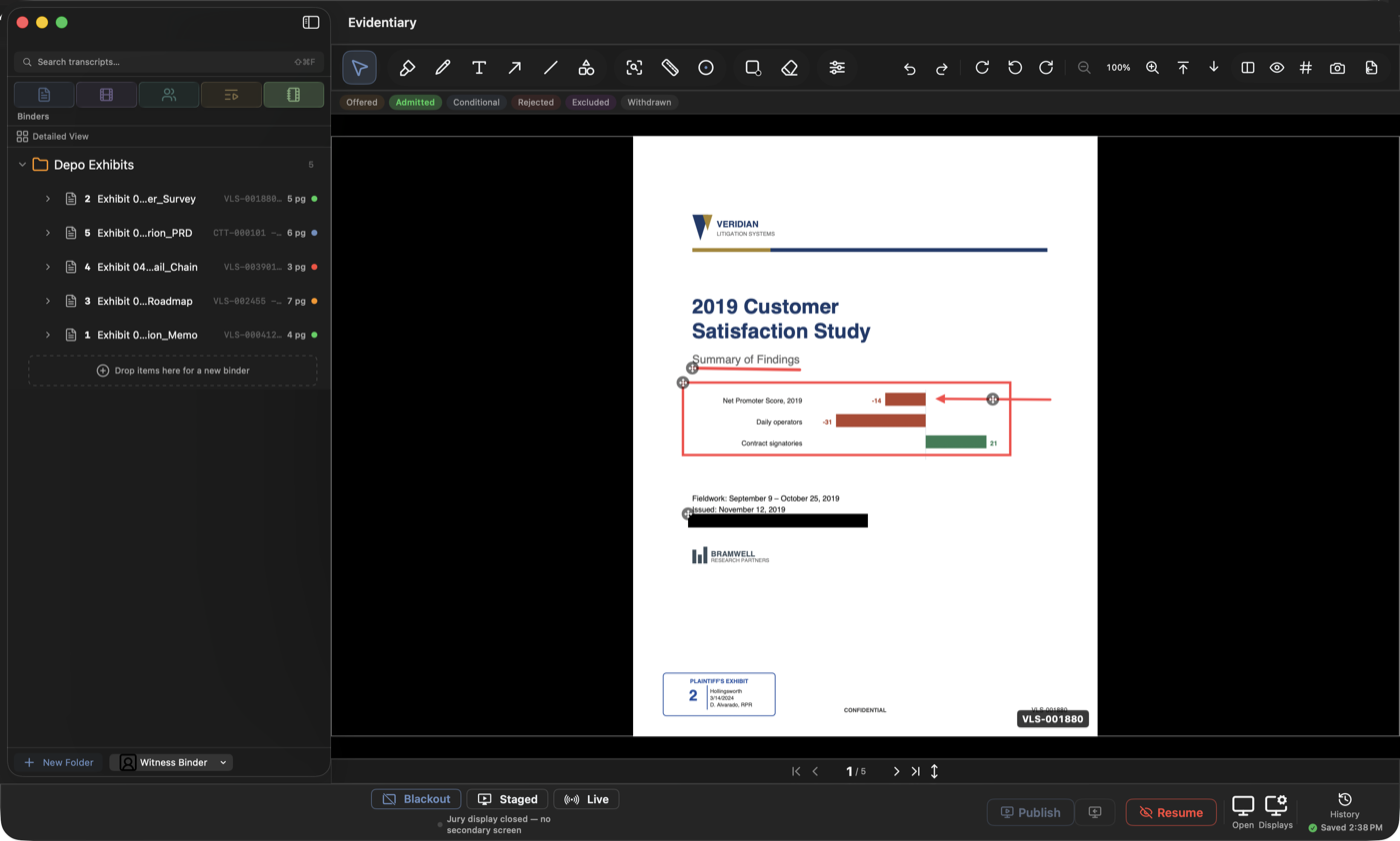
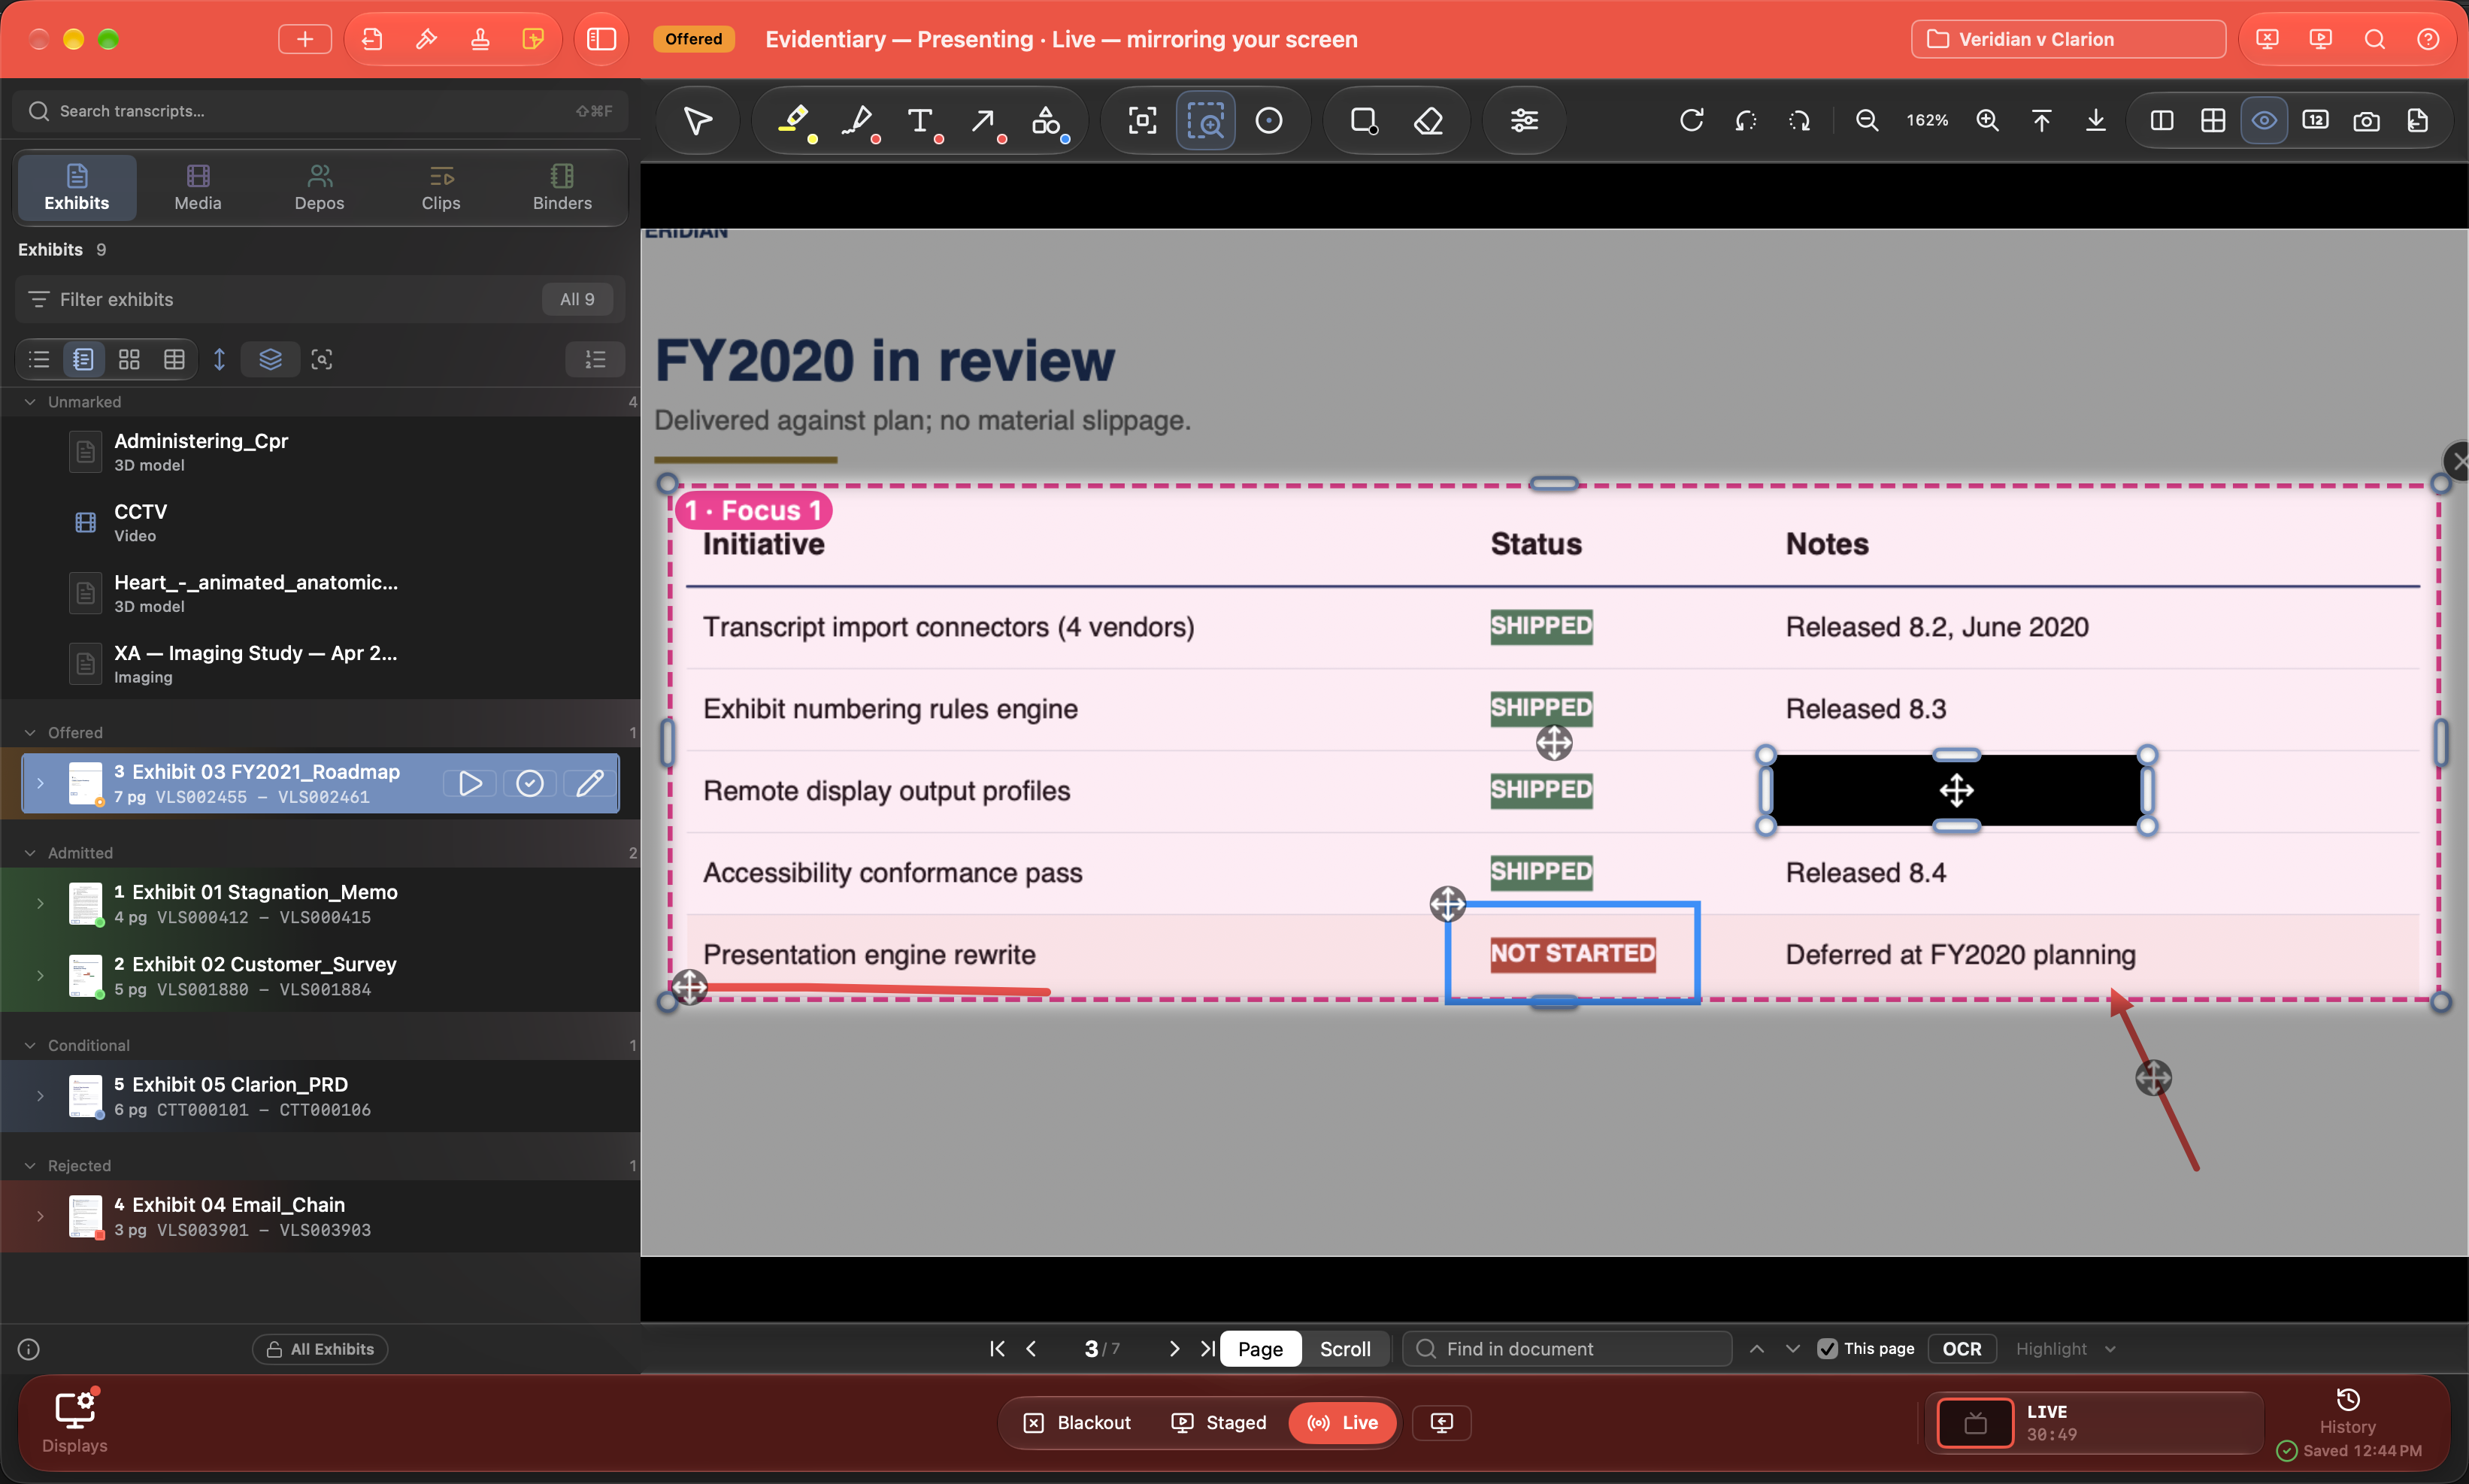
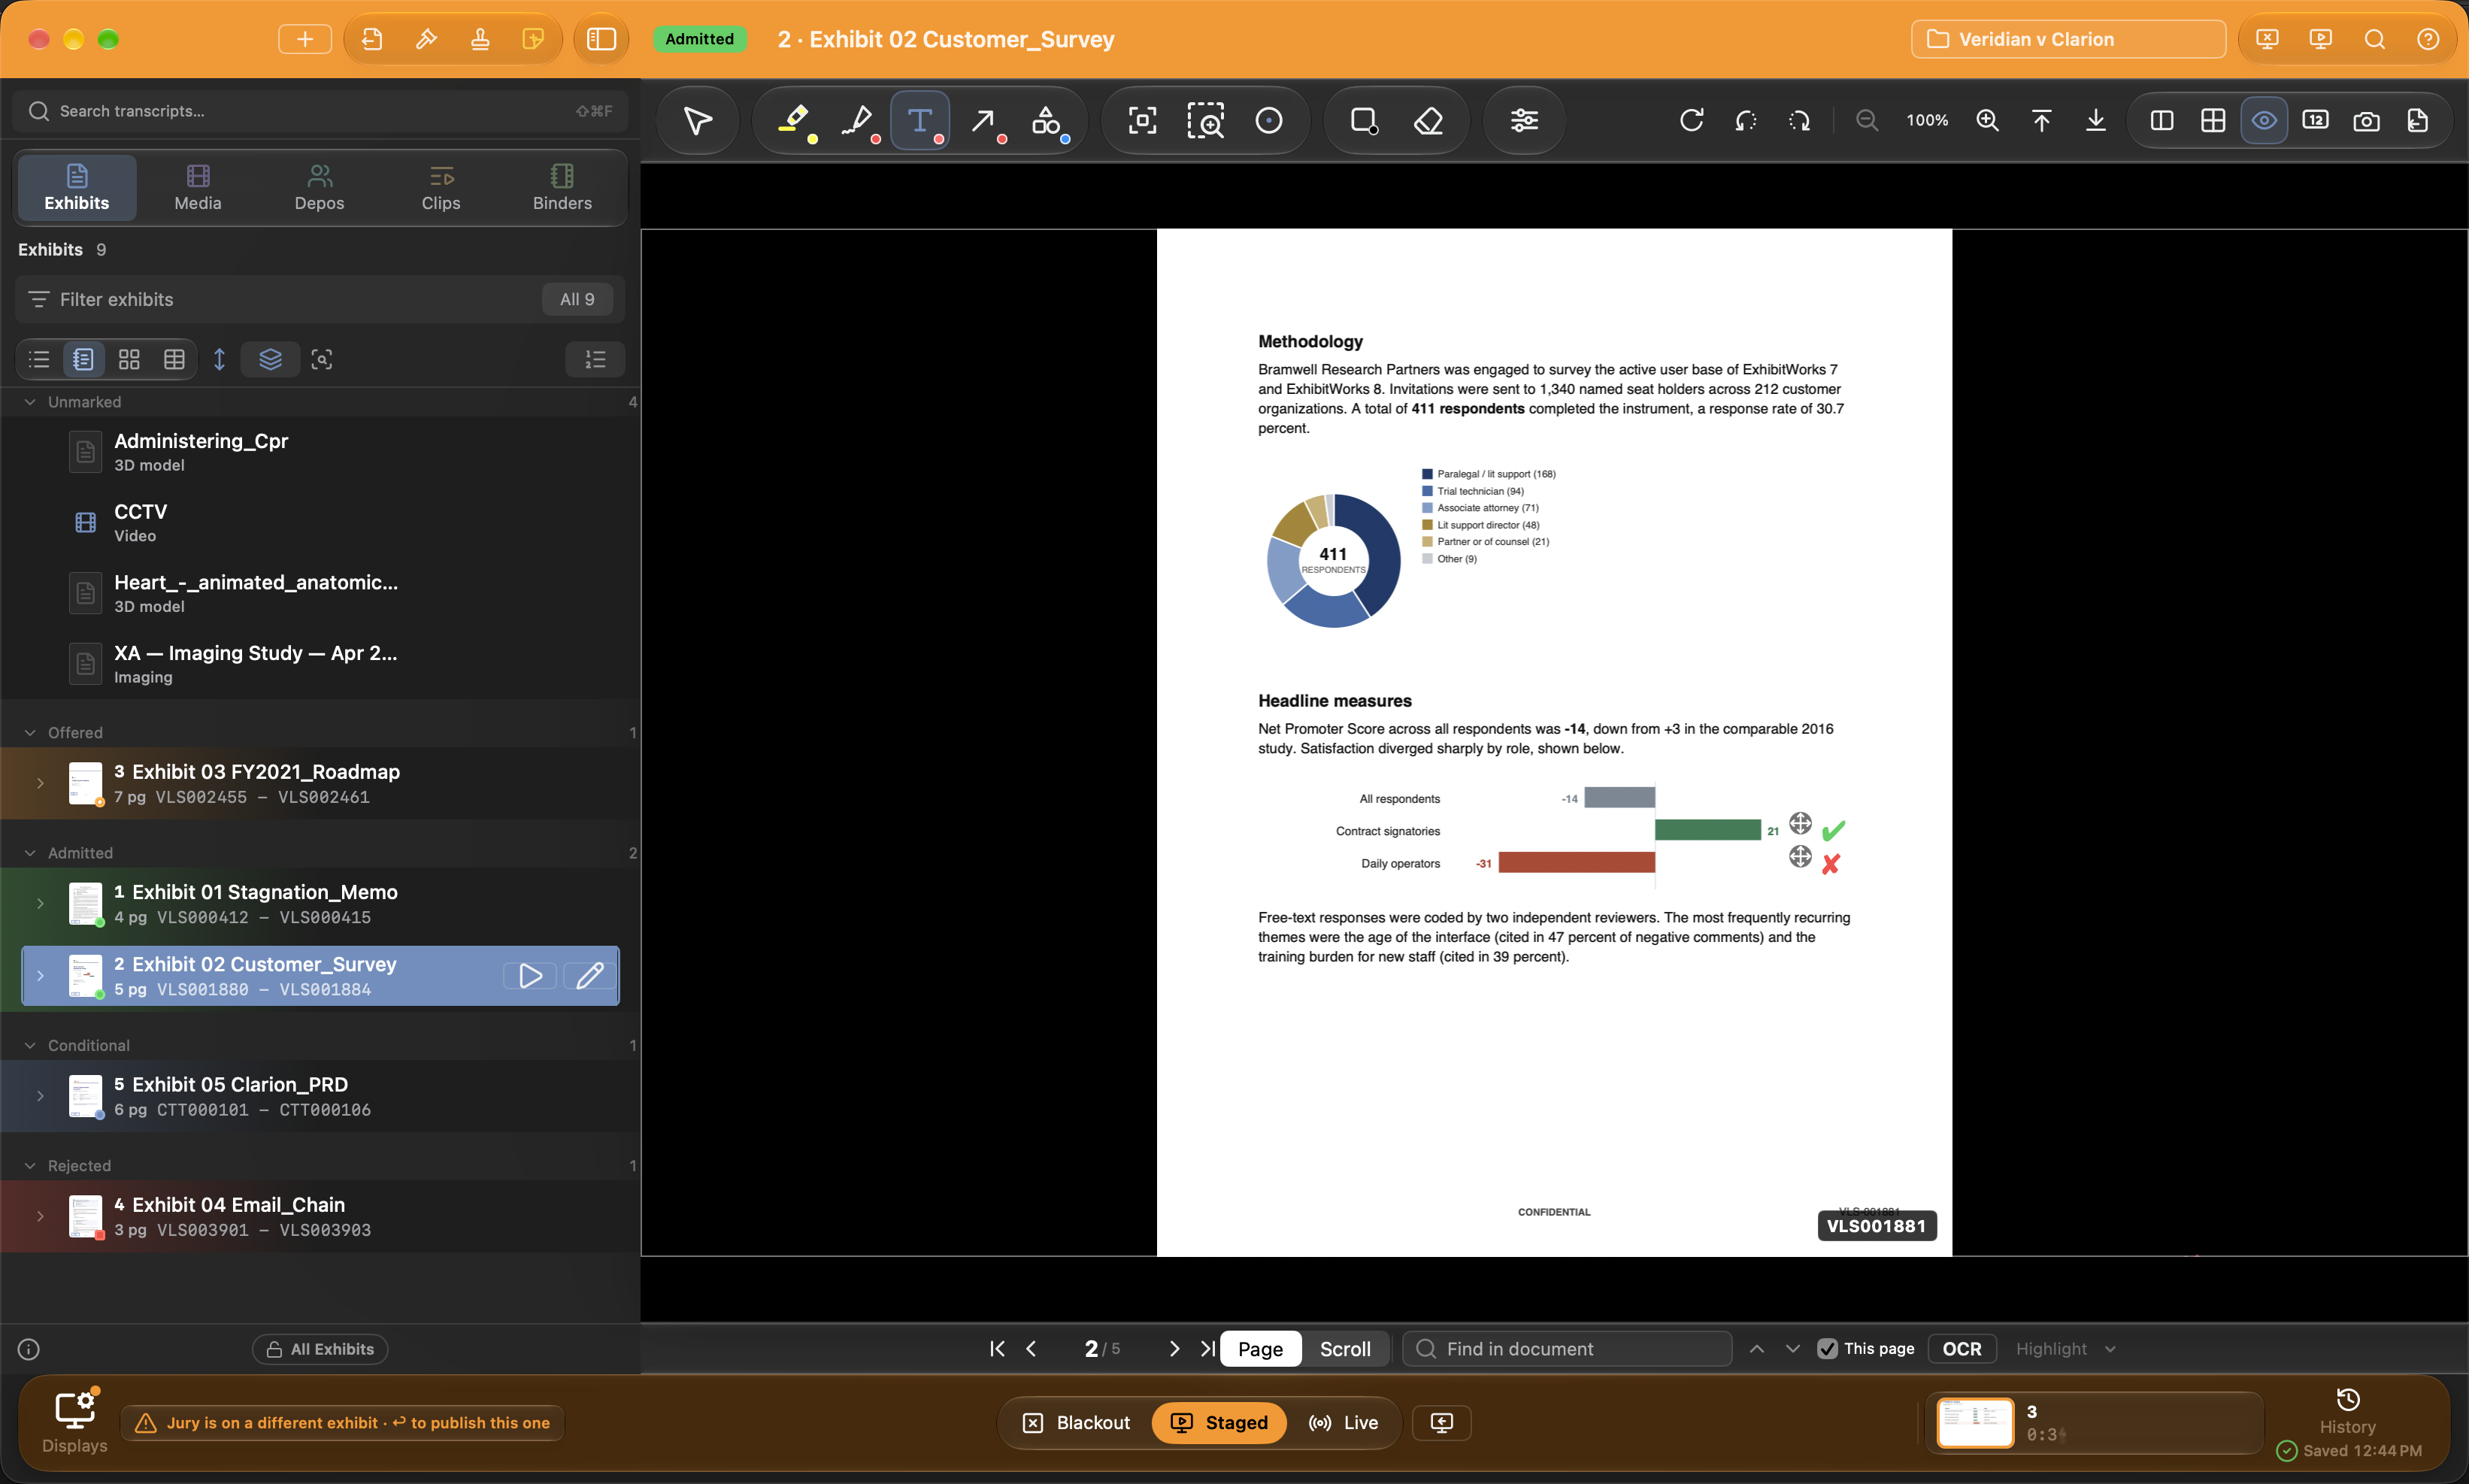
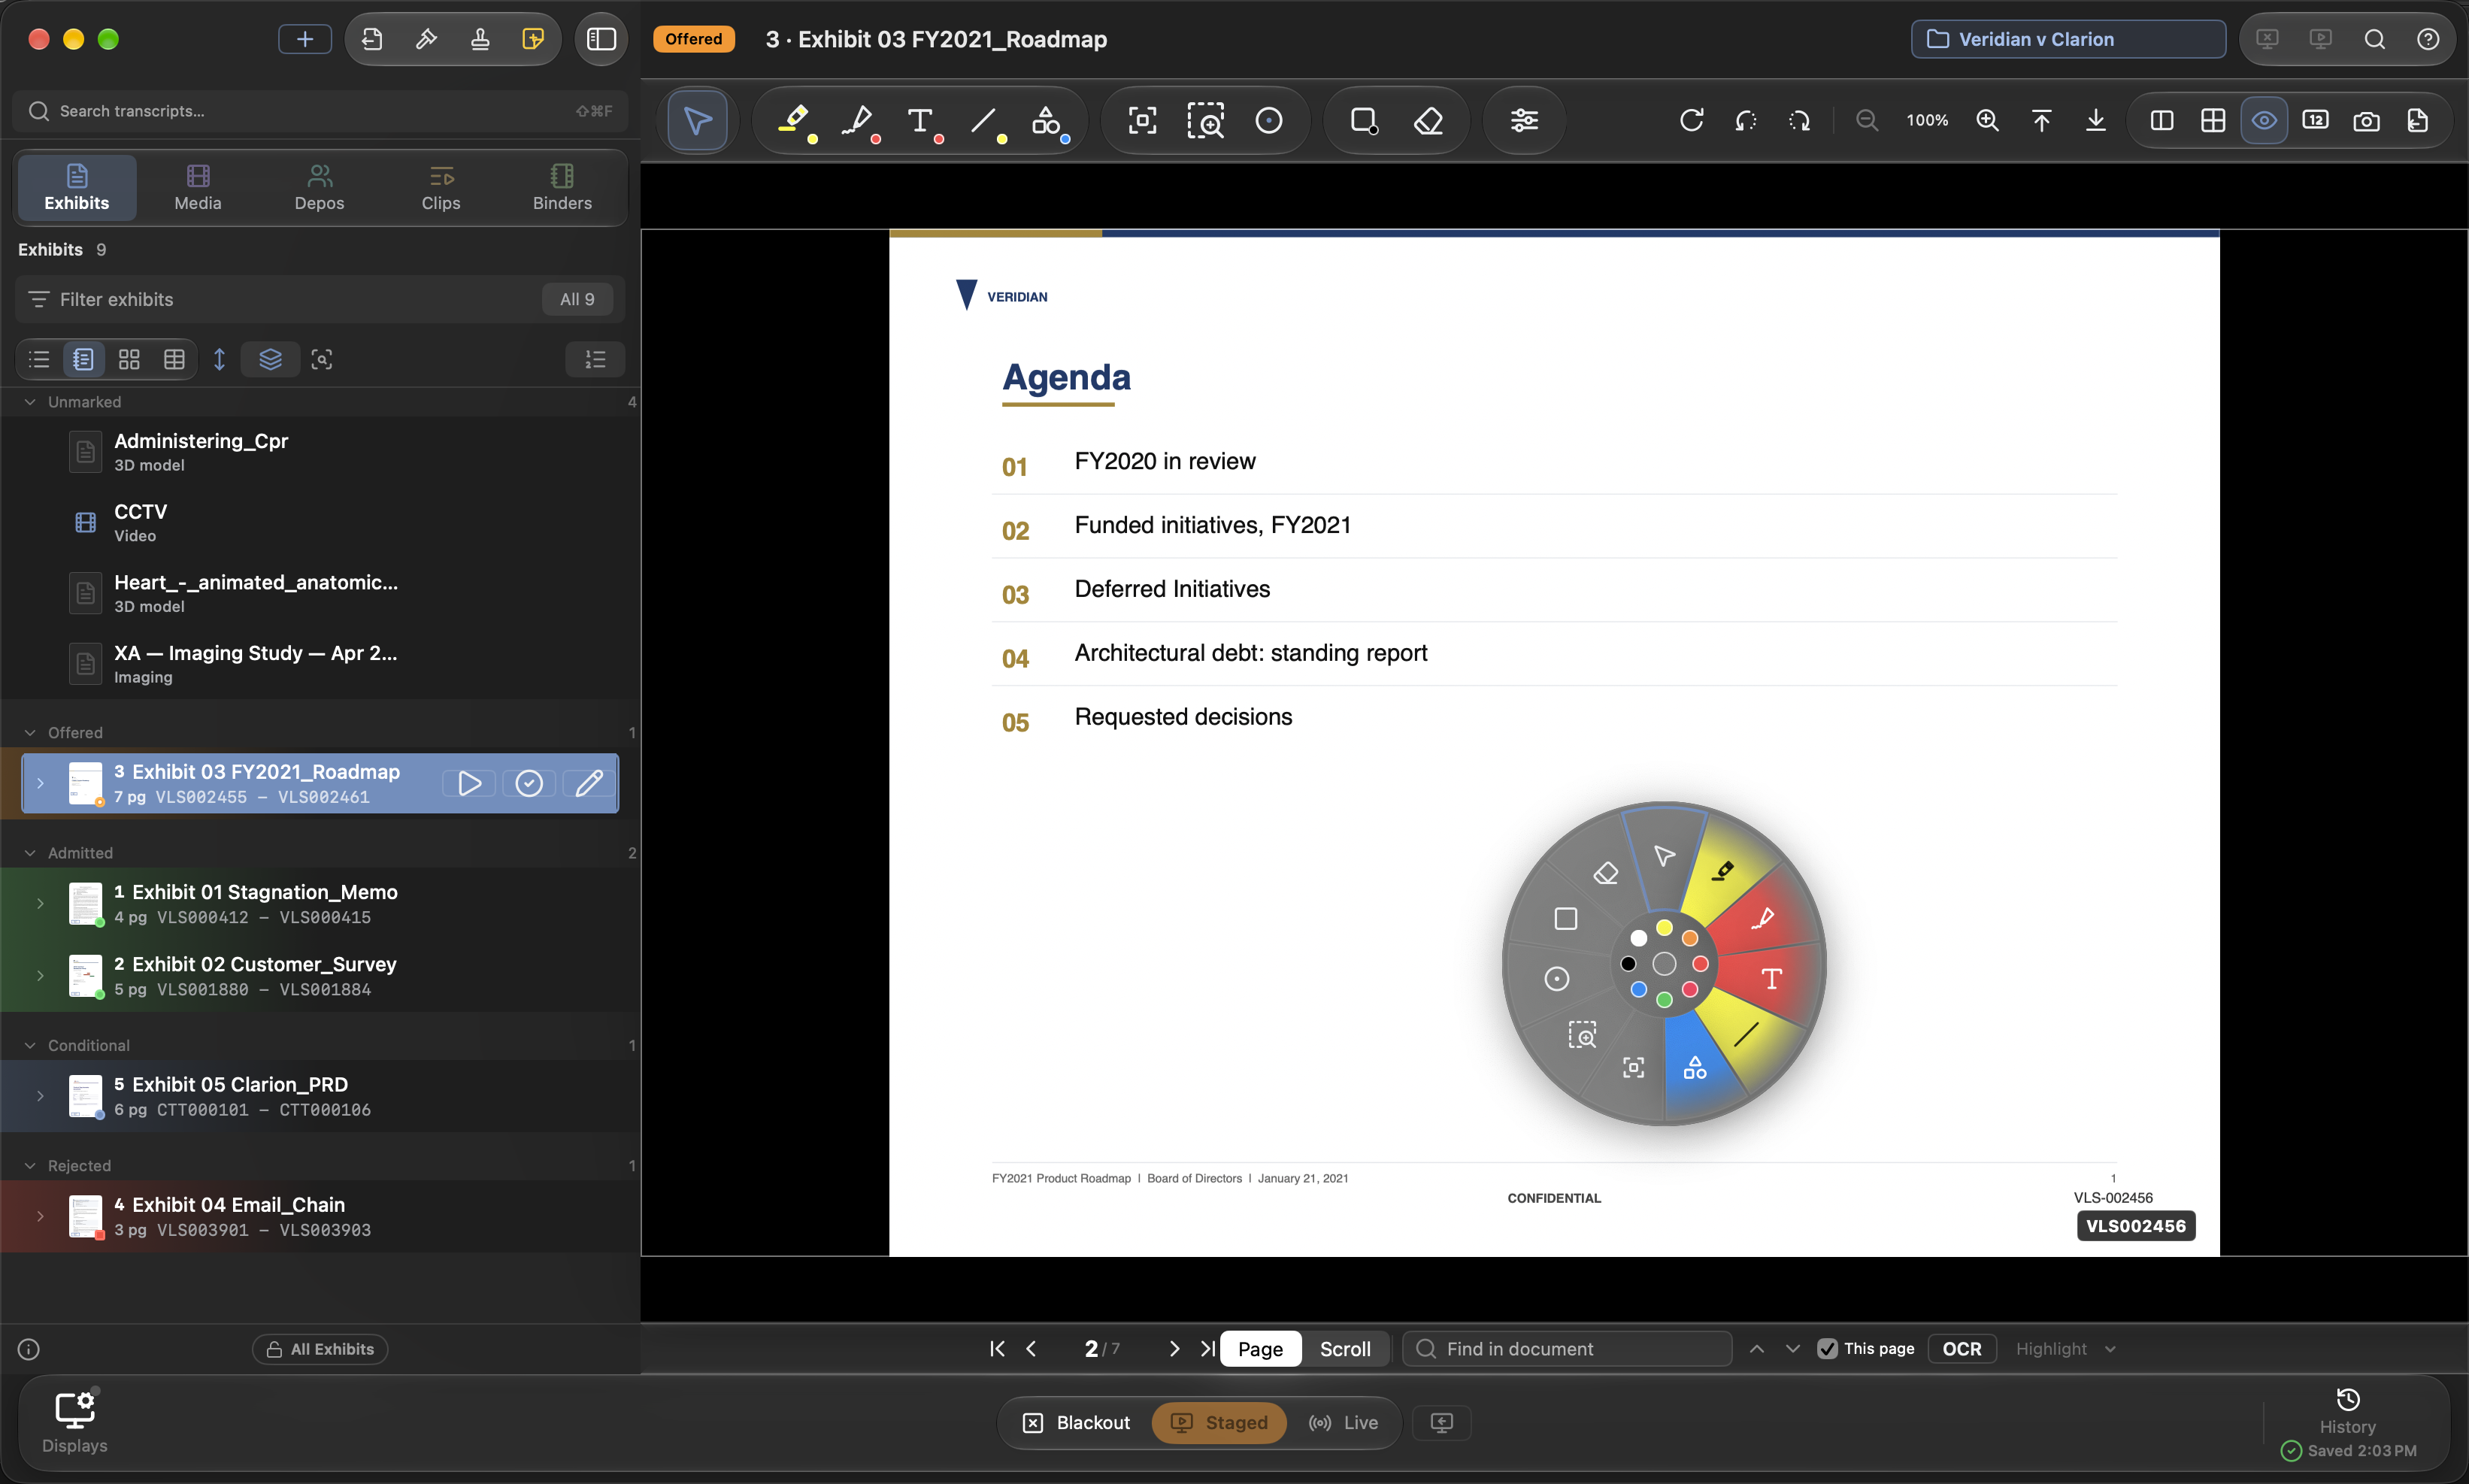
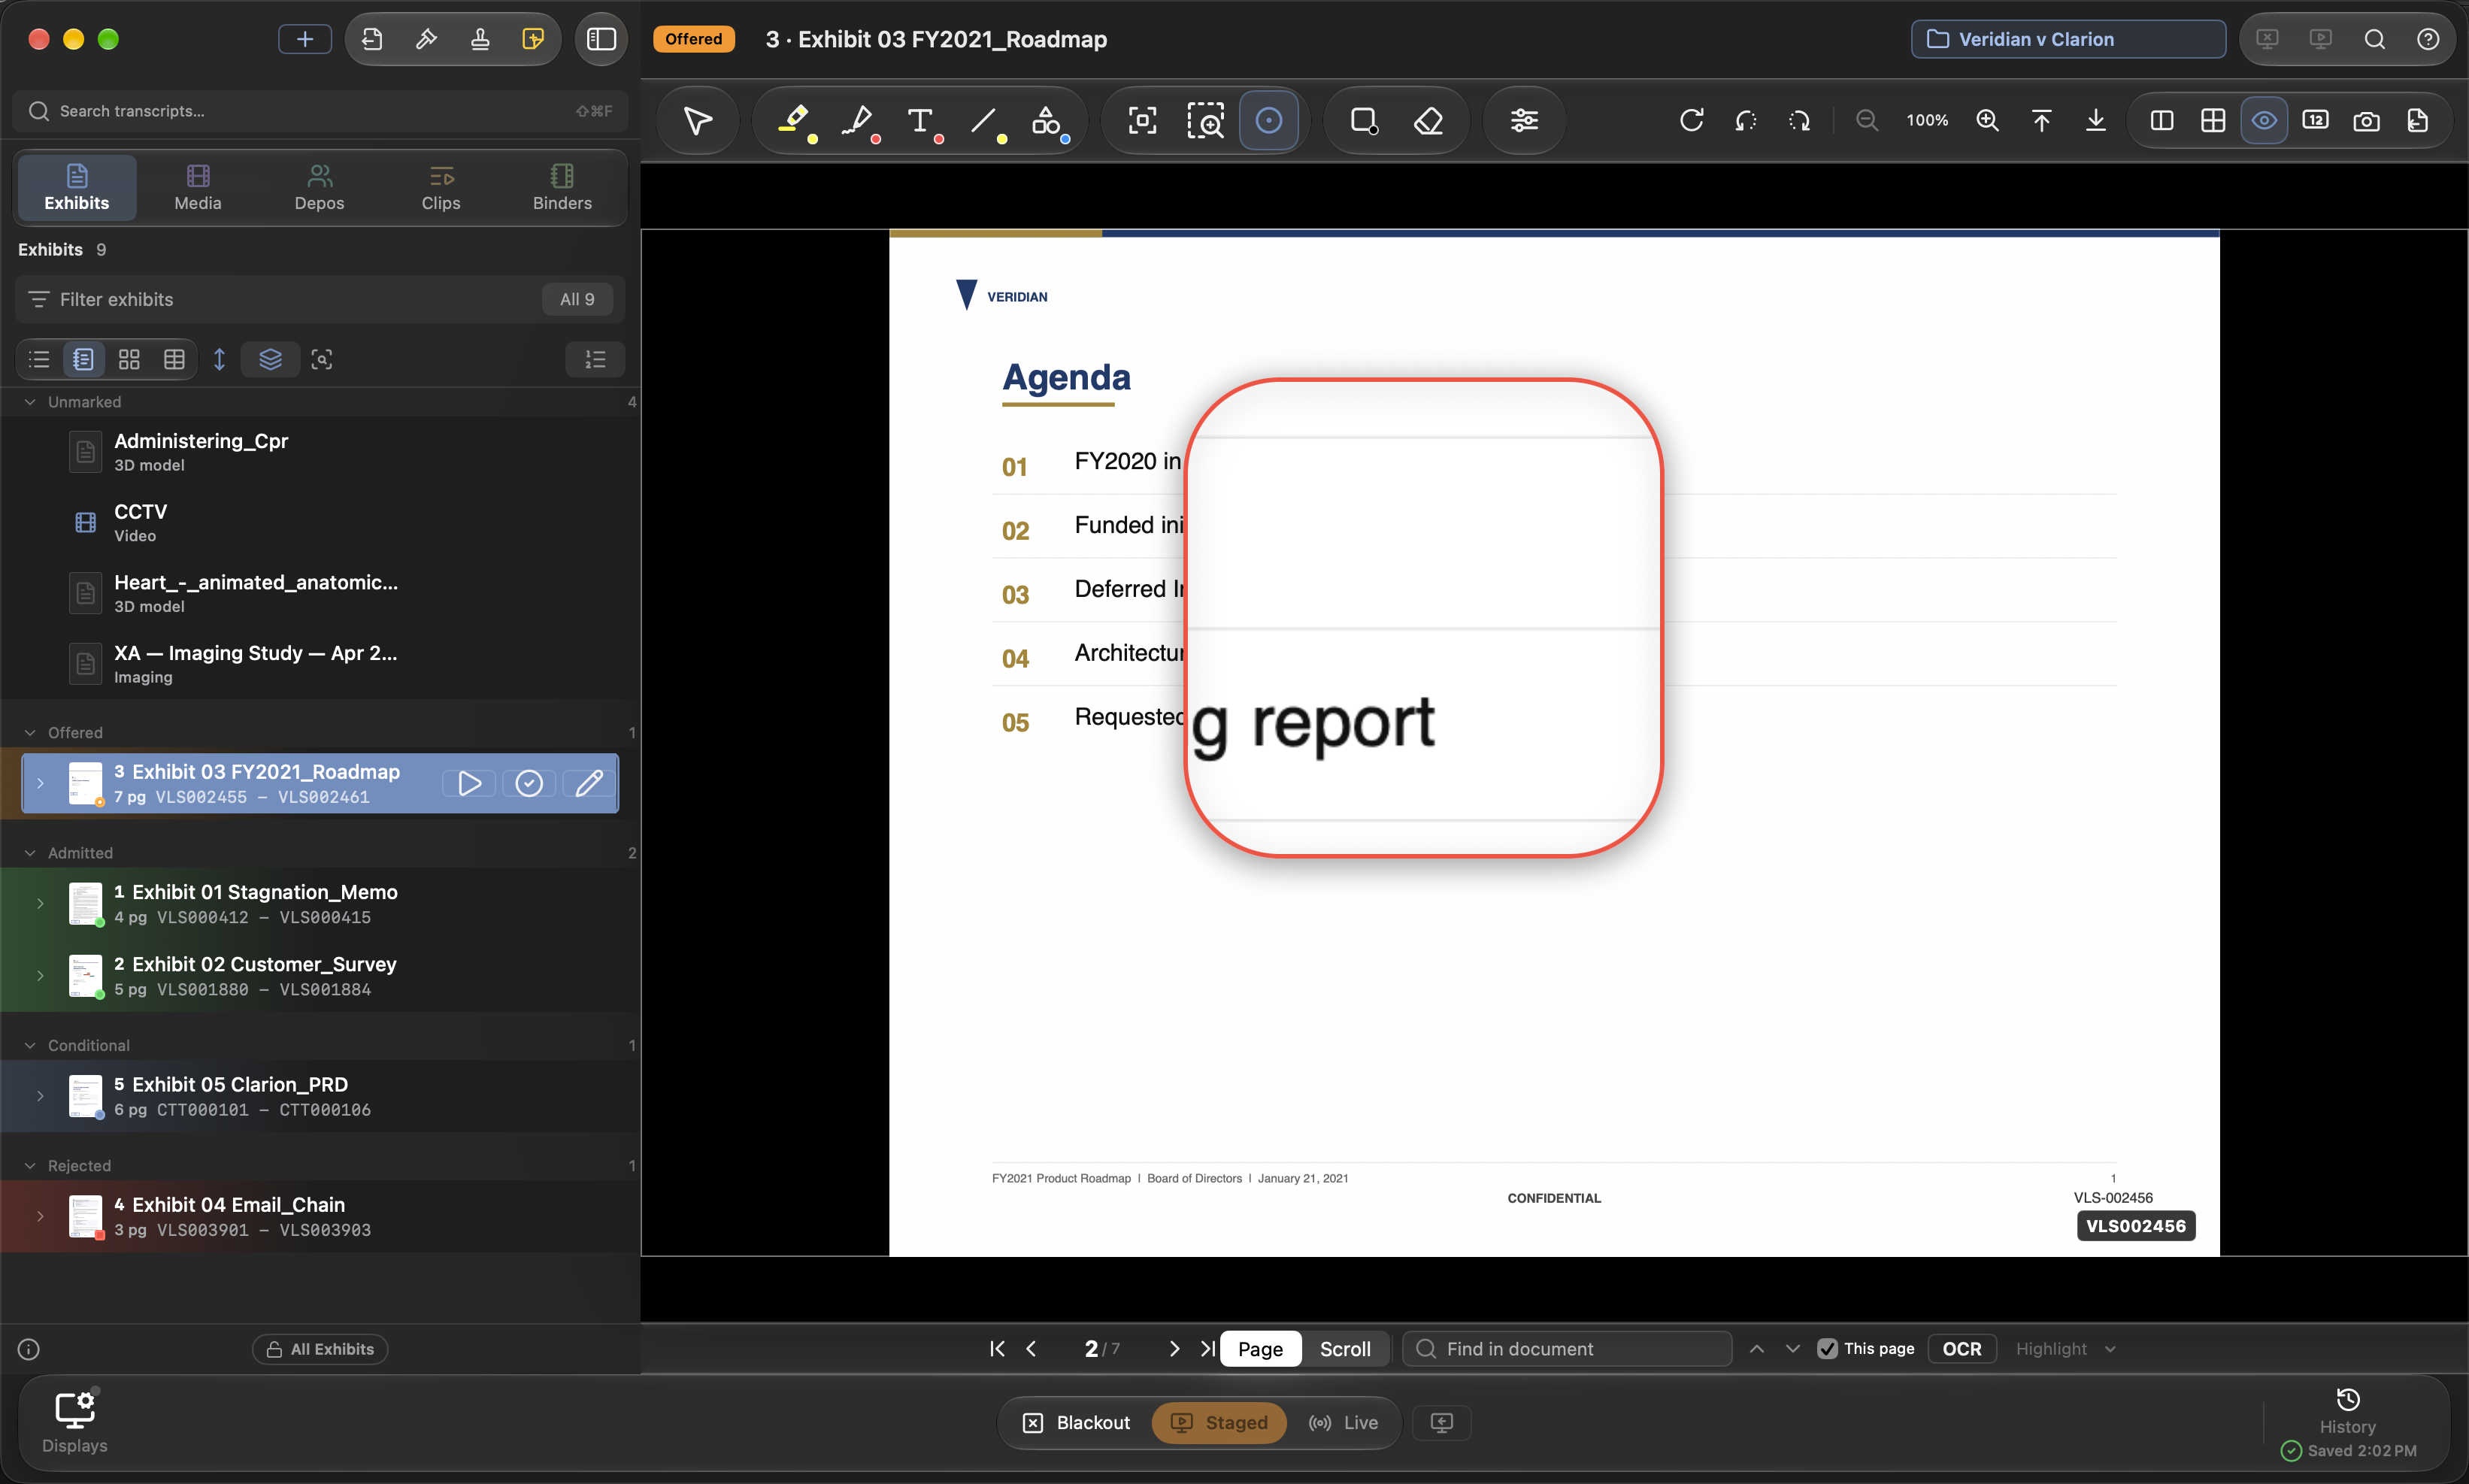
### Second monitor setup
| Control | Location | Shortcut |
|---|---|---|
| Open Jury Display | View menu | ⌘⇧J |
| Close Jury Display | View menu | ⌘⌥⇧J |
| Close jury display | Anywhere in the app | ⌘⎋ |
| Displays tile | Presentation control bar | — |
The Displays button, first on the control bar at its left end, is the jury view's switch. Its popover draws your monitors; clicking an external tile opens the jury view on that screen, clicking it again takes it off, and taking the last lit tile off closes the jury window. Closing the workspace window closes the jury view with it.
Your primary display, the one carrying the menu bar, always stays private. The external screens you pick — a second monitor, a courtroom TV, the projector — carry the jury feed, and when several are lit they are driven in lockstep: mode changes, publishes, page flips, and laser movement reach every jury window together.
With more than one external monitor, Displays is where you choose which of them show the jury view. Its Show Jury View On popover draws your monitors in their real arrangement, the way System Settings does, each tile labeled This Mac, Jury, or Private. The first tile you pick opens the jury view there and only there; the other externals stay Private, your own working screens, until you click them too, and every choice is remembered between sessions. ⇧⌘J opens the jury view on every external that is not parked Private, and does nothing while all of them are. The primary tile cannot be assigned and says so with a padlock. The popover's Audio row picks the jury speakers from every output device the Mac can see; every clip and deposition player routes to that device, and Test Tone plays one second of tone through it so you hear which speakers the jury will hear before the first clip plays.
An iPad makes a jury monitor too. Connect it with Sidecar (Control Center ▸ Screen Mirroring, or System Settings ▸ Displays ▸ +) as an *extended* display, and it appears in the picker as a tile captioned Sidecar; click it and the jury view opens on the iPad, which can then sit at the witness stand or in counsel's hands. An Apple TV joined the same way over AirPlay shows as AirPlay; a courtroom television with AirPlay built in works the same. Both are ordinary external displays to Evidentiary, so every rule above applies — pick extend, never mirror, or your own screen goes to the jury.
Identify Displays — in that popover and in the View menu — flashes a large numbered card on every screen simultaneously, each with the display's name and role badge. Courtroom carts frequently present a pair of identical panels; use this to match physical monitors to tiles before assigning jury output.
Auto-open on connect is a persisted checkbox in the same popover, off until you set it: with it on, the jury display opens by itself when an external display appears. Separately and always on, Evidentiary reopens the jury window the instant a display carrying jury output returns, in the mode it left. Blackout first if you are not certain what will be on screen when the picture comes back.
Warning: With no external display attached, opening the jury view takes over your own screen. Evidentiary warns first and offers Open Anyway; ⌘⎋ exits at any time. Use it for rehearsal, not in the courtroom.
The jury window is deliberately unlike a normal window: borderless, covering the whole screen frame including behind the Dock and menu bar, so no title bar reaches the projector, and black wherever content does not cover it. It never takes keyboard focus, so your typing always lands in the operator window. While it is open the Mac's display-sleep timer is held off, so a long cross on a static exhibit never blanks the projector; the moment it closes the Mac sleeps on its usual schedule. It stays above everything, the macOS menu bar included, even while you work in another app. It steps aside only while the app in front has a window on the jury screen, so a co-counsel's slideshow or a document camera can present over it, and rises again when you come back to Evidentiary.
Test Pattern in the display picker sends a calibration image to the jury display: SMPTE color bars, a grayscale ramp, an overscan border at the very edge of the frame, a perfect circle, and a caption naming the resolution. If the circle is an oval, the display or projector is scaling non-uniformly and every exhibit will be distorted the same way. If any part of the overscan border is off-screen, so is the edge of every page you publish. Showing the pattern opens the jury display, leaves Blackout, and tears down any mounted exhibit, so run it before the jury is seated.
### Black out the screen, freeze it, or go live
Evidentiary has exactly three presentation modes, and the whole operator model rests on them.
| Mode | What the jury sees | Your screen | Publishing |
|---|---|---|---|
| Blackout | Your backdrop, black unless you chose a color or logo | Unchanged — you keep working | Not possible; Publish reports a cue |
| Staged | A frozen copy of the last publish | Free — turn pages, annotate, open other exhibits | Publish pushes the current view |
| Live | A real-time mirror of your staging view | Every move is seen | Automatic; nothing to publish |
In the control bar, one switch carries all three as segments — Blackout, Staged, Live — and the selected segment fills grey, amber, or red so the mode reads from across the room. Until a secondary display is enabled in the Displays picker the Staged and Live segments are dimmed and the status beside them reads "No Secondary Display Enabled".
Blackout is the panic button. One key makes the jury screen dark (a second press brings back exactly what the jury was seeing, so an objection costs two clicks), or shows your chosen backdrop (Settings ▸ General ▸ Jury Display: a color, or a logo image, centered or tiled) in place of black. The staging canvas on your own screen has its own color under Settings ▸ General ▸ Staging Area. It is not a dimmer — the picture cuts to black and the sources feeding it stop: designation playback, an active impeachment, a video stream, and a deposition playback session all halt, the mounted hosts tear down, and the jury exhibit name clears. Leaving Blackout returns to whichever of Staged or Live was last active, and from a cold start that is Staged.
Staged is the working mode and the default. The jury display holds a frozen copy of your last publish while you turn pages, mark up, and pull up the next exhibit in private; new marks are not pushed as you draw them. Switching from Live back to Staged locks the jury display onto exactly what it was showing at that instant — this is how you freeze the jury display mid-argument. If a video was playing it pauses and holds the last frame, with a cue pill reading "Jury holds frame — Play resumes to jury".
Live is a mirror. The jury display follows your page, your zoom, your scroll position, and each annotation as you commit it. Selecting an exhibit mounts it immediately; video, Office files, medical images, and the side-by-side stage mount themselves without a publish.
| Control | Shortcut |
|---|---|
| Blackout | ⌘⇧B, or B |
| Staged | ⌘⇧S |
| Live | ⌘⇧L |
| Toggle Staged and Live | G |
B toggles Blackout from anywhere in the workspace and is disabled while the jury display is closed. G flips between Staged and Live but does nothing from Blackout, so a stray keystroke cannot restore a picture you deliberately cut. All of these are rebindable in Settings ▸ Hotkeys, and every tooltip and cue reflects your current bindings.
A presenter remote — a Logitech or Kensington clicker — works out of the box, because those send the PowerPoint keys: Page Down and Page Up turn pages, the start button (F5) opens the jury display or, once it is open, goes Live, and the blank-screen button (.) toggles Blackout. Settings ▸ General ▸ Presenter Remote turns the mapping off if you would rather Page Down scrolled the lists. The same three switches, plus Open / Close Jury Display, sit in the Dock icon's right-click menu for the moments another app is frontmost.
Warning: In Live, everything you do is on the jury's screen — including opening an exhibit you did not intend. Staged is the default working mode for a reason. Use Live for deliberate, continuous markup in front of the jury.
### Publish an exhibit to the jury
Publish is the large prominent button in the presentation control bar, and its default key is ⏎ (Return), rebindable like the rest. It is enabled only when the mode is Staged and the jury display is open.
Note: Space never publishes. A single Space plays or pauses video, or Quick Looks the selected exhibit when no video is loaded; a double-tap of Space opens Quick Search.
A publish takes a frozen copy of your staging view: the document, every published mark, the sticker, the aspect ratio, the page count, the zoom level, the pan offset, the continuous-scroll position, the page brightness and contrast adjustments, the Bates value, and the exhibit label. The jury display holds that copy until the next publish, a mode change, or a blackout. Publish resolves its target in a fixed order — a frozen side-by-side pair when the split stage is up, then a video exhibit, then the staged PDF or image exhibit, then an Office file. Video is the exception to freezing: publishing a video mounts it and starts playback, and it stays live. When a publish replaces something the jury was already looking at, an Undo publish button sits on the bar for ten seconds and puts the previous page back exactly, marks and all. The JURY badge at the bottom left carries a running clock since the current item went up, so an eight-minute video reads as eight minutes.
A Publish that cannot do anything beeps and shows a transient pill beside the button: "Jury is dark — leave Blackout to publish", "Live already mirrors your screen", or "Nothing staged — open an exhibit first".
The out-of-sync cue is the most useful indicator on the bar. In Staged, whenever the jury display is showing something other than your current staging view, a warning pill appears reading "Jury p.N · Staging p.M · ⏎ to publish", or naming a different exhibit entirely. Clicking the pill publishes. If the pill is absent in Staged, your screen and the jury display agree.
Publishing also stamps the exhibit's "first shown to jury" date, a single time and permanently, and adds an entry to Presentation History.
### The publish guards
Court-excluded exhibits are always guarded, in every mode and regardless of any other setting. Mark an exhibit Excluded on the Admission Board as soon as a motion-in-limine ruling comes down, and any attempt to show it raises a modal alert naming the exhibit and warning that showing it may cause a mistrial or sanctions. Show Anyway is a destructive button, not an OK button.
Evidence Lock is the second guard, and it is yours to set. The All Exhibits / Admitted Exhibits toggle at the bottom of the exhibit list restricts the jury to evidence that is actually in. With it engaged, publishing (or, in Live, auto-showing) an exhibit that is not admitted or conditionally admitted is refused, so an unadmitted, merely-offered, or rejected exhibit cannot reach the jury by a mis-click. The alert's Unlock & Show clears the lock for the case and then publishes; it does not make a one-time exception. The lock is per-case and remembered between sessions.
In Live there is no dialog, because a modal cannot arrive fast enough to matter. The jury display holds what it was already showing and a cue appears on your screen instead.
### Reverse publish
Reverse Publish (⇧R, or the reverse-monitor button in the control bar) pulls the jury's exhibit back into your viewer, at the page the jury is on — the opposite direction from Publish. Use it after working ahead privately, or when opposing counsel asks about "the document on the screen". It is enabled when the jury display is open, the mode is not Blackout, and the jury is showing a PDF exhibit. Video, Office files, and the side-by-side stage are not reverse-pullable.
### Presentation history and presenter notes
The History button in the control bar lists what has gone to the jury display this session: a glyph, the name, "Page N of M", and the time. Clicking a row loads that exhibit at that page into your viewer. Recall does not publish — the jury display is unaffected until you press Publish. Impeachment player sessions are logged here too. A Full jury log… button at the foot of the popover opens the durable Jury View Log described in the note below.
Note: History is a session list. The durable, cross-session record is the Jury View Log, opened by the Full jury log… button: every exhibit and video shown to the jury, and every Blackout, Staged, and Live change, is appended with a timestamp to a per-case file that survives quitting and reopening the case (and is never cleared by the session Clear button). Export… writes it as a plain-text timeline in the form a court wants, and Reveal shows the underlying file. Alongside it, the per-exhibit "first shown to jury" stamp and File ▸ Export Exhibits Shown Record… give the exhibit-by-exhibit view. Any binder folder can also be designated the Target Notebook, a running log of what actually reached the jury: each publish files that exhibit and page automatically, and ⇧B adds the page you have staged. See Playlists and Binders.
⌘⌥N (View ▸ Presenter Notes) mounts a private notes strip beneath the staged exhibit — talking points, the next question, the objection to anticipate. A chip shows which page the note belongs to, and the field grows from one line to four. Notes are stored per page and travel inside the case package. The strip is operator-only: never drawn on the jury display, never included in a flattened export, and not shown while the side-by-side stage is up.
### Zoom into a document and rotate a page
A one-pixel white outline on the staging canvas marks the edge of the jury screen. Content outside that outline will not be on the jury display.
| Control | Behavior |
|---|---|
| Zoom out | Steps down by 0.25. Zooming back to 1× also clears the pan |
| Percentage readout | Click to reset to 100% and clear the pan |
| Zoom in | Steps up by 0.25, to a maximum of 4× |
| Pin top | Fits the page width and pins the top edge |
| Pin bottom | The same, pinned to the bottom edge |
Use = and − to zoom into a document from the keyboard, and ⇧= or ⇧− to jump straight to the top or bottom half — ideal for showing one clause big. The edge presets clamp between 2× and 4×; pressing the same one again returns to fit-page.
Pan a zoomed page by holding ⌃ and dragging with any tool armed, by dragging with the Select tool, by scrolling, or by pinching on a trackpad. Modifiers are read live during a drag, so pressing ⌃ mid-stroke abandons the in-flight mark and pans instead. Zoom and pan travel with a publish — the frozen copy the jury holds includes your zoom level, pan offset, and scroll position.
To rotate a page, use the rotate menu in the toolbar or the keyboard: [ and ] turn 90° at a time, ⇧[ and ⇧] nudge by a single degree for deskewing a crooked scan, stopping at ±15°. The menu also holds Reset Rotation. A nudge tilts the page and the marks travel with it, so a highlight keeps its word, but each mark stays square to the staging area: callout boxes, highlights, redactions, shapes, and text labels sit level instead of a degree off. Arrows, lines, freehand ink, and the ruler keep the angle you drew, since the angle is the point of them. A 90° turn rotates everything together. Rotation is per page, is recorded in the undo stack, and is one of the few presenter changes that survives closing and reopening the exhibit.
Note: Video rotation is a separate control on the Video menu and does not use these keys. See Media.
### Turning pages and continuous scroll
Move with ←/↑ and →/↓, and jump to the ends with ⇧←/Home and ⇧→/End. Digits typed on the canvas collect into a page-number buffer with a "Page N" pill; ⏎ commits and ⎋ cancels. A ⌘-scroll or trackpad swipe flips pages on both your screen and the jury display, one page per swipe. Arrow keys yield to the sidebar when your last click was in a list, so Finder-style browsing still works, and clicking a page sub-row in the sidebar stages that page directly.
The Page | Scroll control beside the page counter (⇧S) turns a multi-page exhibit into one scrolling column instead of paged turns; Settings ▸ General ▸ Staging Area can make Scroll the default for every exhibit. Entering it resets zoom and pan and opens centered on the page you were reading; leaving it lands you on the page in the middle of the view. The wheel and trackpad scroll the column with any tool armed; a drag with a drawing tool still draws, it never scrolls. ⇧F freezes the view on purpose, including halfway across a page break, so you can annotate a seam without the page drifting; ⇧F again, or a click on the pill, resumes. In Scroll, ↑ and ↓ move half a screen and ⌥↑/⌥↓ turn whole pages. A thin ruler on the column's right edge shows one tick per page break, a bar where you are, and a tint on the page under the center; click anywhere on it to align that page. Zooming in Scroll — a pinch, the zoom buttons, or ⌥⌘= — keeps whatever is in the middle of your view in the middle, so the page never walks off center as you zoom. The jury mirror is scroll-locked to your published position rather than free-scrolling.
The status pill at the leading edge of the title bar shows the admission status of the exhibit on screen; click it to change or clear it. See Exhibits for the full admission workflow.
### The annotation tools
A pair of rules govern the whole strip. Click the active tool again, or right-click any tool, to open its options — and a right-click arms that tool as it opens them, so picking a colour or a fill never leaves you still holding the last tool. Every color choice is the same eight fixed swatches — yellow, orange, red, pink, green, blue, black, white. In a tool's options popover they are a grid with the current one ringed; on a compact toolbar row, where a grid will not fit, the swatch opens a short menu of the same colors by name. There is no free color picker and no separate panel to chase: a mark has to survive a projector and a jury's eyes, and the set is chosen so that any of them does. And tool keys only fire while an exhibit is on the canvas — they are shadowed by the video transport keys while a video is loaded, so with a video mounted K pauses and L jogs forward instead of arming the laser and the line. While a tool is armed, the pointer wears it: the arrow carries the tool's button from this strip at its heel — the same pill and colours, the highlighter with its ink colour — so a glance at the cursor says what a click will do. The pointer tool is the plain arrow, and the jury display never shows the badge.
| Tool | Key | Gesture | Options |
|---|---|---|---|
| Select (Pointer) | V | Drag to pan when zoomed | — |
| Highlight | H | Drag a rectangle | Color (its own swatch), Follow |
| Draw (Freehand) | F | Drag a stroke | Color |
| Text | T | Click to drop a label | Color, size, per-label style |
| Line / Arrow | L (A draws an arrow) | Drag end to end | Arrowhead (Line or Arrow), color, thickness |
| Shape | S | Drag a rectangle | Rectangle, ellipse, or triangle; color; thickness |
| Callout | C | Drag a source marquee | Full style popover |
| Measure (the Line button's menu) | M | Drag; drag either end to resize | Color |
| Laser | K | Follows the pointer | Mode: Laser Dot (color, pointer style, line fade) or Magnifying Glass (power, size, shape — a circle, a rounded square, or a rounded rectangle that fits a line of text — and outline color); the menu shows only the chosen mode's options |
| Redact | R | Drag a rectangle | Fill: black, white, grey, or blur |
| Erase | E | Click or drag over a mark | Erase-all context menu |
Every key is rebindable in Settings ▸ Hotkeys. Every tool keeps its own color — the highlighter's yellow, red for the others until you change it — remembered across launches and shared with the tool wheel and the hotkeys, so a tool always comes back in whatever color it last drew with. Thickness, text size, and shape fill are likewise one setting wherever you change them. Line thickness applies to arrows, lines, and shapes; text size to labels. The highlighter carries one option no other tool has. Right-click it and turn on Follow, and a highlight reaches the jury display while you are still dragging it, so the courtroom watches the box grow across the line you are reading instead of having it appear all at once when you let go. It is the same switch as Follow-along highlights in the markup strip — see Toggles that change what the jury sees — put on the tool itself, where you are already right-clicking for its color. Follow only has something to show in Live mode, where what you do reaches the jury as you do it; in Staged the jury holds the last published frame, so the drag stays on your screen until you publish. The same popover carries Smart, which turns the highlighter into a text selector: drag from the first word to the last and the highlight follows the lines of text — a partial first and last line, whole lines between — instead of the box you drew, so a highlight across a paragraph never clips a line or spills into the margin. Smart needs the page's text, so it is live at once on a PDF that carries a text layer and, on a scan, once the page has been OCRed (PDF Tools ▸ OCR, or the sidebar's OCR commands); it is greyed out until then; a smart highlight moves as one mark and has no resize handles, since its shape is the text itself.
Text drops a label that takes focus immediately, so you can type without a second click. Text is one-shot: Return finishes the label, hands the keyboard back, and returns you to the pointer — so the next key you press reaches the app instead of the label — and a press anywhere else on the page finishes it the same way instead of dropping a second label under the click. ⇧Return breaks a line when a label needs a second one, and Escape finishes it as Return does. To place several labels, arm Text again for each. Right-clicking a placed label offers size, bold, italic, underline, strikethrough, and cut, copy, and paste. Right-click the Text tool itself to switch it to a ✔ or ✘ stamp: the mark follows your pointer as a faint preview at the size and colour it will have, and each click drops it, centred where you click — for a verdict form's boxes or a list to tick off — and the tool stays armed for the next one. Switch back to the first segment to type labels again. Laser follows your pointer, stays where you stop, leaves no mark, and creates nothing to undo. Hold the mouse button and move to draw a red line that stays as long as you hold it, for underlining or circling, and fades out when you let go, on both screens. Hold ⇧ to keep the pointer, or the line you are drawing, perfectly horizontal or vertical, and draw a rough loop around something to have it snap to a perfect circle; right-click it to choose its color (red by default, or orange, yellow, green, blue, or white, each shown as a dot beside its name), the classic dot or the comet trail, and how long the line lingers (half a second to five seconds, one by default); all three choices are remembered. The same popover's Mode switches the dot for a Magnifying Glass: a round glass rides the pointer on both screens and shows the page under it enlarged, two times by default with 1.5× and 3× on offer, in a small, medium, or large circle; the line and its color work the same in either mode, the comet trail stays off while the glass is up, and the marks on the page ride inside the glass, enlarged with it, moving and resizing as you drag them, with the glass following your drag. Measure is a proportional ruler — it reports the span as a percentage of the page in each axis, with no calibration step and no real-world units, so do not present a measurement as inches or feet. It shares the Line button: right-click it for Line, Arrow, or Ruler, each with its glyph, and the button wears whichever you chose; the shape button's menu shows its rectangle, ellipse, and triangle the same way. Right-clicking the markup bar itself — not a tool on it — offers Show Tools, a checkbox per tool, and Show All Tools to put them back. A team that never uses Focus or Measure can take them off the bar and give the four they do use more room. Hiding a tool takes nothing away: it keeps its hotkey and its wedge on the tool wheel, the bar just stops drawing a button for it. The pointer is always there, because a markup bar with no way back to it is a trap.
Right-click the Shape button (or click it again when it is already armed) and its options open in a popover: the three kinds at the top, then the settings all three share, so there is one set rather than one per shape — Filled draws the shape solid rather than outline-only, Opacity is a slider from 100% down to 10% for a mark you want to see through, and Blend Mode decides how it sits on the page — Normal draws over it, Highlight darkens like a highlighter so the text underneath stays readable, Colorize tints rather than covers, and Invert flips what is beneath, which is the one reliable way to stand out on a page whose color you cannot predict. Every setting applies to the next shape you draw, not to shapes already on the page. The button's face morphs to the kind you chose — a slash, an arrowhead, or a ruler — so the toolbar shows what the next drag will draw, and the Highlight, Draw, Text, Line, and Shape faces each carry a small dot in their current color, the way Redact shows its fill. The Highlight face goes further: its chisel tip, its cap band, and the swipe it leaves are drawn in the color it will highlight with, so the button shows the color as the tool itself rather than as a marker beside it.
Redact covers material with your choice of the classic black bar, white, grey, or a blur that obscures a face or logo without the hard rectangle. Redactions are treated as privilege marks, not drawings, and behave differently from every other tool.
| Action | Effect on redactions |
|---|---|
| Turning the page | Survive |
| Closing and reopening the exhibit | Survive |
| Erase All Annotations on this page or every page | Survive |
| Clicking one with the eraser | Removed |
| ⇧E (Clear Annotations on Page) | Removed (face blurs from Blur Faces stay) |
| Restoring an older snapshot | Grafted back on from the current state |
| Export flattened PDF | Burned into the output file |
Warning: Redactions survive both Erase All commands by design, but ⇧E removes them along with everything else. Do not use ⇧E to tidy a page that carries privilege redactions.
### Magnify part of a document for the jury
The callout tool (C) is the blow-up: it magnifies a region of the page into a floating panel while dimming the rest, so the jury's eye lands where you point it. Drag a marquee around the source region and Evidentiary commits a 3× magnification, centers it in the viewport, caps it at 70% of each axis, and nudges it clear of any callout already on the page.
Drag the body to move it; the position commits about twenty times a second, so the jury display tracks the move smoothly instead of jumping at the end. Eight handles surround the body in your staging view; the jury never sees them. Round handles sit on the corners and bars on the edges, and each does one thing:
| Handle | Drag | With ⇧ |
|---|---|---|
| Corner (round) | Aspect-locked scale, anchored on the opposite corner | Free resize, width and height independently |
| Edge (bar) | Show more or less: the edge moves on both the blow-up and the source region, revealing more of the page at the same magnification | Stretch that axis of the blow-up only |
⌃ from any handle also shows more or less. Modifiers are read live, so you can change your mind mid-drag. Right-drag inside the blow-up itself to re-frame it: the page scrolls under the box while the box and its magnification stay put. Re-framing has its own button because it is a different act from moving the box — a left drag on the blow-up still slides the box around the page.
A new blow-up opens at about 90% of the stage, and the magnified crop runs edge to edge inside the border — no margin between them. Double-click the body to delete it. Clicking the armed callout tool a second time opens the style popover — dim the rest of the page on or off, dim amount, drop shadow on or off, border color, thickness, and corner radius — and every change applies live to both screens. In continuous scroll the source ring scrolls with the page while the blow-up stays anchored; on the side-by-side stage a blow-up can cross the divider between panes.
Focus regions are the other way to blow up a passage: instead of a floating panel, the whole jury view smoothly zooms and pans to frame it, the way a documentary pushes in on a photo. Pick the Focus tool (beside Callout) and drag a rectangle over the part you want; the view flies to it and the region is saved with a label. Tap a saved region to fly there again, and tap empty space to zoom back out to the whole page. The move happens on the jury screen too, since both screens share the view; the region outlines are operator-only and never reach the jury or an export — they are a live presentation gesture, not a mark on the page. Drawing a region just stages it — Wait to Zoom is on by default — so you can line up several focus points before you start moving; the view flies only when you tap one or press its ⌥ digit. Right-click the Focus tool and turn Wait to Zoom off to fly the moment each region is drawn. Right-click also opens Spotlight the Zone: with it on, the rest of the page dims as the view flies in, so the room's eye goes to the passage and nothing else, and it lifts again when you zoom back out. The dim fades on the same curve as the zoom rather than snapping on at the end. Two sliders sit under the switch. Dim amount sets how dark the rest of the page goes, from a light wash to nearly black. Edge softness feathers the boundary: at zero the spotlight has a clean rectangular edge, and further along the dim falls off gradually, which reads less like a cut-out and more like a light on the page. Both are remembered between cases, and they are the Focus tool's own — the Callout tool keeps its separate dim setting. Each region wears its number on its chip — 1, 2, 3 in the order drawn, beside its name if it has one — and ⌥1 through ⌥0 fly to regions 1 through 10, the same move as clicking one.
### Erase an annotation or remove a highlight
There are four ways to take a mark off the page.
- The eraser (E). Click or drag over a mark to remove it. Move grips hide while the eraser is armed so they do not fight over the same drag.
- Double-click a mark with any tool. This works for highlights, redactions, shapes, arrows, lines, freehand strokes, callouts, and measurements — the quickest way to remove a highlight you dragged somewhere you did not intend.
- Erase All. Right-click the eraser for Erase All Annotations on This Page and Erase All Annotations on Every Page. Both preserve redactions, and both record as a single undo step.
- ⇧E (Clear Annotations on Page). Removes every annotation on the focused page, including redactions, in one undoable step. Face blurs from Blur Faces stay — Remove Face Blurs is how those come off. In side-by-side it acts on the focused pane.
Warning: Erase All Annotations on Every Page clears the whole document's working marks in one action. It is undoable while the presenter is open, but not after the exhibit is closed. Snapshot first.
⌘Z undoes and ⌘⇧Z redoes, fifty steps deep — in side-by-side each pane keeps its own history and the menu commands target the focused pane. Committing a mark, moving one, rotating a page, both Erase All commands, ⇧E, restoring a snapshot, and moving or resizing a callout are all recorded. Publishing is not, and neither are keystrokes inside a text label — ⌘Z steps back to before the label existed, not through the characters. The stack clears when you turn the page, the same event that clears the departed page's marks.
Every committed mark carries a move grip, an arrows glyph in a black circle drawn on your canvas only — the jury never sees the grips. Highlights and redactions also wear the callout's resize handles while the Select tool is active: drag a corner dot to resize (hold ⇧ to keep the shape) or an edge bar to move that edge; their grip sits at the mark's center. The tools also work on the jury display itself: pick one in the main window and draw on the jury screen, and the mark publishes as you release. Grips, handles, and double-click delete stay on the staging canvas. Dragging one is a pure move: position only, clamped to the page, one undo step on release.
### Toggles that change what the jury sees
| Toggle | Default | Effect |
|---|---|---|
| Follow-along highlights | Off | The jury watches a highlight rectangle grow as you drag it instead of seeing only the finished mark — a live underline as you read aloud. Live mode only. Also on the Highlight tool’s right-click options, as Follow |
| Jury exhibit badge | Off | Stamps "EX P-12 p. 5 / 12" in the corner of the jury display so everyone can track what is on screen. Requires a label; not drawn in continuous scroll |
Both persist across launches.
### Adjust Image
The last pill in the tool strip corrects a murky scan or a dark photograph, per page. A small orange dot on the button marks a page carrying a non-default adjustment.
| Slider | Range | Default |
|---|---|---|
| Brightness | −1 to 1 | 0 |
| Contrast | 0.5 to 2.5 | 1 |
| Saturation | 0 to 2 | 1 |
| Temperature | −1 to 1 | 0 |
| Tint | −1 to 1 | 0 |
Warning: This is not an operator preview. While any slider is off its default the popover posts "Adjusted — jury sees this view". The corrected image is what publishes, what the frozen Staged copy carries, and what a flattened export writes. Keep corrections to legibility, and be ready to state on the record that the exhibit was brightened. Reset returns the page to its original values, and adjustments are stored per page with the case, so unlike working annotations they survive closing and reopening the exhibit.
### Video on the jury display
Video exhibits play with the full transport described in Media, and the same annotation tools work on video on your side of the glass. Publishing mounts the video and starts playback; it stays live rather than freezing. Send Frame publishes a single frozen frame instead. Switching to Staged while a video is on the jury pauses it and holds the last frame, with a pill telling you that pressing Play resumes to the jury. Playing deposition designations to the jury is a mode of its own; see Playback Mode.
### Markup snapshots
Working annotations do not survive. Turning the page discards that page's marks, and closing an exhibit discards them all. A markup snapshot is the save action — a named copy of everything on the exhibit, with a preview of what you saw, stored inside the case package.
| Item | Survives a page change | Survives closing and reopening |
|---|---|---|
| Page rotation and deskew | Yes | Yes |
| Redactions | Yes | Yes |
| Page brightness and contrast | Yes | Yes |
| Sticker and Bates stamps | Yes | Yes |
| Presenter notes | Yes | Yes |
| Highlights, drawings, text, arrows, lines, shapes, callouts, measurements | No | No |
| Zoom and pan | No | No |
Save one with ⌘S (File ▸ Save Markup Snapshot…) or from the Snapshots menu in the presenter toolbar. The name is pre-filled from the exhibit number, page, and a revision counter, so repeated saves on the same page number themselves in order. Restore from the same menu or from the snapshot rows in the exhibits sidebar; restoring records an undo step first, so a mistaken restore is recoverable with ⌘Z while the presenter is open. After a restore, a camera-with-check button appears in the toolbar: Update Restored Snapshot folds your current marks back into that same snapshot rather than accumulating near-identical copies.
Note: Restoring grafts your current redactions onto the restored state. A snapshot taken before a redaction was applied cannot un-redact the page.
Annotate tonight, save the snapshot, restore it in front of the jury tomorrow. Naming snapshots for the moment they belong to — a witness name, a line of cross — makes them findable mid-examination, because Quick Search matches them by name. Managing snapshots from the sidebar is covered in Exhibits.
### Knowing you are presenting
Evidentiary reports the state of the jury display in four places simultaneously, so no single glance is load-bearing.
| State | Title bar | Menu-bar item |
|---|---|---|
| Live | Red, "Presenting" plus a summary | "LIVE" with a red signal glyph |
| Staged | Orange, "Staged" plus a summary | "STAGED" with an orange display glyph |
| Blackout | Dark grey, "Jury Dark — feed cut" | "DARK" with a grey slashed-circle glyph |
| Jury display closed | Normal | None |
The summary names the most specific thing on the display — playing deposition clips, playing video, showing a named exhibit, or mirroring your screen — and VoiceOver announces the transitions. The menu-bar item's own menu switches modes and reports what is showing; it disappears the moment the jury display closes. The presentation control bar — a glass dock floating just above the bottom of the window, tinted amber in Staged and red in Live so the state reads from across the room — carries the remaining indicators: a jury tile at the trailing end, beside History, showing a thumbnail of the page the jury holds (or a film, camera, or blackout glyph), ringed in the mode color, with the exhibit's name and a clock counting since it went up — click the tile for the last document published to the jury, large, without turning to the second display. It keeps showing that page while the display is dark or a video is running, dimmed with a line saying so, because the question you are asking the tile is usually what the jury last saw rather than what is lit up this second. The three modes are one control in the middle of the dock — Blackout · Staged · Live — whose colored capsule slides to the mode you pick; clicking Blackout while dark resumes. When you publish, a thumbnail of the page rises from the workspace and shrinks into the jury tile — a receipt you can see without reading anything.
Every panel — Playback Mode, the clip editor, Mass Add, the Document Camera — opens on the screen your main window is on, never on the jury display, even when it last closed there. If one is out of reach anyway (a display unplugged, a window dragged behind the jury view), Window ▸ Gather Windows (⌥⌘G) brings every panel onto that screen, stacked in front of each other.
⇧P opens the Jury Preview panel, a small floating mirror of the jury display in the corner of your screen. It never takes focus, so it cannot steal a keystroke, and it stays visible even when Evidentiary is not frontmost. A badge and matching border report the mode — red BLACKOUT, green STAGED, navy LIVE. The badge is authoritative in every mode; the picture area mirrors still images rather than frame-accurate video, so to confirm exactly what the jury sees, use Copy Jury Image (⌘⇧C), which copies a bitmap of the current jury frame to the clipboard for the record.
Active modes badge. Whenever something other than plain staging is driving the courtroom — a designation list playing, an impeachment cued, a binder running — a badge appears in the title bar. Click it for a list of what is live, each with a one-click Exit, so nothing is ever running that you did not know about.
### Trial Mode
⌘⇧T (View ▸ Enter Trial Mode) is the trial-day lockdown. It auto-hides the Dock and the menu bar, clearing the operator's screen of everything that is not Evidentiary. They are auto-hidden rather than removed, so a deliberate cursor poke at the edge of the screen still summons either one — you can hand off or switch apps during a break without leaving Trial Mode. Exiting restores your Dock and menu-bar settings exactly as they were. A navy shield-check badge in the title bar shows Trial Mode is on; clicking it opens a popover that turns it off. Because the system menu bar is hidden, the jury-status menu-bar item goes with it, so the title-bar tint, the control bar, and the Jury Preview panel are the indicators to watch.
Warning: The quit guard is the only thing standing between a mistyped ⌘Q and a closed case in front of the jury. While Trial Mode is active, every route to termination — ⌘Q, the Dock menu, a logout — is intercepted with a confirmation. Enter Trial Mode before the jury is seated, not after the first near-miss. Trial Mode does not persist across launches; make entering it part of the trial-day routine.
### Pre-Trial Check
Help ▸ Pre-Trial Check… runs a courtroom preflight before you convene. Tick the checks you want, run them, and clear each finding as you resolve it — every finding names the exhibit, deposition, or playlist it points at. The checks cover exhibits missing an exhibit number or a source file, exhibits with no admission status (a deposition's own video and transcript files are left out of both: they are never numbered or admitted as exhibits), conditional admissions still to connect up, depositions missing a deponent name, a date taken, a transcript, or a video volume, designations with no time range, video and audio that this Mac cannot decode, cloud-synced files that have not finished downloading, and empty playlists. Three hardware rows cover the things that end a trial day early: Running on battery (the bar also shows a Battery pill below 40%), Notifications can reach the jury display (passes once a Focus Shortcut is named in Settings ▸ General), and Jury audio output (fails until speakers are chosen in the Displays popover, or when the chosen ones are unplugged).
The decode check opens every media exhibit in the case, so its running time scales with the amount of video. Run it the evening before, on the machine that will sit at counsel table. The footer also carries Test Pattern on Jury Display, because the check verifies the case, not the room — pair it with the test pattern and one real publish to the courtroom monitor before proceedings start.
Side-by-Side Compare
Put two exhibits at once on the jury display — the contract against the invoice, the photograph against the diagram, page 12 against page 13. Press \ to compare two documents side by side and \ again to leave. The presenter toolbar's Compare button opens the split screen too, with the staged exhibit already loaded on the left and the right pane empty. The stage is locked to your jury display's own proportions and split exactly down the middle, with letterbox bars filling whatever is left of the window. There is no draggable divider, on purpose: what you lay out is pixel-for-pixel what the courtroom gets.
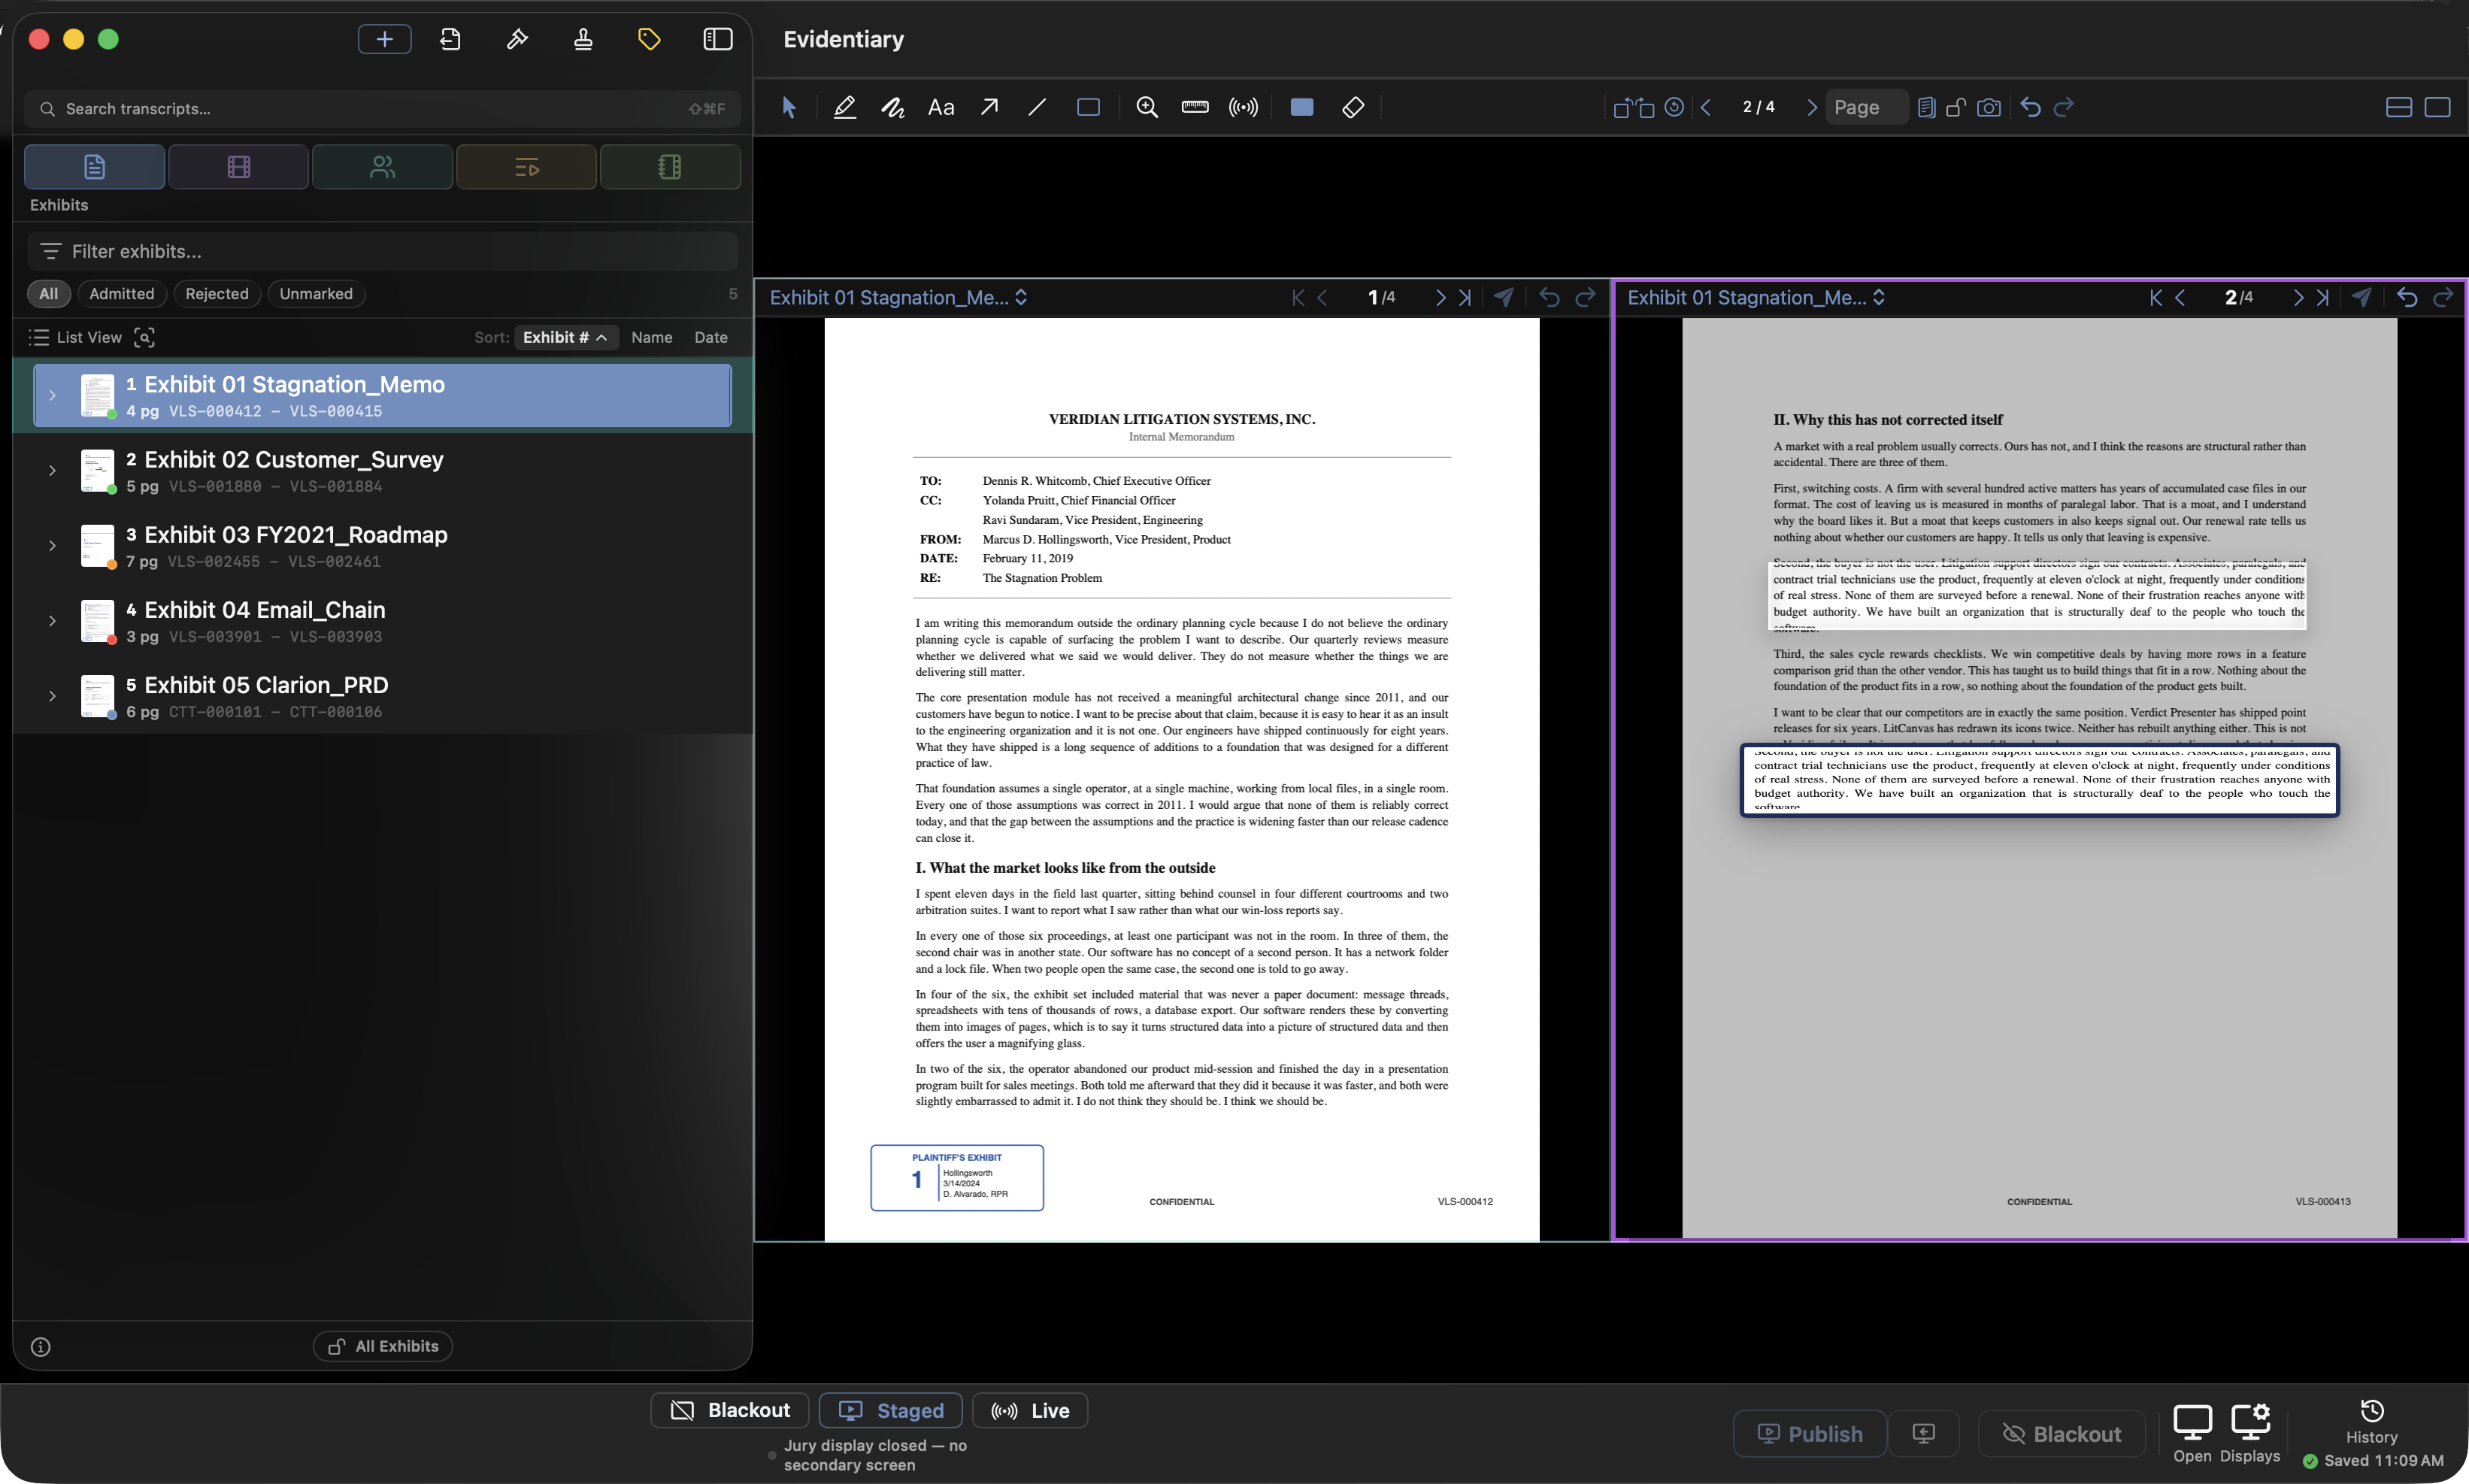
The split button in that bar flips between side-by-side and top-and-bottom on a click. Right-click it for everything else the split can do: Split Side by Side and Split Top and Bottom outright, Swap Panes to exchange what the two are showing (each keeps the page it was on, so a swap does not send you back to page 1), Unsplit, Focus Other Pane, and Lock Panes, which stops a sidebar click from loading a new document into the focused pane while you are working. There is one Focus Other Pane rather than a Next and a Previous, because with exactly two panes those are the same command.
Everything in this chapter is about showing two exhibits at once: two documents, two pages of one document, or a document beside a photograph.
### Entering and leaving
| Action | Result |
|---|---|
| Compare button | Enters with the current exhibit on the left, the right pane empty, focus on the left |
| Right-click Compare → Compare with Next Page | Enters with this page on the left and the next page of the same exhibit on the right — the split the hotkey makes, without leaving the mouse |
| \ | Enters with the current exhibit on both panes — left at the current page, right at the next page |
| ⌘\ | From single view, the same current-page and next-page layout. Already in compare, loads the focused pane's exhibit at the next page into the other pane, leaving the focused side untouched — press it repeatedly to walk one pane forward through the document |
| Single View button | Returns to single view |
| \ again | Exits, clearing both panes and releasing the page lock |
### Filling the panes
- Click a pane to focus it, then click any exhibit — or any page under an exhibit — in the sidebar and it loads into that pane.
- Drag an exhibit row from the sidebar straight onto the pane you want it in. A ring marks the target. Drops from the sidebar are accepted; files from Finder are not.
- Pick from the Exhibit dropdown at the top of each pane, which lists None plus every exhibit.
- ⇧N re-spreads at any time: the right pane takes the left pane's exhibit at the left pane's next page, however far the two have drifted apart.
An empty pane reads Select an Exhibit with a prompt to pick one from the dropdown above.
### Knowing which pane is which
Each pane keeps an identity color — teal on the left, purple on the right — and the same tint marks that exhibit's row in the sidebar. Focus decides which pane the shared toolbar, the rotate controls, the page field, and undo act on. Clicking or dragging in a pane focuses it and draws in the same gesture, so there is no separate click-to-focus step; the focused pane carries a thicker, brighter outline. Tab moves focus to the other side.
### The shared toolbar
One toolbar sits above both panes and drives whichever is focused.
| Group | Controls | |
|---|---|---|
| Tools | The single-page presenter's tool strip itself — Pointer, Highlight, Draw, Text, Line (line, arrow, or ruler), Shape, Callout, Focus, Laser, Redact, Erase, and Adjust — with the same colour dots, hotkey tooltips, right-click and click-again options, and the same Show Tools hiding, which applies to both bars at once. A tool, thickness, or text size you pick applies to both panes; the buttons reflect the focused one | Compare Text, after the laser, diffs the two pages on screen word by word: what the left page has and the right lacks is tinted red on the left, what the right adds is tinted green on the right. It reads the PDF's text layer, or OCR word boxes for scans; press it again to clear. |
| Options | Color well, stroke thickness, text size | |
| Page | Rotate counter-clockwise, rotate clockwise, reset, previous, "N / M", next, and a page-jump field | |
| Layout | Two-page spread ⇧N, page lock, orientation toggle | |
| Save | Save Side-by-Side Snapshot… | |
| History | Undo and redo for the focused pane | |
| Exit | Single View |
Pick Highlight once and draw on either side. Each pane remembers its own color per tool, so the left pane's arrows can stay red while the right pane's are blue. A callout dragged across the divider paints over the neighboring page instead of being clipped at the seam. The controls that can only mean one page at a time — rotation, the page chevrons, the page-number field, undo and redo — act on the focused pane. Two-finger scroll pans whichever zoomed pane the cursor is over. Each pane also has its own compact top bar: the exhibit picker, first, previous, "N / M", next, last, a Publish button for that pane's marks, and pane-level undo and redo.
### Lock the pages while comparing
The lock button freezes the comparison. Every page control in both panes and in the shared toolbar goes quiet, drops onto panes are rejected, and ⇧N does nothing. Scrolling still pans within a zoomed pane but cannot page past the lock. A Pages locked banner on the stage says so while it is on, and choosing another exhibit leaves compare for single-page view rather than silently swapping a pane out from under you. The lock clears itself when you exit compare.
Use it once the comparison is exactly right — it prevents a stray arrow key or scroll from moving one side of an argument you are midway through making.
### Orientation
The orientation toggle flips the split between left and right and top and bottom; the stage stays locked to the jury monitor's proportions either way. A stacked split suits two landscape photographs, a wide spreadsheet, or a chart. Side-by-side suits portrait documents. The orientation is captured in a snapshot and restored with it.
### Publishing the split
The split stage publishes as a unit and is the first thing Publish looks for. In Staged, pressing ⏎ freezes the pair — both panes, both pages, all marks — and sends that frozen copy to the jury. In Live the split mirrors continuously, and in Blackout the jury display stays dark. Inside a pane, publishing is more immediate: the pane's own Publish button pushes all marks on that pane's page, and every page change in a pane publishes right away.
Note: Because panes mirror at the pane level, treat side-by-side as closer to Live than to Staged when you are turning pages. Blackout (B) is still the reliable way to work unobserved. Presenter Notes are single-view only and are not shown while the split stage is up.
### Snapshots
The switch is animated, and it is directional. Entering compare, the page you were on travels into its pane — a portrait page keeps its size and slides over, a landscape page shrinks to fit the narrower pane — and the other pane fades in once its document is ready, so nothing pops or flashes empty. Leaving, the pane you were working in grows back out to fill the stage while the other fades away with it. The jury display makes the same move when the split reaches it — as you enter and leave in Live, or when you publish a split in Staged — so the courtroom sees a page travel rather than a cut; turn that off in Settings ▸ General ▸ Jury Display ▸ Animate Compare and Multi-View on the jury display for a straight cut. Reduce Motion lands all of it flat.
Double-click a page in either pane to leave the comparison and open that exhibit at that page in single view. The camera button saves the whole comparison as one snapshot — both exhibits, both pages, every mark, and the orientation. It suggests a name built from both exhibits, lists under both of them in the sidebar and in Quick Search, and restores the entire side-by-side layout in one click, from either exhibit. The button is disabled until both panes are loaded. A split snapshot cannot be updated in place with Update with Current State; save a new one instead. An ordinary single-exhibit snapshot can be loaded while you are comparing: click it in the sidebar and it lands in whichever pane is focused, bringing that saved markup into one half of the comparison without leaving it.
Multi-View
Show two, three, or four exhibits on the jury display together, each in its own section, then bring one up to fill the screen and work on it. The stage divides into equal sections in the shape of your jury display, so what you lay out is what the courtroom gets. While a section is up you annotate, add callouts, turn pages, and change the page size as you would in single view. Send it back and it returns to its section exactly as you left it.
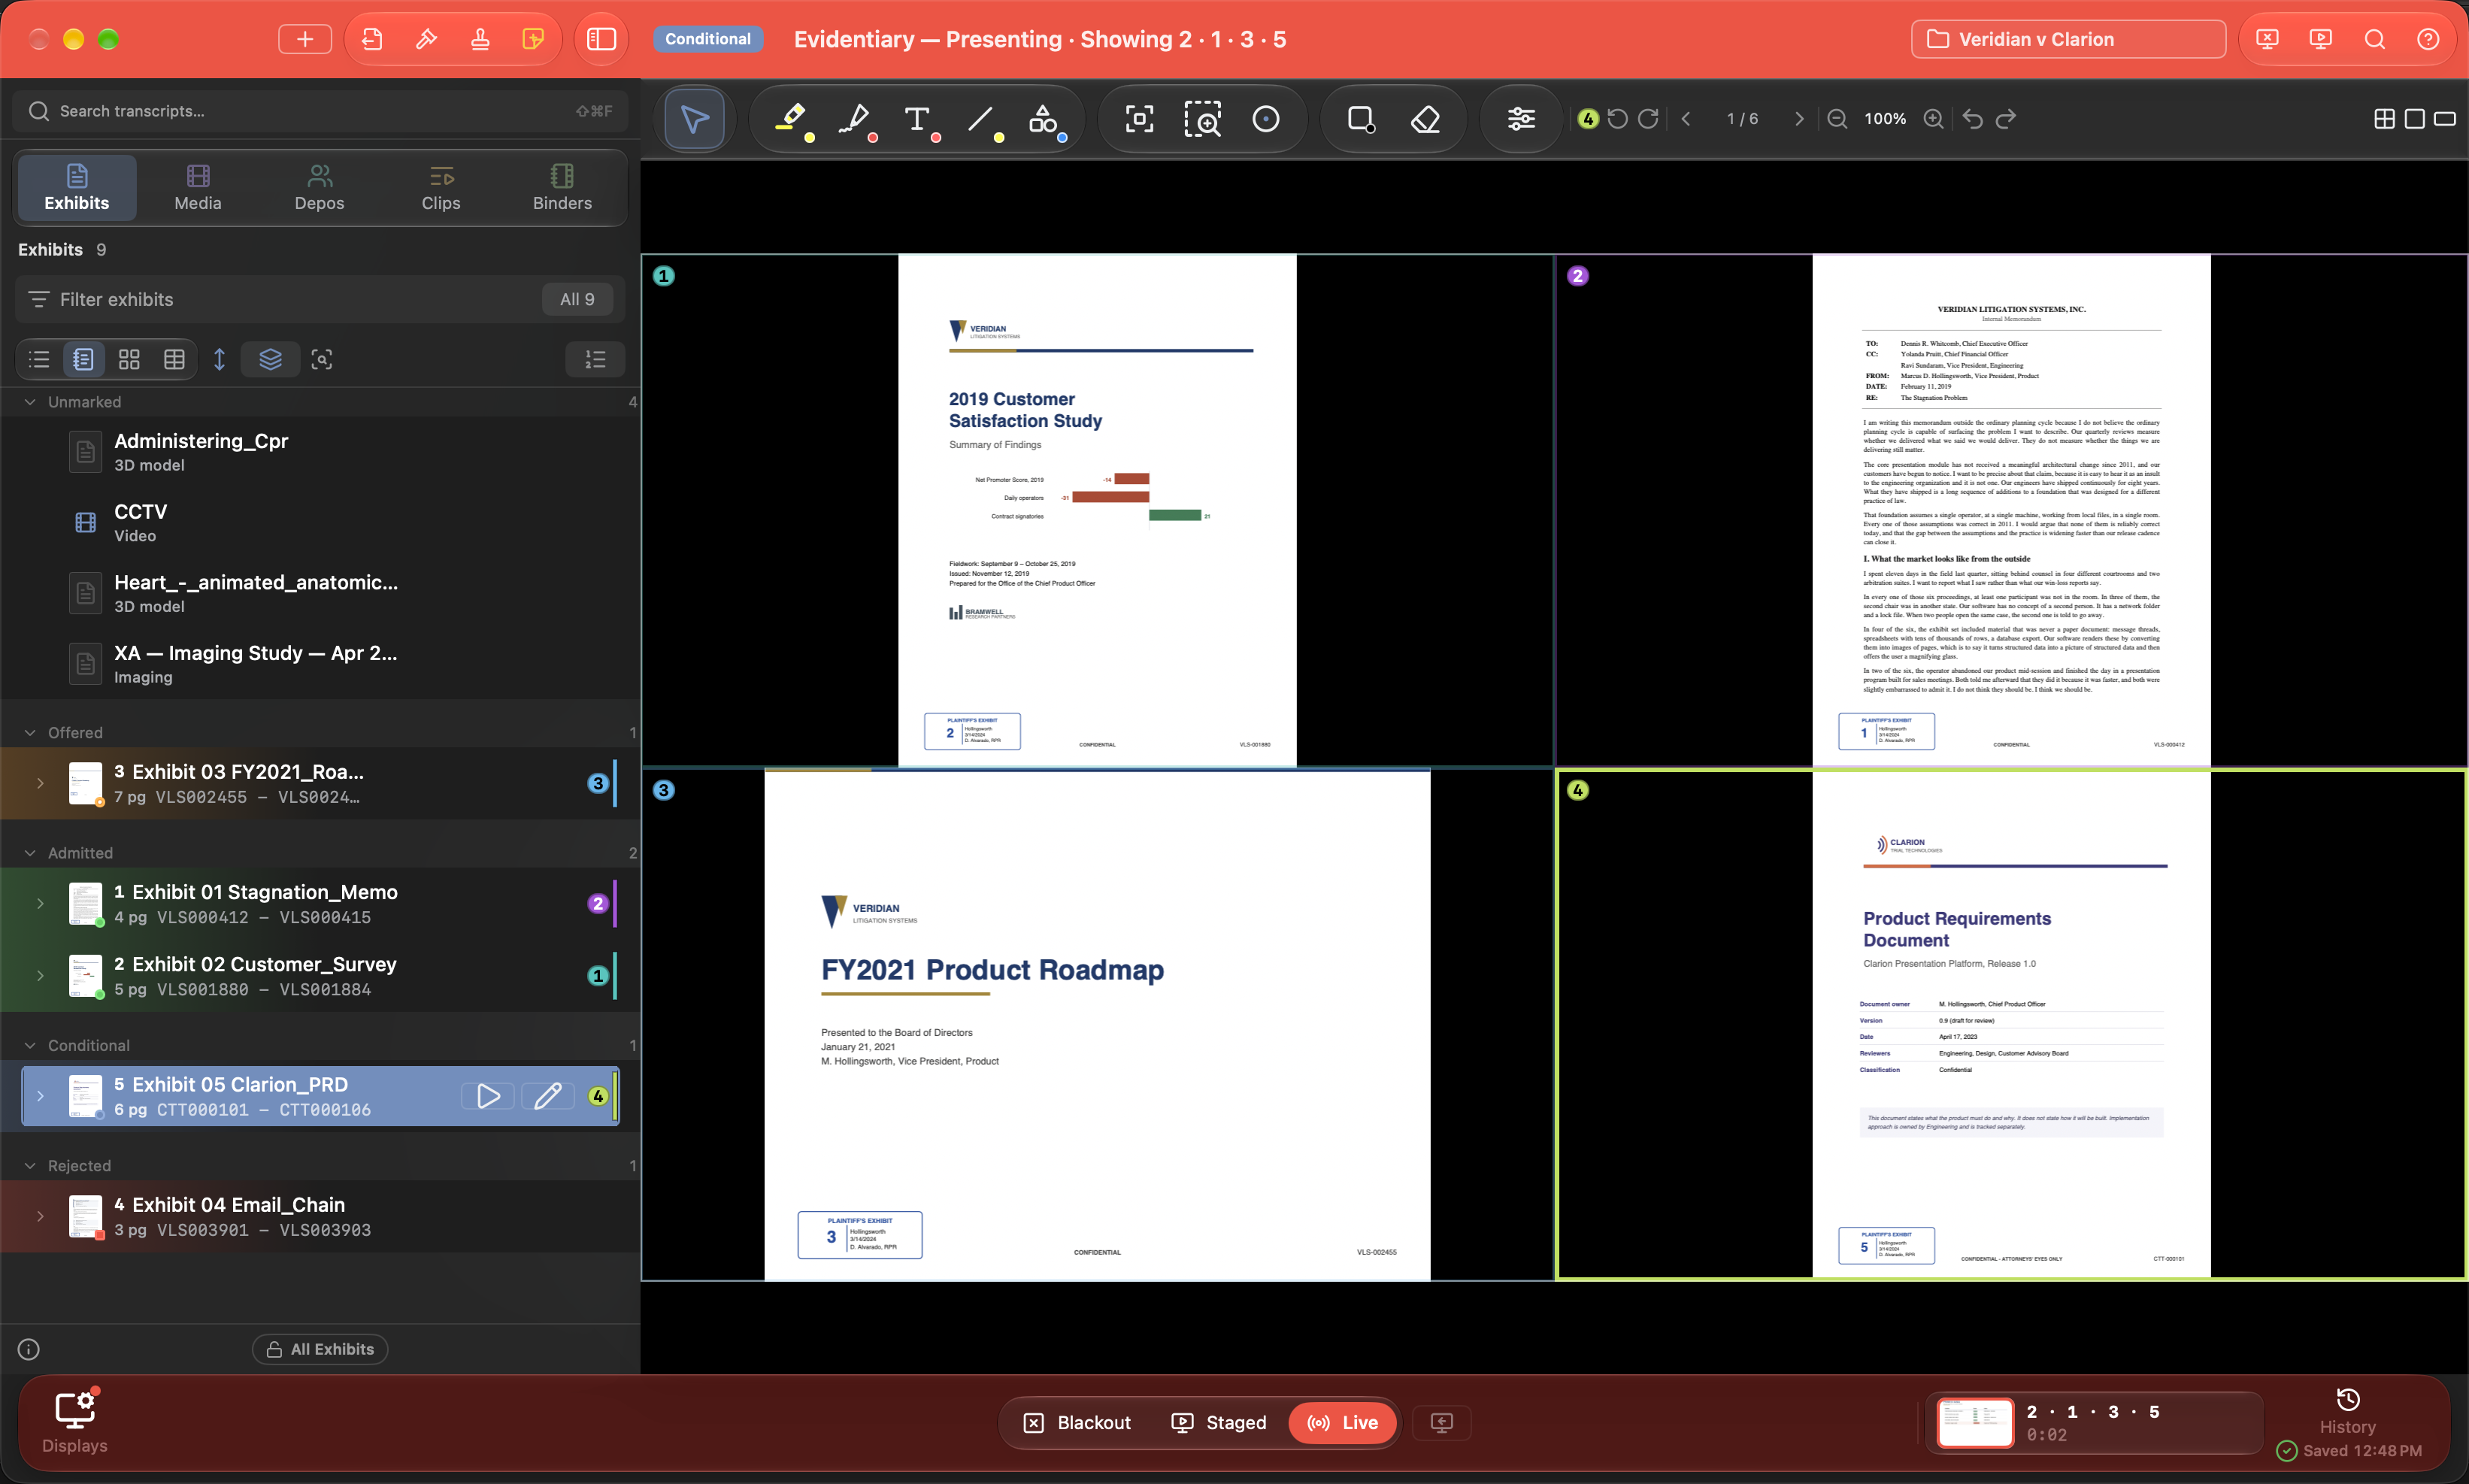
### Entering and leaving
| Action | Result |
|---|---|
| Multi-View button in the presenter toolbar | Enters with the exhibit on stage in section 1 and the other sections empty |
| ⇧\ | Enters, or leaves |
| View ▸ Multi-View, or Toggle Multi-View in the command palette | Enters, or leaves |
| Single View button at the end of the Multi-View toolbar | Leaves |
Entering from single view, the page you were on travels into section 1 and the board appears around it. Leaving, the section that is up (or, at the overview, the selected one) grows back out into single view, showing that exhibit at the page it was on. If that section is empty, single view opens empty. Multi-View and Compare are separate modes, and switching between them is a straight cut: coming in, the exhibit in the focused pane goes into section 1, and going back, the sections are left behind.
### Choosing a layout
The layout menu in the Multi-View toolbar sets the board: 2 Across, 3 Across, 4 Across, or 2 × 2, which puts one section in each corner. The number of sections follows the layout. With three exhibits in 2 × 2, the empty corner stays black on the jury display.
A layout with more sections adds empty ones and keeps everything already placed. A layout with fewer sections asks first when a section that goes away holds an exhibit. Switch and Empty Section (or Sections) empties them, and the marks on them go too. Cancel leaves the board as it was. The menu works at the overview, so send a section back before you change the layout.
### Filling the sections
- Click a section to select it. Its outline gets thicker and brighter. Then click an exhibit in the exhibit list, or a page under one, and it goes into the selected section at that page. An empty section reads "Click an exhibit in the list, or drag one here". The list highlights the exhibit in the selected section, so selecting an empty section clears the highlight.
- While a section is up, a list click replaces the exhibit in that section.
- Drag a row from the exhibit list onto any section. A ring marks the target. The section takes rows from the list, but not files from the Finder.
- The same exhibit can sit in more than one section. For example, two pages of one document can each have their own page size and marks.
- At the overview, right-click a section and choose Empty Section N to clear it. The item is dimmed when the section is already empty, and the exhibit stays in the case.
- Sections hold documents and images. Video and audio play in single view. An Office file needs Annotate first, to make pages a section can hold. A 3D model needs a Snapshot first, and an imaging exhibit needs Make Exhibit first. A quarantined file has to be marked safe first. The message says which of these applies, and the section keeps what it had.
- In Live, Multi-View refuses an exhibit the court excluded. With the exhibit list set to Admitted Exhibits, it also refuses one that is not in evidence. Sections you filled in Staged are checked when you switch to Live: any section holding such an exhibit is emptied, and a notice names the exhibit.
### Knowing which section is which
Each section has an identity color and a number: 1 is teal, 2 purple, 3 sky blue, and 4 lime. The number sits in the section's corner and the color outlines it. The selected section's outline is thicker and brighter. The exhibit list shows the same numbered chips on every exhibit placed on the board: on its row, with an edge bar in the section's color, on its grid card, and beside its number in the table. The chips show even on the selected row. An exhibit in two sections shows both numbers. Outlines, numbers, and chips appear only on your screen. The jury sees clean documents.
### Bring Up and Back to Overview
The overview is for looking and arranging. To work on a section, bring it up: double-click it, press U, or select it and click Bring Up in the toolbar. It grows out of its place to fill the stage. From there, every tool, the page keys, rotation, and page size work on it as in single view. At the overview, Tab moves the selection from section to section.
Back to Overview is U again, Esc, or the same toolbar button. The section shrinks back into its place and keeps its page, marks, callouts, and page size, so it becomes an exact miniature of what you were looking at. Esc never empties a section. With the jury display open, the first Esc sends the section back and a second Esc (or B) blacks out the jury display.
At the overview, the page keys, tool keys, and page size keys do nothing, so a stray key cannot change a section you are not working on. Turning a page in a section that is up works as it does everywhere else: the page you left loses its working marks, and ⌘Z brings them back.
### The toolbar
One toolbar sits above the board. It stays the same height whether a section is up or not, so the stage never jumps. It works on the section that is up or, at the overview, on the selected one, and its numbered chip shows which.
| Group | Controls |
|---|---|
| Tools | The single-view tool strip, with the same tools, color dots, options, and right-click menus. A tool you pick applies to every section, so it is ready in whichever section you bring up |
| Page | Rotate counter-clockwise, rotate clockwise, previous, "N / M", next |
| Page size | Smaller; a percentage you click to fit the whole page; larger |
| History | Undo and redo for that section |
| Board | The layout menu, Bring Up / Back to Overview, and Single View |
The rotation, page, and page size controls are dimmed at the overview and turn on when a section is up. Right-click the toolbar for Show Tools. When a page that is up is larger than the section, two-finger scroll moves it around. Presenter Notes and the scrolling column are single-view only.
### What the jury sees
The jury display shows the board the way your stage does, with the same sections, pages, and marks, but without the outlines, numbers, or prompts. An empty section is black.
- Live follows every move: filling a section, bringing one up, and sending it back.
- Staged changes only when you publish (⏎). Then the board, and any section that is up, appears on the jury display and grows or shrinks to match your screen. Bringing a section up, sending it back, and changing the layout reach the jury with the next publish. If a section is still opening its new exhibit when you publish, you are asked to publish again, so the jury never gets the exhibit it replaced. When two or more sections hold exhibits that are excluded or not in evidence, one prompt names them all before any reach the jury.
- Blackout keeps the jury display dark.
On the jury display, bringing a section up or sending it back is animated unless you turn off the animation toggle in Settings ▸ General ▸ Jury Display. With that toggle off, or with Reduce Motion on, the change is a straight cut. If the jury exhibit badge is on, it shows only on a section that is up. The Jury View Log and Presentation History get one line for each board shown, such as "Multi-View 2 × 2: 1 P-12 p.3 · 2 P-14 p.1 · 3 empty · 4 D-2 p.7", and one line for each section brought up.
Depositions and Transcripts
The Depositions tab (⌘3) is where deposition video, transcripts, and sync data live. Each deposition is one row in the sidebar with its clip lists nested underneath, and clicking a row loads that transcript into the detail pane. Everything that binds a page:line citation to a moment of video starts here: once you sync a deposition transcript, clicking a line plays that testimony, a selection becomes a designation with real timecodes, and impeachment plays straight from a citation. Under each name the row shows the transcript's page range — pp. 1–256, pp. 257–500 — so a multi-volume witness with a missing stretch stands out at a glance. (A scanned PDF shows its range once it has been opened once.)
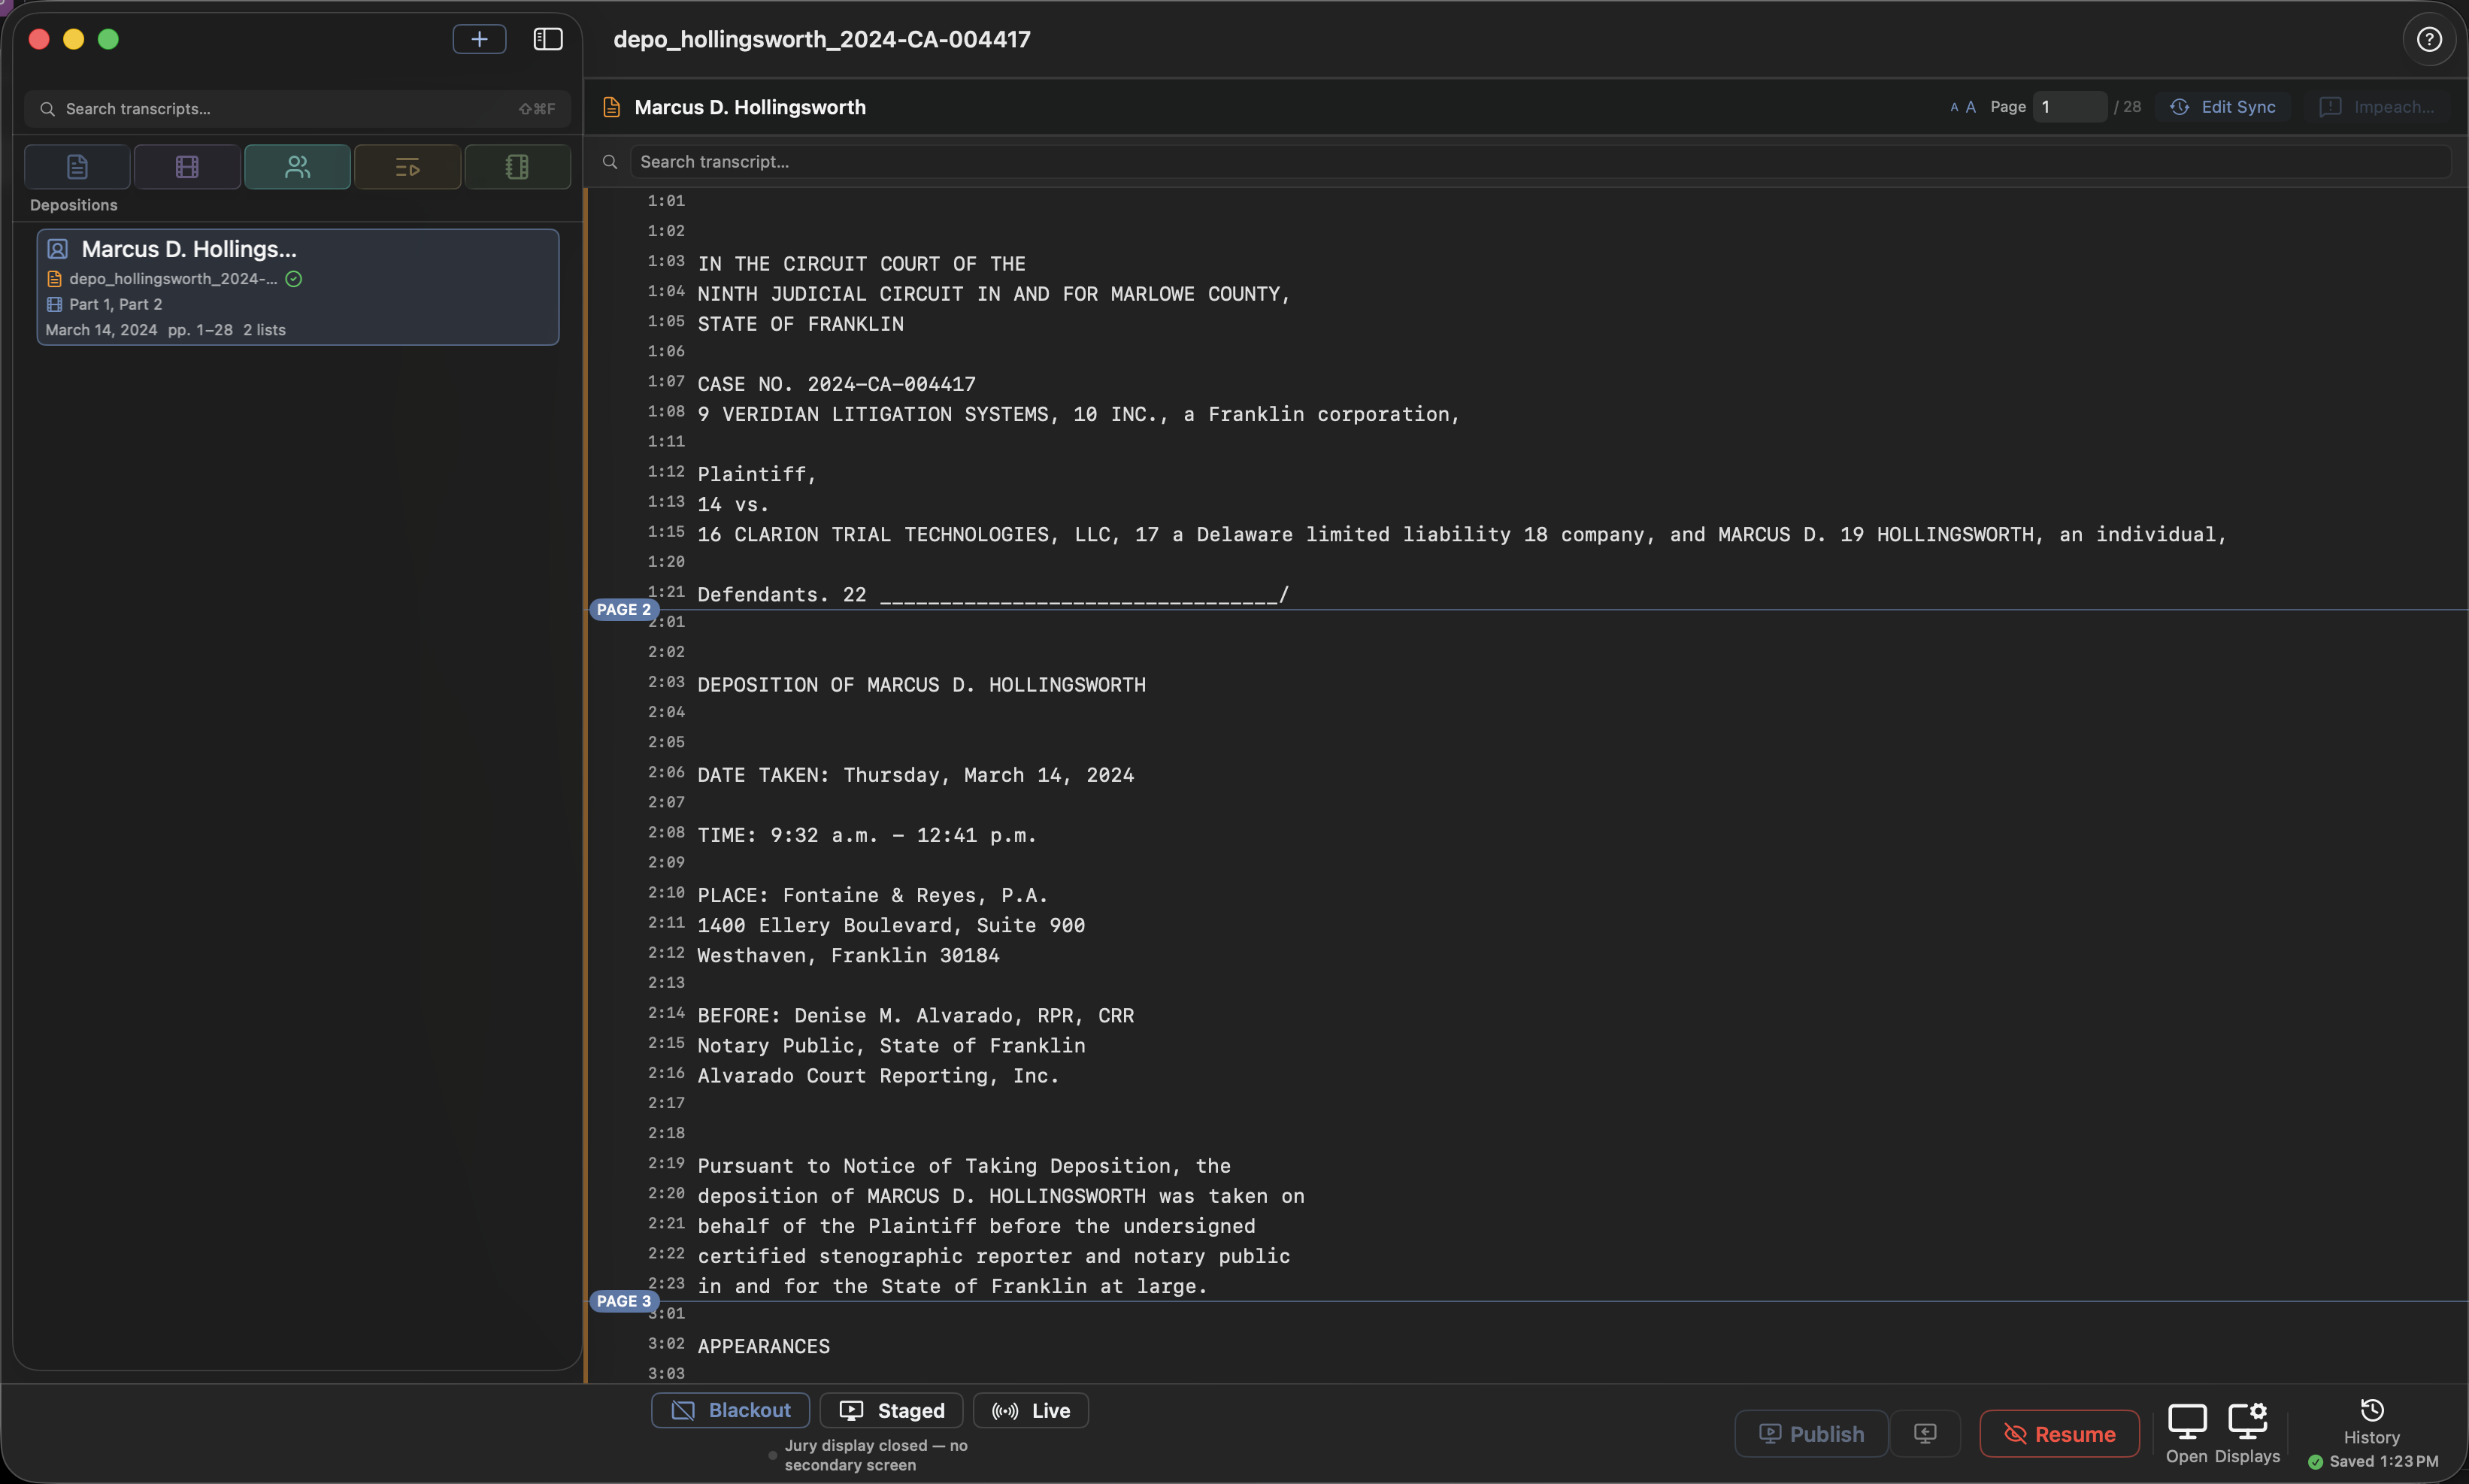
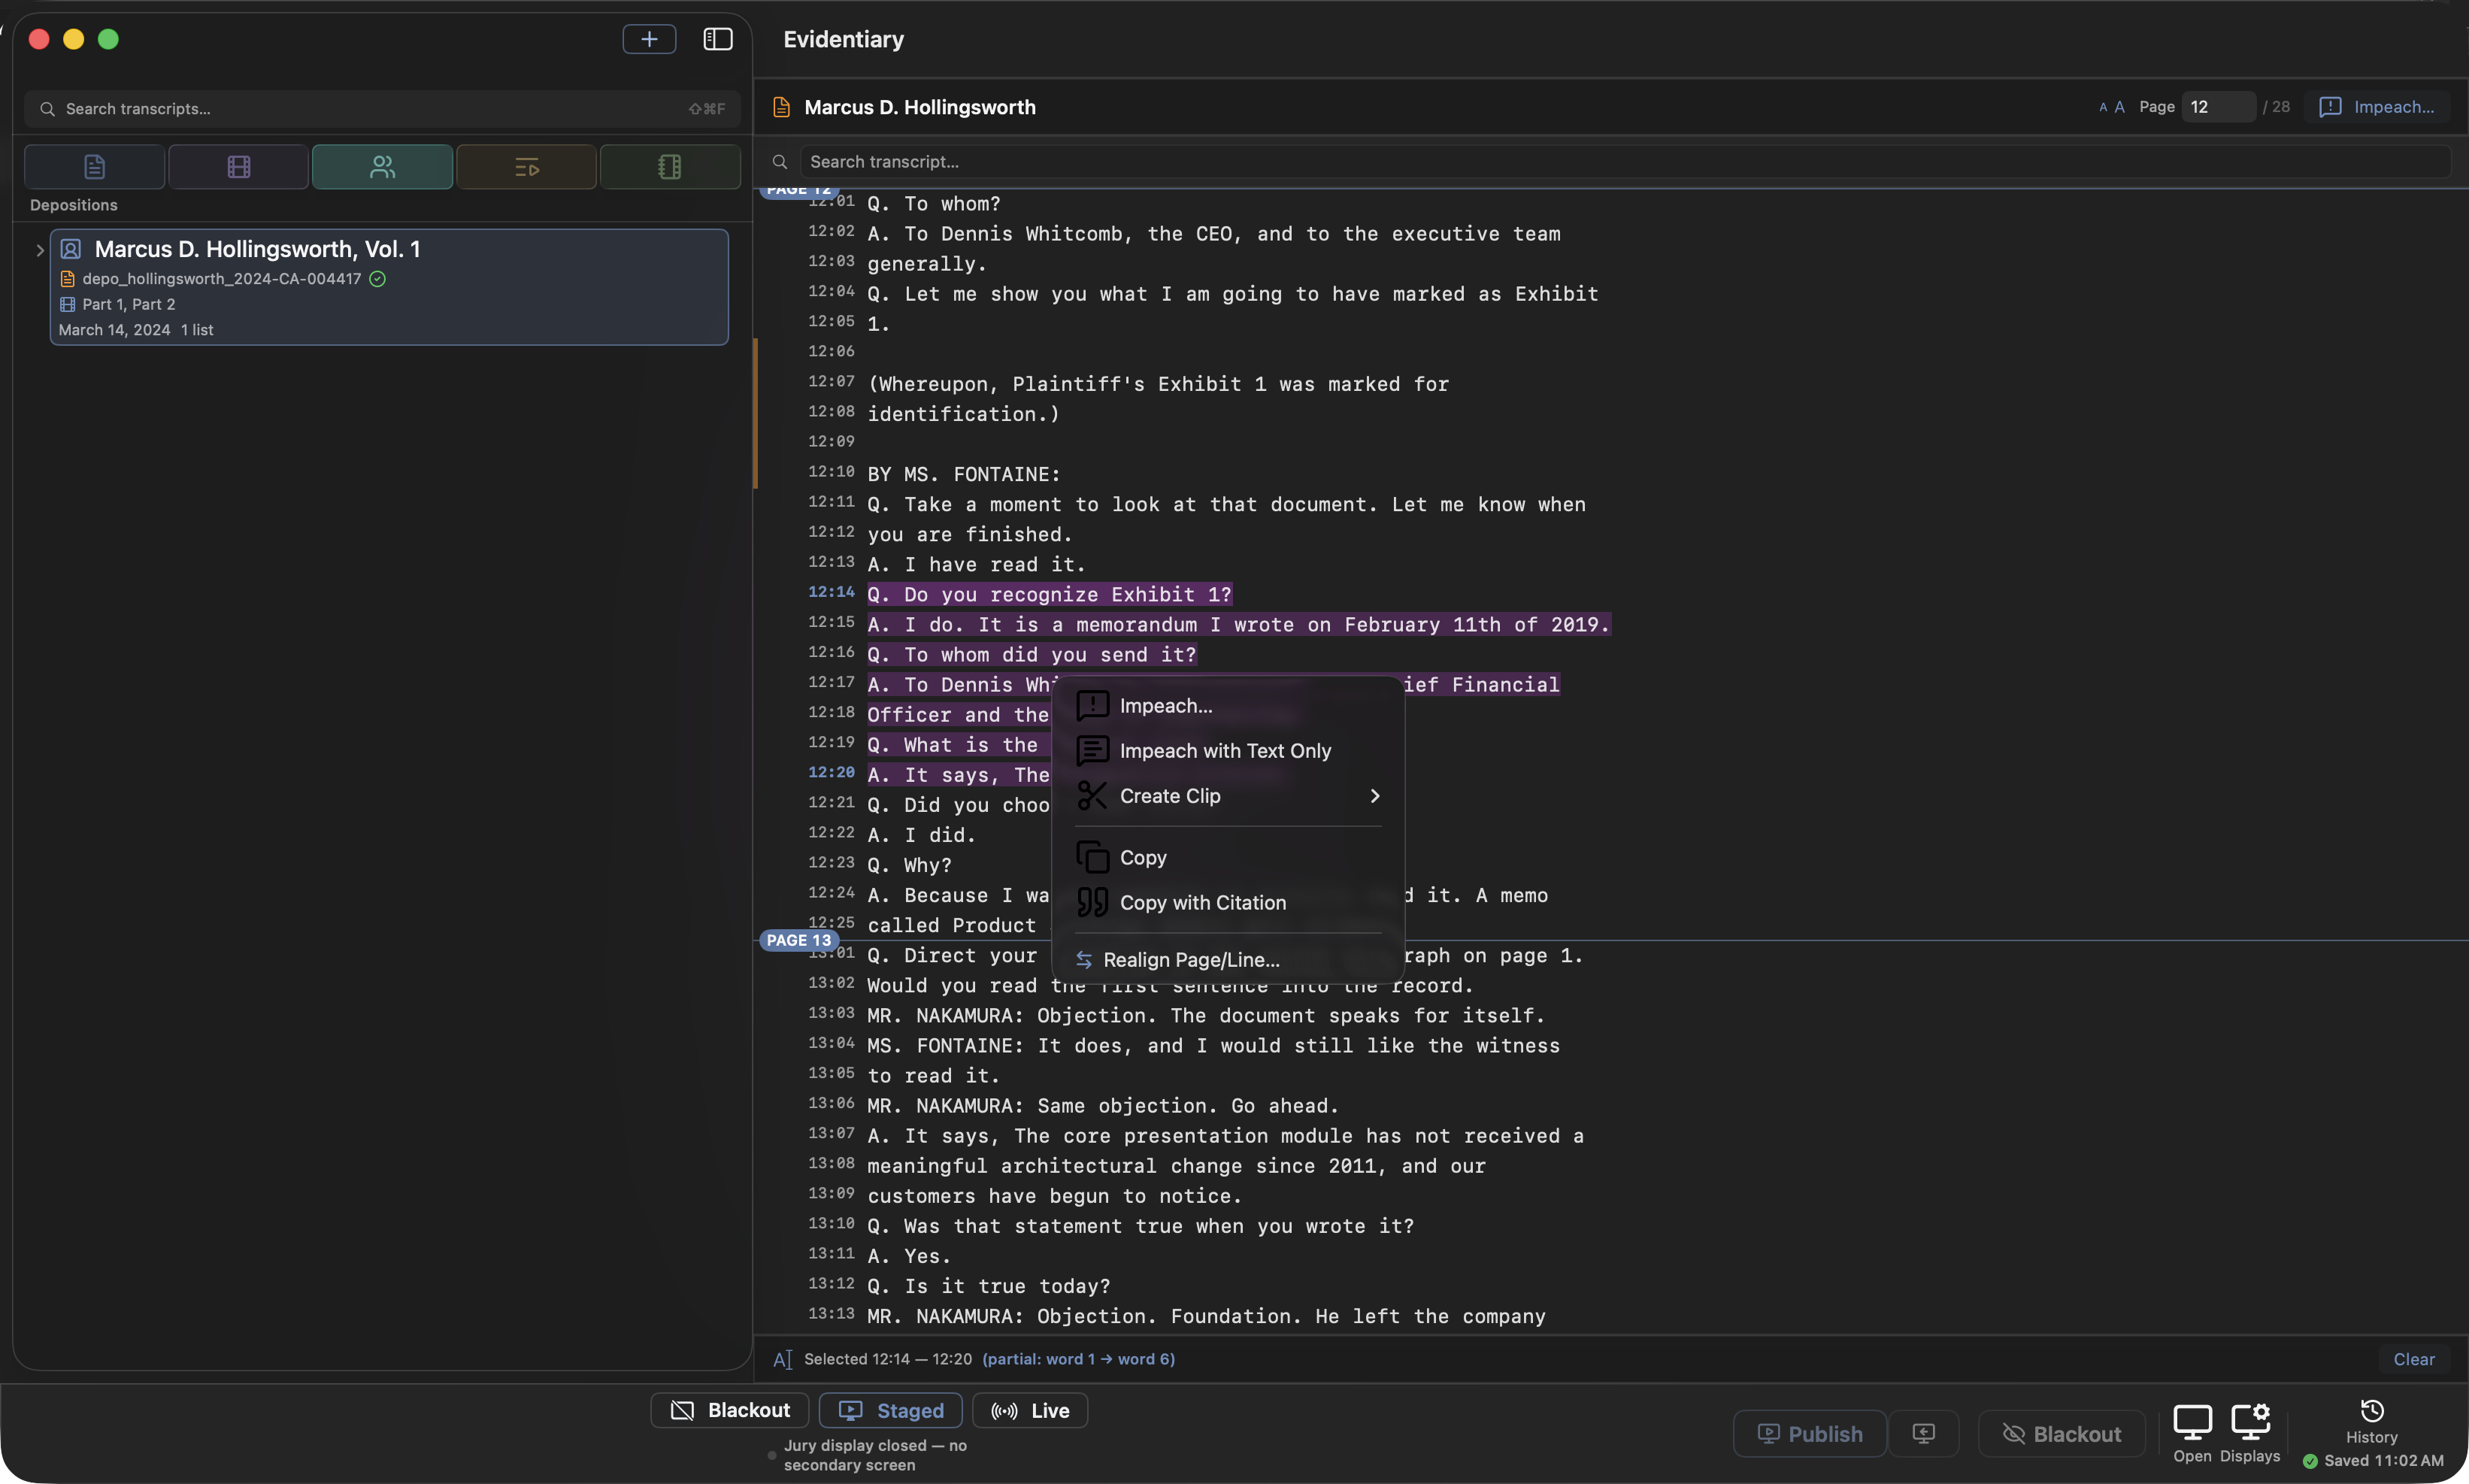
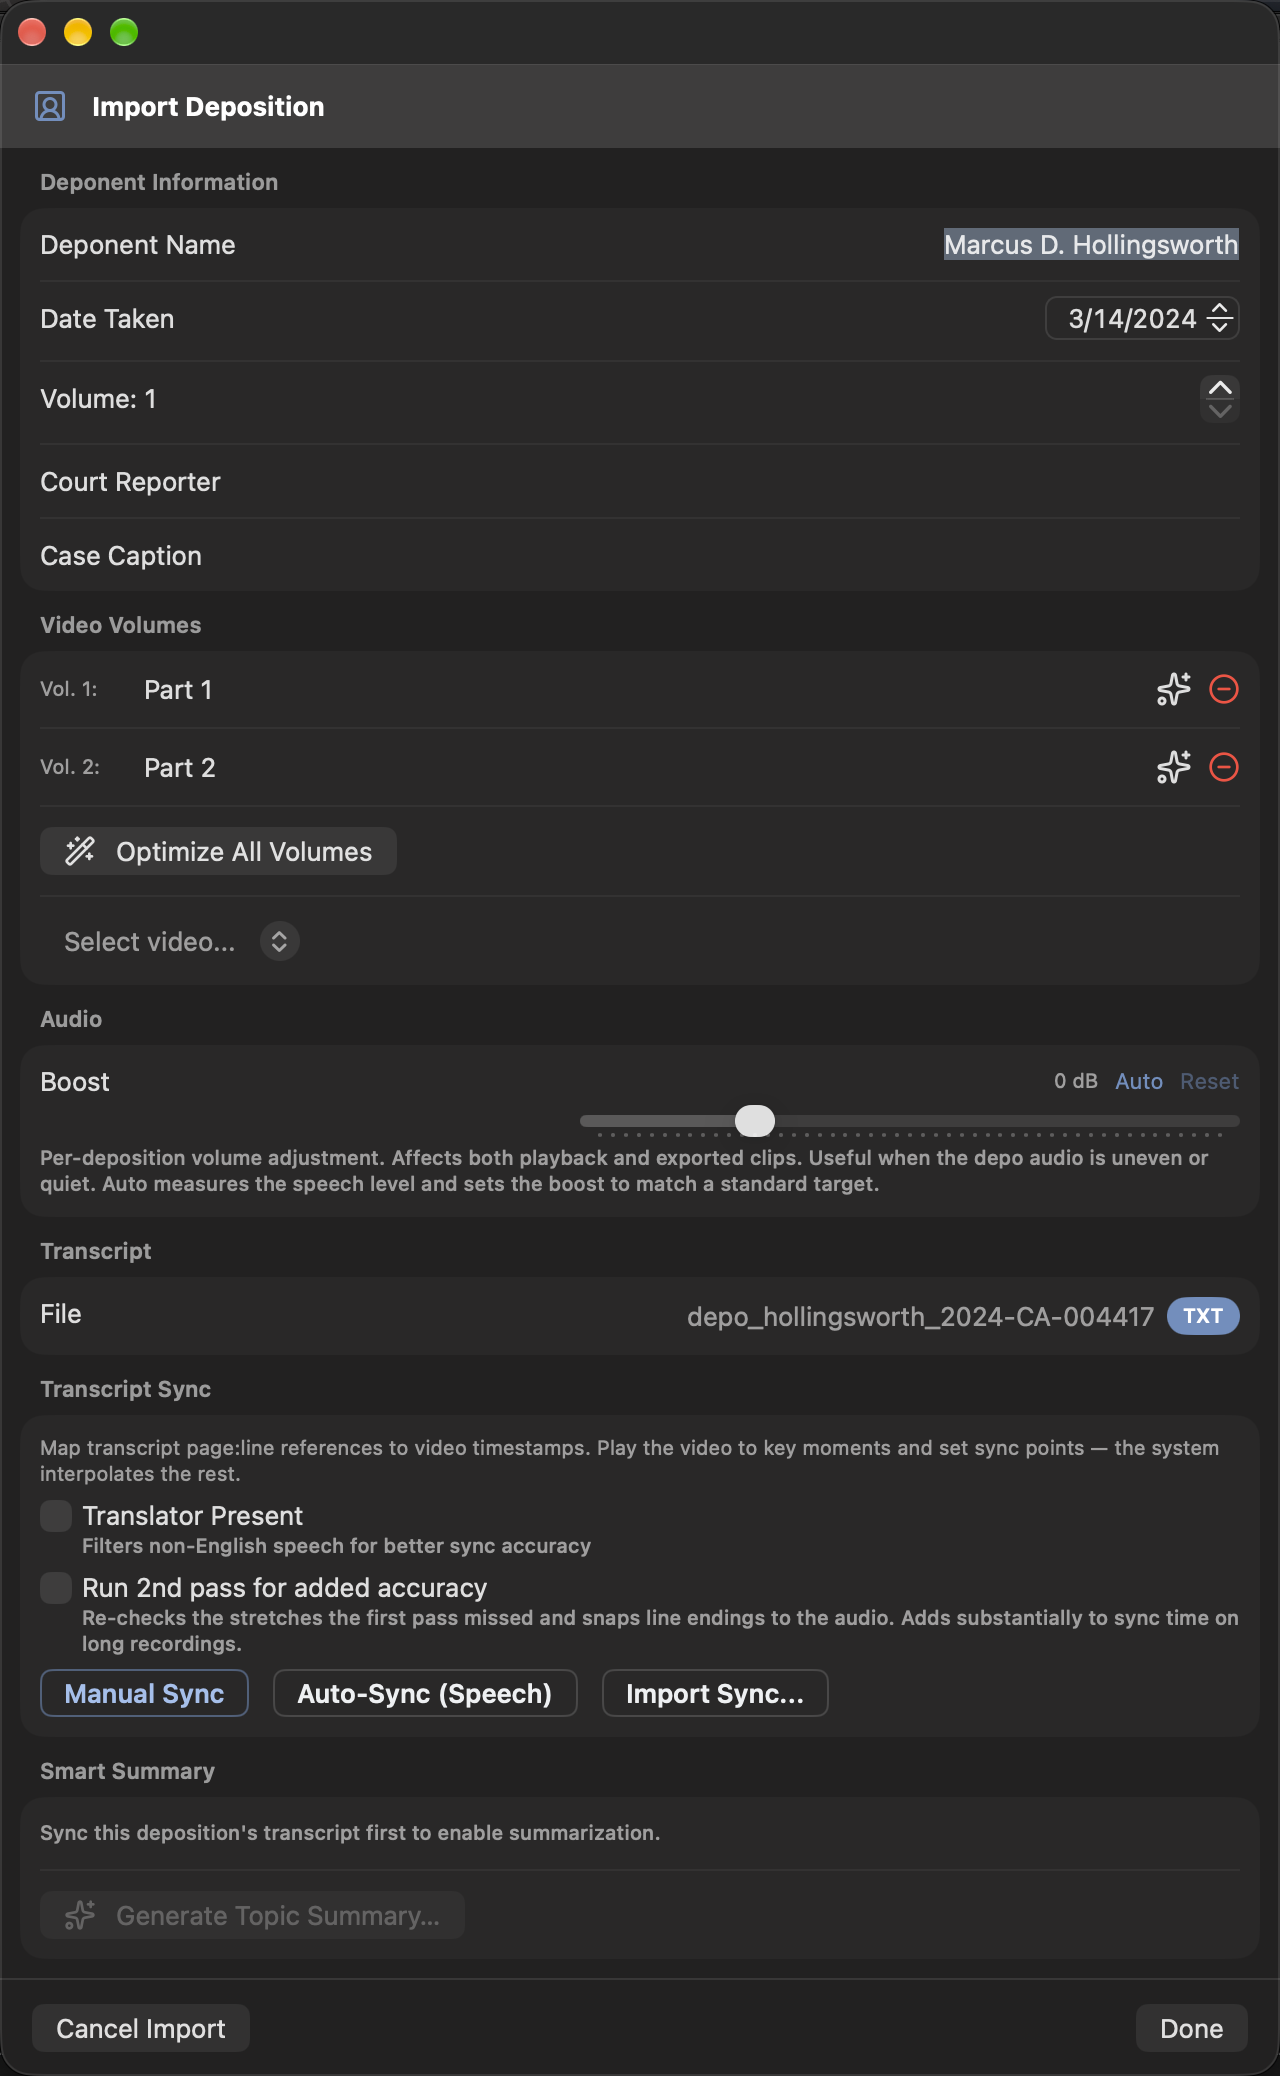
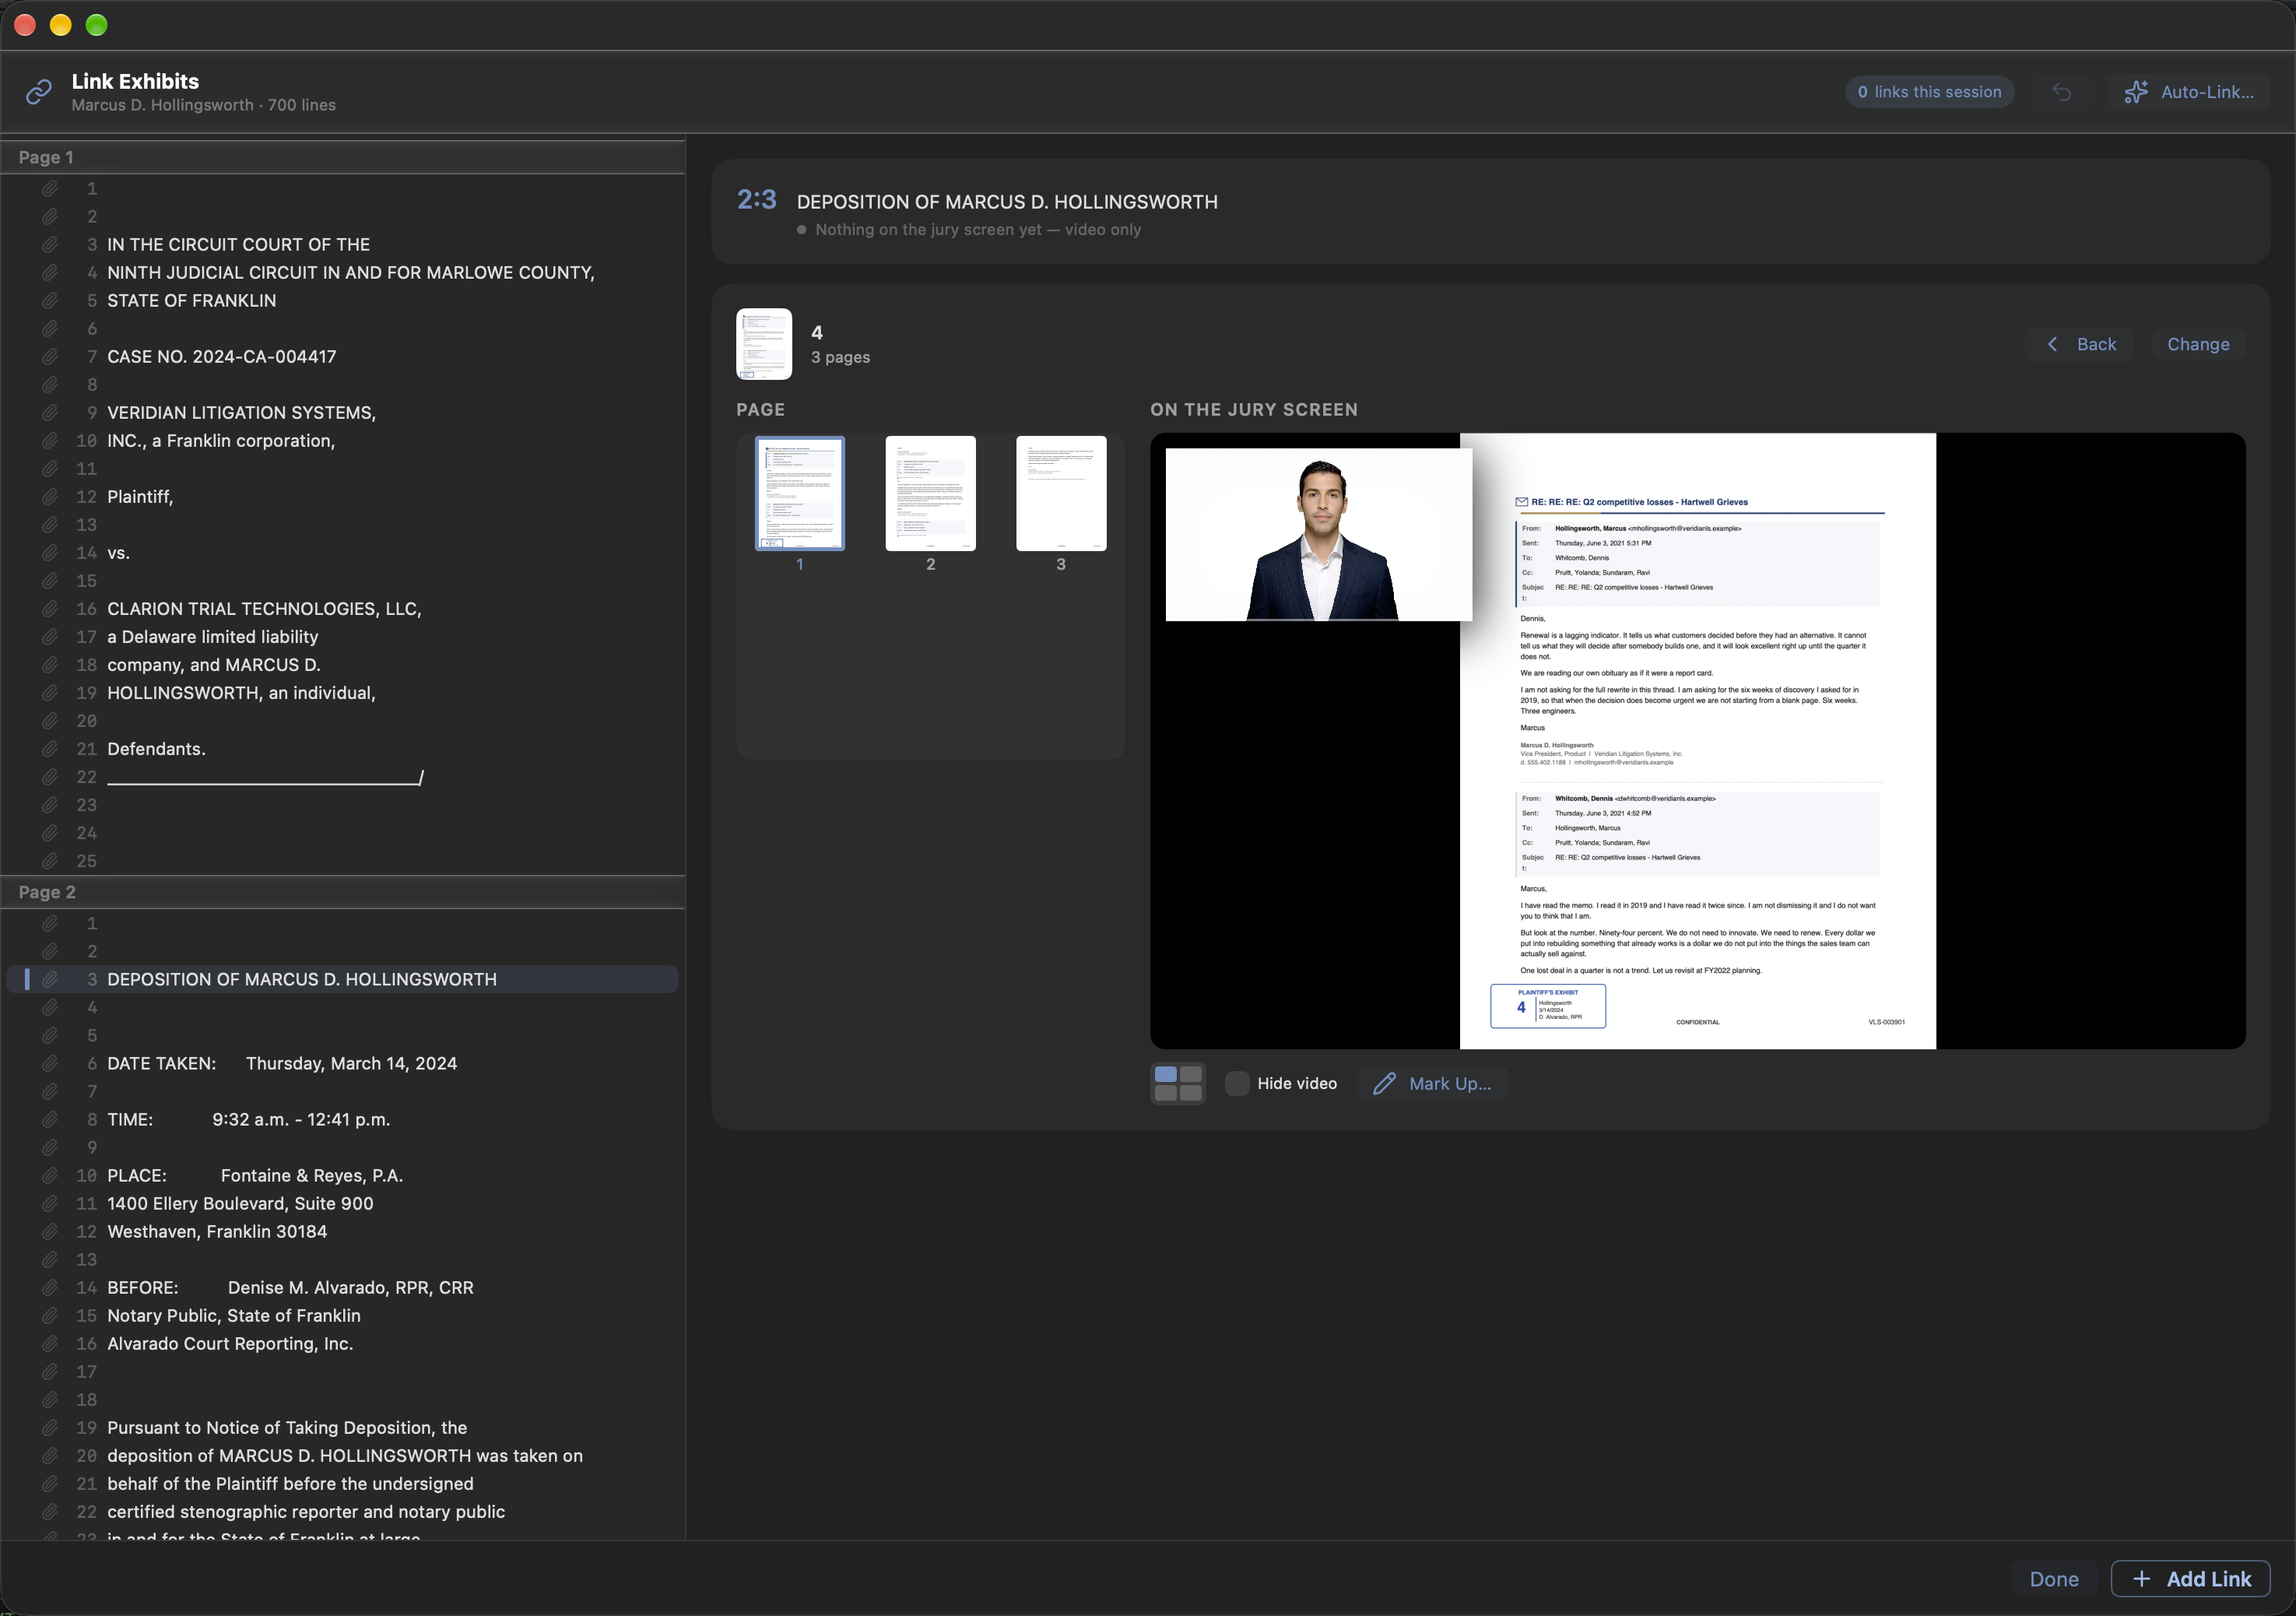
### Importing a deposition
Drag a deposition's whole folder anywhere onto the sidebar while the Depos tab is showing — a row, the space below the rows, the header, even the search field — or onto the Depos tab button while another tab is showing, and it becomes one deposition: the videos, plus exactly one transcript source. The import reads the top level only and picks the transcript by priority — a .tws sync file first, then a sync .xml, then the .txt, then the .pdf. It needs exactly one file of the winning tier plus at least one video; anything else raises "Can't import folder" rather than guessing. Drop several folders at once for several depositions. Loose files behave differently on purpose: a transcript or a video volume dropped onto a deposition's row attaches to that deposition, while a folder is always a new one wherever it lands.
Loose files work too. A .tws or .xml each becomes its own deposition, and video, PDF, and TXT files dropped together form one combined deposition. Videos are natural-sorted, so Vol.01 lands ahead of Vol.02 and Vol.10 sorts after Vol.9.
Dropping onto an existing deposition row targets that deposition: a video is appended as a volume, a PDF or TXT becomes the transcript and auto-fills the deponent name and date from the cover page, and a .tws or .xml applies its sync.
The toolbar Add menu covers the rest.
| Item | What it does |
|---|---|
| New Deposition… | Adds a blank deposition and opens the Edit Deposition sheet. |
| Import TWS… | Adds a new deposition per .tws file — the deposition arrives pre-synced. |
| Import Sync XML… | Adds a new deposition and matches the video filenames inside the file against video exhibits already in the case. |
| Sync All Depositions… | Opens Batch Sync. |
| Export Depo Report… | Saves a CSV inventory of the video depositions. |
| Organize Files into Deponent Folders | Appears only when there is loose deposition media to file. |
When an imported .tws or sync XML references volumes the case does not have, a Missing Video Volumes alert offers Pick Videos… or Skip. A file that fails to import is named in the message; the usual cause is a cloud placeholder that has not downloaded yet.
### The deposition row
Rows sort alphabetically by the deponent's last name. Each carries four lines: the deponent name, the transcript file with a green check mark once the deposition is synced, the attached video volumes, and the deposition date plus the number of clip lists built from this witness. Drag the deposition icon out to pull a copy of the transcript into Finder. Hovering exposes Reveal in Finder, Edit, and Delete.
The clip lists built from a witness live on the Clips tab, under Deposition Clips; the row's last line counts them. Right-click a list there to edit, rename, play, export, or delete it — Delete asks first (see Playlists and Binders).
Delete Deposition… asks which kind of delete you mean. Move to Exhibits removes the deposition record but leaves the transcript and video in the case as ordinary exhibits — the one to pick when a deposition was assembled wrong and you want to rebuild it from the pieces. Delete from Case removes the deposition *and* its transcript and video exhibits. Neither is undoable.
### The Edit Deposition sheet
The hover Edit button, the Edit Deposition… context item, and several imports all open the same sheet — the control panel for one deposition, saving every change as you make it. It runs through Deponent Information (name, date taken, the transcript volume number for a multi-day deposition rather than the count of video files, court reporter, case caption), Video Volumes, Audio, Transcript, Transcript Sync, Smart Summary, and operator-only Notes that never reach the jury display. The whole sheet is a drop target: videos append as volumes, a PDF or TXT replaces the transcript.
Volumes. Removing a volume leaves a placeholder in its slot rather than closing the gap. Sync entries and designations address video by volume index, so the placeholder is what keeps Volume 3 pointing at Volume 3 after Volume 2 is pulled. The Sync Report flags the empty slot.
Audio boost. Different videographers record at different levels. Auto measures this deposition's speech loudness and sets a boost so every deposition plays at the same standard level; the slider runs −6 to +18 dB by hand. The boost belongs to the deposition, so it applies in the clip editor, Playback Mode, the impeachment player, and exported video. Fix a quiet witness once.
Transcript. The section names the linked transcript file and tags it with its format — TXT, PDF, PDF (OCR) for a scan with no text layer, TWS or XML when the text was materialized from a sync file, or Generated for a speech-recognition transcript. There is no picker: drop a transcript on the deposition (or use the Import Deposition flow) to attach or replace one, and the deponent name and date auto-fill from the cover page. Convert PDF to TXT… writes the attached PDF out as a plain ASCII transcript; drop that TXT on the deposition to sync against it instead. ASCII transcripts import one-to-one and are the most reliable source for page:line accuracy; a scanned PDF is read with Vision OCR the first time it opens.
Translator Present. Check this before syncing testimony taken through an interpreter. The recognizer then aligns against the English portions and ignores the rest.
Run 2nd pass for added accuracy. Off by default. When checked, sync makes a second visit to the recording: it re-examines the stretches the first pass could not place, and it settles each matched line's ending against the audio itself. Both are refinements on top of an already-usable sync, and the second one reads the whole recording again — expect a long deposition to take substantially longer. Leave it off for everyday work; turn it on for testimony you are about to designate from, or when the timings came back rough.
### Syncing a deposition transcript
Syncing maps each transcript page:line to a moment in the video. The controls sit in the Transcript Sync section of the Edit Deposition sheet, and the whole pass runs on device — nothing is uploaded.
Auto-Sync (Speech) listens to the deposition audio and matches what it hears against the transcript text. It stays disabled until the deposition has at least one video volume and a transcript. While it runs you get a progress bar, a live elapsed timer, and Cancel; when it finishes, the sheet reports the run time, the accuracy, and how many lines aligned.
That accuracy figure is the fraction of *testimony* lines matched directly against the audio. A page counts as testimony when it carries a Q. or A. line or a speaker's colloquy (a page or two of one continuing answer counts too); everything else — the caption, appearances, index, stipulations, certificate and errata of every volume, including the front matter that opens a second volume mid-transcript — is never spoken on the recording, so it is excluded rather than scored as failures. The sheet works the figure out from the deposition's current sync entries, exactly as the Sync Report header does, so the two always show the same number. Read the Sync Report rather than the headline percentage — it names which stretches were interpolated. Three things move the match rate materially: an ASCII transcript instead of a scanned PDF, Translator Present on interpreted testimony, and Run 2nd pass for added accuracy when you can spare the extra time.
Edit Sync is the repair bench for stretches auto-sync got wrong — and, as Sync Manually, the from-scratch tool for audio speech recognition cannot handle. It works where the problem is visible: open the deposition's transcript and click Edit Sync in the header (the Edit Deposition sheet's button lands in the same place, and right-clicking a transcript line offers Fix Timing Here…). The mode docks a video-and-waveform preview under the toolbar, marks every estimated stretch amber in a health strip beside the scroll bar, and counts the spots to check in the bar — the chevrons, or N and P, jump straight to them.
The loop: click the line you want to fix — every click plays a two-second preview, and each row's chip shows its listed time. Jog with ←/→ (⇧ jogs 5 seconds, ⌥ a single frame) until the playhead sits where the line is really spoken, then press Return — the line pins there, and the lines between your pin and the nearest verified neighbor re-time to match. Verified lines never move: a fix stays inside the stretch that needed it. To re-time a whole passage in one pass, select its first line and press Space — playback starts at that line — then tap Return the moment each line is actually spoken: the time stamps, the next line arms itself, and the tape keeps rolling. ⌘Z takes back the last pin, clicking a pinned chip unpins it, and nothing touches the deposition until Apply — Cancel discards the whole session.
A never-synced transcript opens the same mode as Sync Manually: anchor the first spoken line, then the last, and every line between is spaced automatically — with as many extra anchors as the recording needs. A practical set: the start of testimony, after each break, and the start of each new volume.
Apply then offers to refine the stretches you fixed with speech recognition. Your anchors give the recognizer the one thing the original pass lacked — a tight, correct window — so it gets a second chance at the lines it missed. Lines it matches at full strength come back with word-accurate, verified times; anything it cannot match (colloquy never spoken on the video, unintelligible crosstalk) keeps your manual timing exactly as you set it, and your anchors never move.
When the audio will not decode. If sync fails on the audio itself, right-click the video exhibit → Optimize Video for Playback… re-encodes it to a clean H.264 MP4 without shifting clip times or sync. The Edit Deposition sheet offers Optimize All Volumes for a multi-volume deposition.
Word-level timings. Line-level sync is enough for whole-line designations; cutting mid-answer at a specific word needs per-word timings. A deposition synced without them shows a notice offering Add Word Timings, which re-runs the pass to capture them. Running it is safe — if the new pass matches worse, the existing line-level timings stay intact.
Warning: Clear throws the sync away. It is not undoable and there is no confirmation. Existing designations keep the times already stored on them, but everything that resolves a page:line on demand stops working until you re-sync: clicking a transcript line to play it, Impeach…, Play deposition range, making clips from a selection, and auto-filling times in the clip editor. Export the sync first if there is any chance of needing it back.
### Sync every deposition at once
Sync All Depositions… in the Add menu opens Batch Sync, which queues every deposition that has both a transcript and a video, with a completed counter, a failed counter, and one row per job.
Sync in Background starts the queue and closes the sheet — progress moves to a strip in the main window with a Show details link and a Cancel button, so a night's worth of depositions can sync while you work on exhibits. Move to Background does the same mid-run, and Include Already Synced re-queues the depositions that are already synced, which the queue lists as skipped — the way to re-sync one without clearing its sync first.
This is the night-before task: load the transcripts and video as the discovery drop lands, start the queue, and come back to a case that is ready to clip.
### Checking and repairing a sync
The Report button opens the sync health report. Nothing about it is stored — it is rebuilt from the deposition's current sync entries every time it opens, so it always reflects the latest manual edits, imports, and realigns. The header gives the accuracy, the matched and excluded line counts, and one line per volume showing how far the alignment reached. A clean sync reports no issues; otherwise you get findings, each with a severity, a page:line range, and guidance.
| Finding | What it means |
|---|---|
| Volume N has no video file | Transcript lines point at a volume with no video attached. They cannot play until you attach it in Edit Deposition. |
| Transcript continues past the audio | The final testimony lines were never heard — the video may end early or be truncated, or the testimony happened off the record. Their timings are guesses. |
| Audio starts after the transcript begins | The recording started late. The opening lines are interpolated. |
| Possible gap in the audio | Ten or more consecutive lines were not heard: an off-record discussion left in the transcript, a hole in the audio, or heavy crosstalk. |
| Long stretch of video between two lines | The video rolls for more than 2:30 with no matched testimony — usually a break or sidebar that stayed on the recording. |
| Timing runs backwards | A line starts before the line above it. Usually an import or realign artifact; re-sync, or repair those lines in Edit Sync. |
| Faster than speech between two lines | The text between the two lines would have to be spoken at more than three times the deposition's own pace, so one of them is sitting on the wrong moment — usually a name or exhibit number the recognizer heard somewhere else. Check the stretch in Edit Sync. Text nobody says aloud — a reporter's parenthetical such as "(Whereupon, Plaintiff's Exhibit 2 was marked for identification.)", or a line the sync left unheard at no length — is not counted. |
| N lines read differently since this sync | The sync keeps the wording it was made from, and Evidentiary now reads the transcript differently — a later update reads it better, or the sync came from another program. Search, captions, and clip text use the old wording until the deposition is synced again. Add ▸ Sync All Depositions…, then Include Already Synced, re-syncs without clearing anything first. |
Each category caps at 20 findings and says so when it overflows — that many usually means the sync itself failed, and re-running Auto-Sync beats triaging line by line. Copy Report puts a plain-text version on the clipboard, written to be dropped into an email to the videographer or the court reporter.
"Interpolated" means a line's timing was estimated from its neighbors rather than heard. Those lines still play, but their endpoints drift, and in the transcript they carry an amber strip down the left edge. Listen to any clip cut inside one before it goes to the jury.
### Realign the transcript page numbers
Court reporters and litigation-support vendors do not always agree on where page numbering starts, so a transcript sometimes parses a page or two out of register — a cover sheet counted, an errata page missed. Right-click any transcript line → Realign Page/Line…, type what that line *should* be (a colon, a space, or a dash all parse), and every line is renumbered by the same offset, with 25 lines to a page preserved. The sheet shows the current offset when one is in effect, and Reset Realignment puts it back.
Sync data is stored in the transcript's raw coordinates and converted for display, so a realign never invalidates a sync: the report, the transcript rows, and the volume markers all pick up the new numbering with no re-sync required.
Warning: Designations are the exception. A clip stores the page:line that was displayed when it was cut. Change the offset after clips exist and those clips keep citing their original numbers — they still play the right testimony, but the printed citation no longer matches the renumbered transcript. Realign first, designate second.
### Transcribe a video when there is no transcript
When a deposition has video but no transcript attached, the Edit Deposition sheet offers Generate Transcript (AI), which transcribes the video's audio on device so clip work can start before the certified transcript arrives. Every volume's file has to be locatable.
Warning: A generated transcript is speech-recognition output, not a certified record. It is labeled machine-generated everywhere it appears, and the transcript viewer carries a standing banner. Do not read from, cite, or publish it as though it were the certified record. Syncing the real transcript later replaces it automatically.
The speaker guess on a machine transcript is exactly that — a guess drawn from oath context and question density. When it lands backwards, right-click any line → Swap Q and A Speakers flips every Q. and A. in one pass, in the sync entries and in the text file on disk. Run it once from any row; the change is transcript-wide.
### Reading the transcript
The transcript view shows the deposition with page:line numbering at whatever text size suits the room — the header control steps 10% at a time between 0.8× and 2.0×, and the scale is remembered across cases and launches. The Page field jumps to a page on ⏎.
Search walks hits in place rather than filtering: type two characters or more, ⏎ or ⌘G for the next hit, ⇧⌘G for the previous, both wrapping. ⌘F focuses the field. To search every transcript in the case at once, use Global Transcript Search (⇧⌘F) — see Quick Search and the Command Palette.
Rows carry their own marks: a navy PAGE N capsule at each page break, a green VOL. N capsule with a film icon where a new video volume begins, an amber strip on lines whose timing was interpolated, and a wash on search hits.
An image-only transcript PDF is recognized with Vision the first time you open it, behind a progress HUD — once only — the result is cached on this Mac and inside the case package, so a copied or shared case never repeats it. If a file cannot be parsed into a page:line transcript at all, Evidentiary says so and keeps it as an ordinary exhibit; ask the court reporter for an ASCII .txt, and failing that a text-based rather than scanned PDF.
### Selecting testimony
Selection works at two grains. Click a line's page:line gutter to select the whole line, then click a second gutter to extend. Click a *word* and shift-click another word to trim the selection to those words. Whole-line selections tint in the accent color; word-level selections tint purple, with a stronger tint on the anchor word, so the grain of what you have is visible at a glance.
A bar along the bottom names the range — Selected 24:16 — 24:19 (partial: word 5 → word 4) — with a Clear button. Everything that acts on testimony reads that selection: Impeach…, Impeach with Text Only, Create Clip into a new list or an existing one, Copy, and Copy with Citation. A selection that crosses a video volume boundary is split per volume when a clip is cut, so each designation addresses a single video file.
### Copy testimony with a citation
Right-click testimony → Copy puts the text on the clipboard. Copy with Citation adds the short-form cite built from the deponent and the range — "(Smith Dep. 12:5–13:2)" — which is the form to drop into a brief, a motion in limine, or an email to opposing counsel. Both respect partial-line boundaries: a selection that starts mid-answer copies from the selected word, not from the start of the line.
### Summarize a deposition
On Macs with Apple Intelligence, the Edit Deposition sheet carries a Smart Summary section that reads a synced transcript on device and returns topic cards: what the witness was examined about, a short summary of each topic, and the page:line references that support it. Generate Topic Summary… stays disabled until the deposition is synced.
Clicking a reference row opens a popover with five lines of context on either side of the citation, the range that would be clipped (the cited line plus or minus two lines), and an Add to Clip List menu naming every candidate list. An entry added that way records its source deposition, fills its video times from the sync, keeps the cited snippet in its notes, and splits if the range crosses a volume boundary. From there it behaves like any other designation.
A search row above the cards filters across titles, summaries, and quoted snippets — the fastest way to find where a term was covered. Summaries are cached, so reopening the window is instant; Regenerate runs the model again, worth doing after a re-sync, since the cache does not invalidate on its own. Treat it as triage for finding the testimony worth designating, not a substitute for reading the transcript.
### Housekeeping
Export Depo Report… in the Add menu writes a CSV inventory of the video depositions — date synced, deponent (surname first), deposition date, and total length read from the video files themselves. It is the file to hand a trial coordinator who needs a running total of video time by witness.
Organize Files into Deponent Folders appears when a case has deposition media sitting loose, and moves each deposition's video and transcript into a per-deponent folder under *Depositions*, leaving trial exhibits where they are. If a deposition's name or date imported wrong, right-click it → Re-detect Name & Date re-runs cover-page extraction and overwrites both fields.
### Moving sync data between cases and apps
Right-click a deposition → Export Sync or Import Sync. Evidentiary's own .tws format keeps everything, word-level timing and edited captions included, and is the round-trip format between Evidentiary users. Sync XML follows the onCue schema and is the format to hand third-party trial-presentation software. A .tws import fills deponent metadata only where the existing fields are blank; a sync XML import also attaches any videos it can match by filename.
Warning: Importing sync replaces the deposition's existing sync data completely. There is no merge and no undo. Export the current sync first if it may still be needed.
The Clip Editor
The clip editor is where you create video clips from a deposition — cut, timed, labeled, reviewed, and made ready for the jury. Open a designation list to enter it (New Clip List sits in the Deposition Clips section header of the Clips & Playlists panel, and New Playlist in the Exhibit Playlists header; the toolbar Add menu has both as well, plus the .dce import), and it opens as its own window: toolbar, timeline, video preview and waveform, add bar, and clip list down the left, the deposition's transcript down the right. A list created without a witness starts empty — pick one from its Choose Deposition menu, also centered in the toolbar, to load the transcript and video.
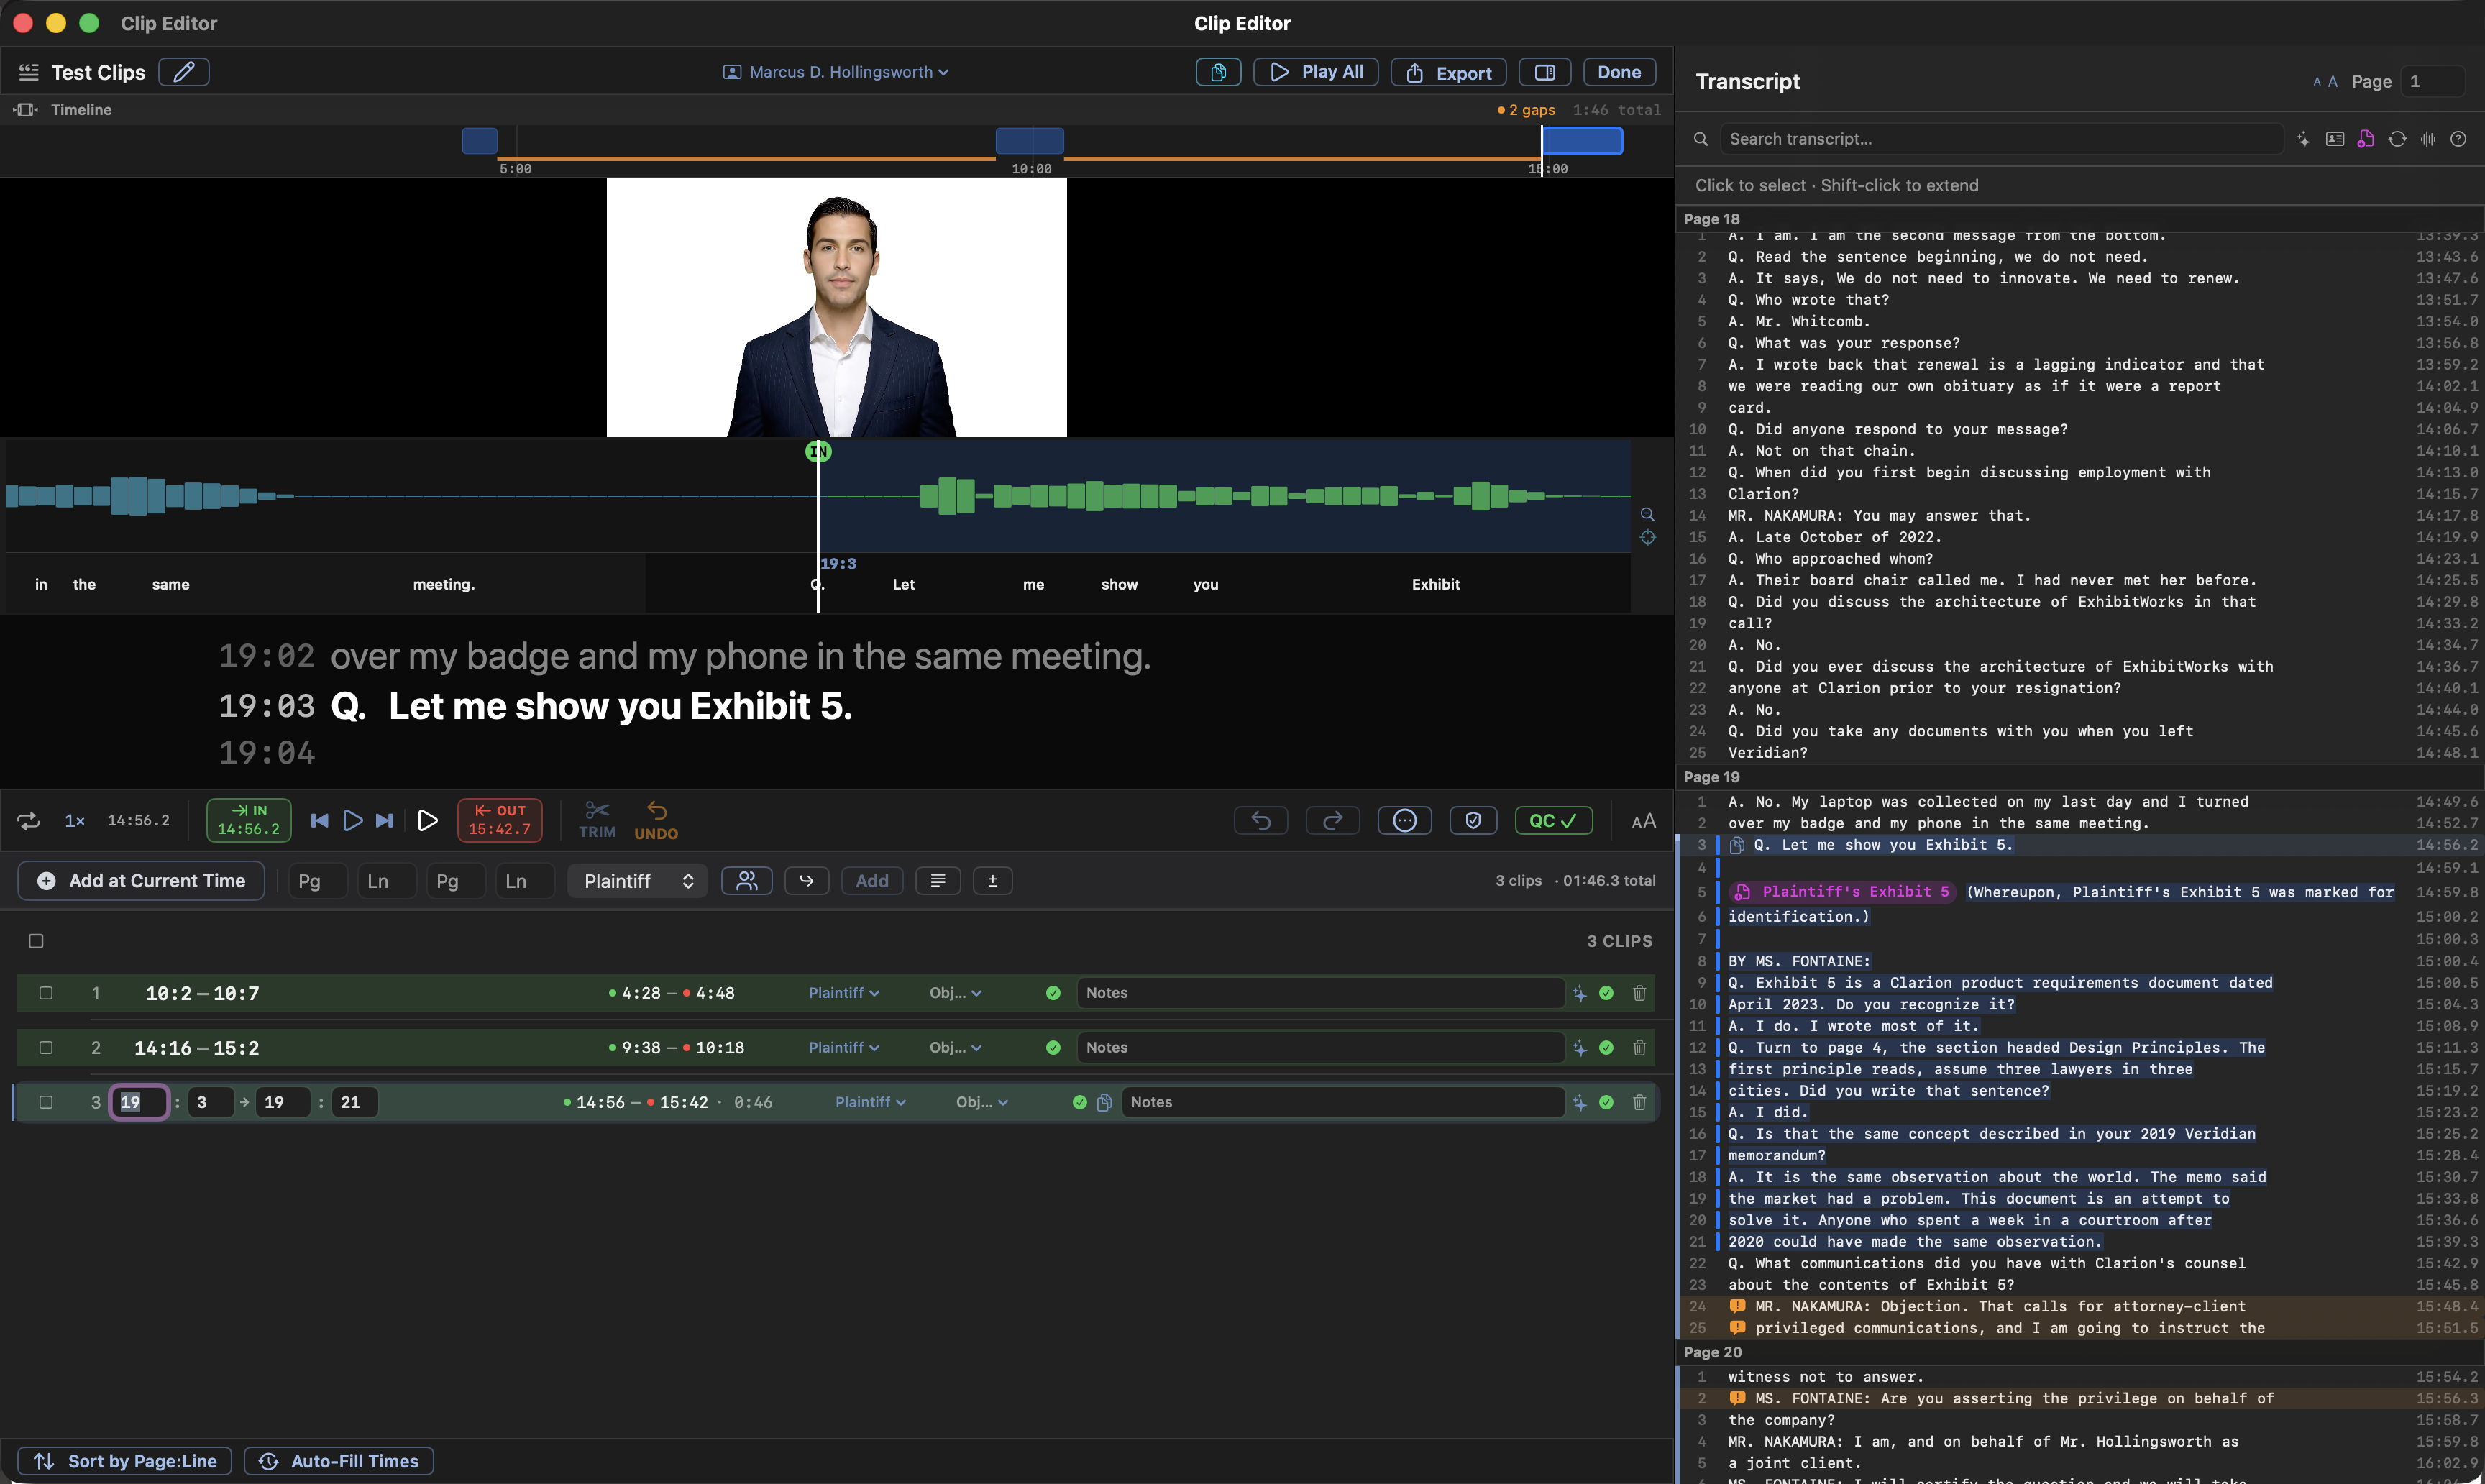
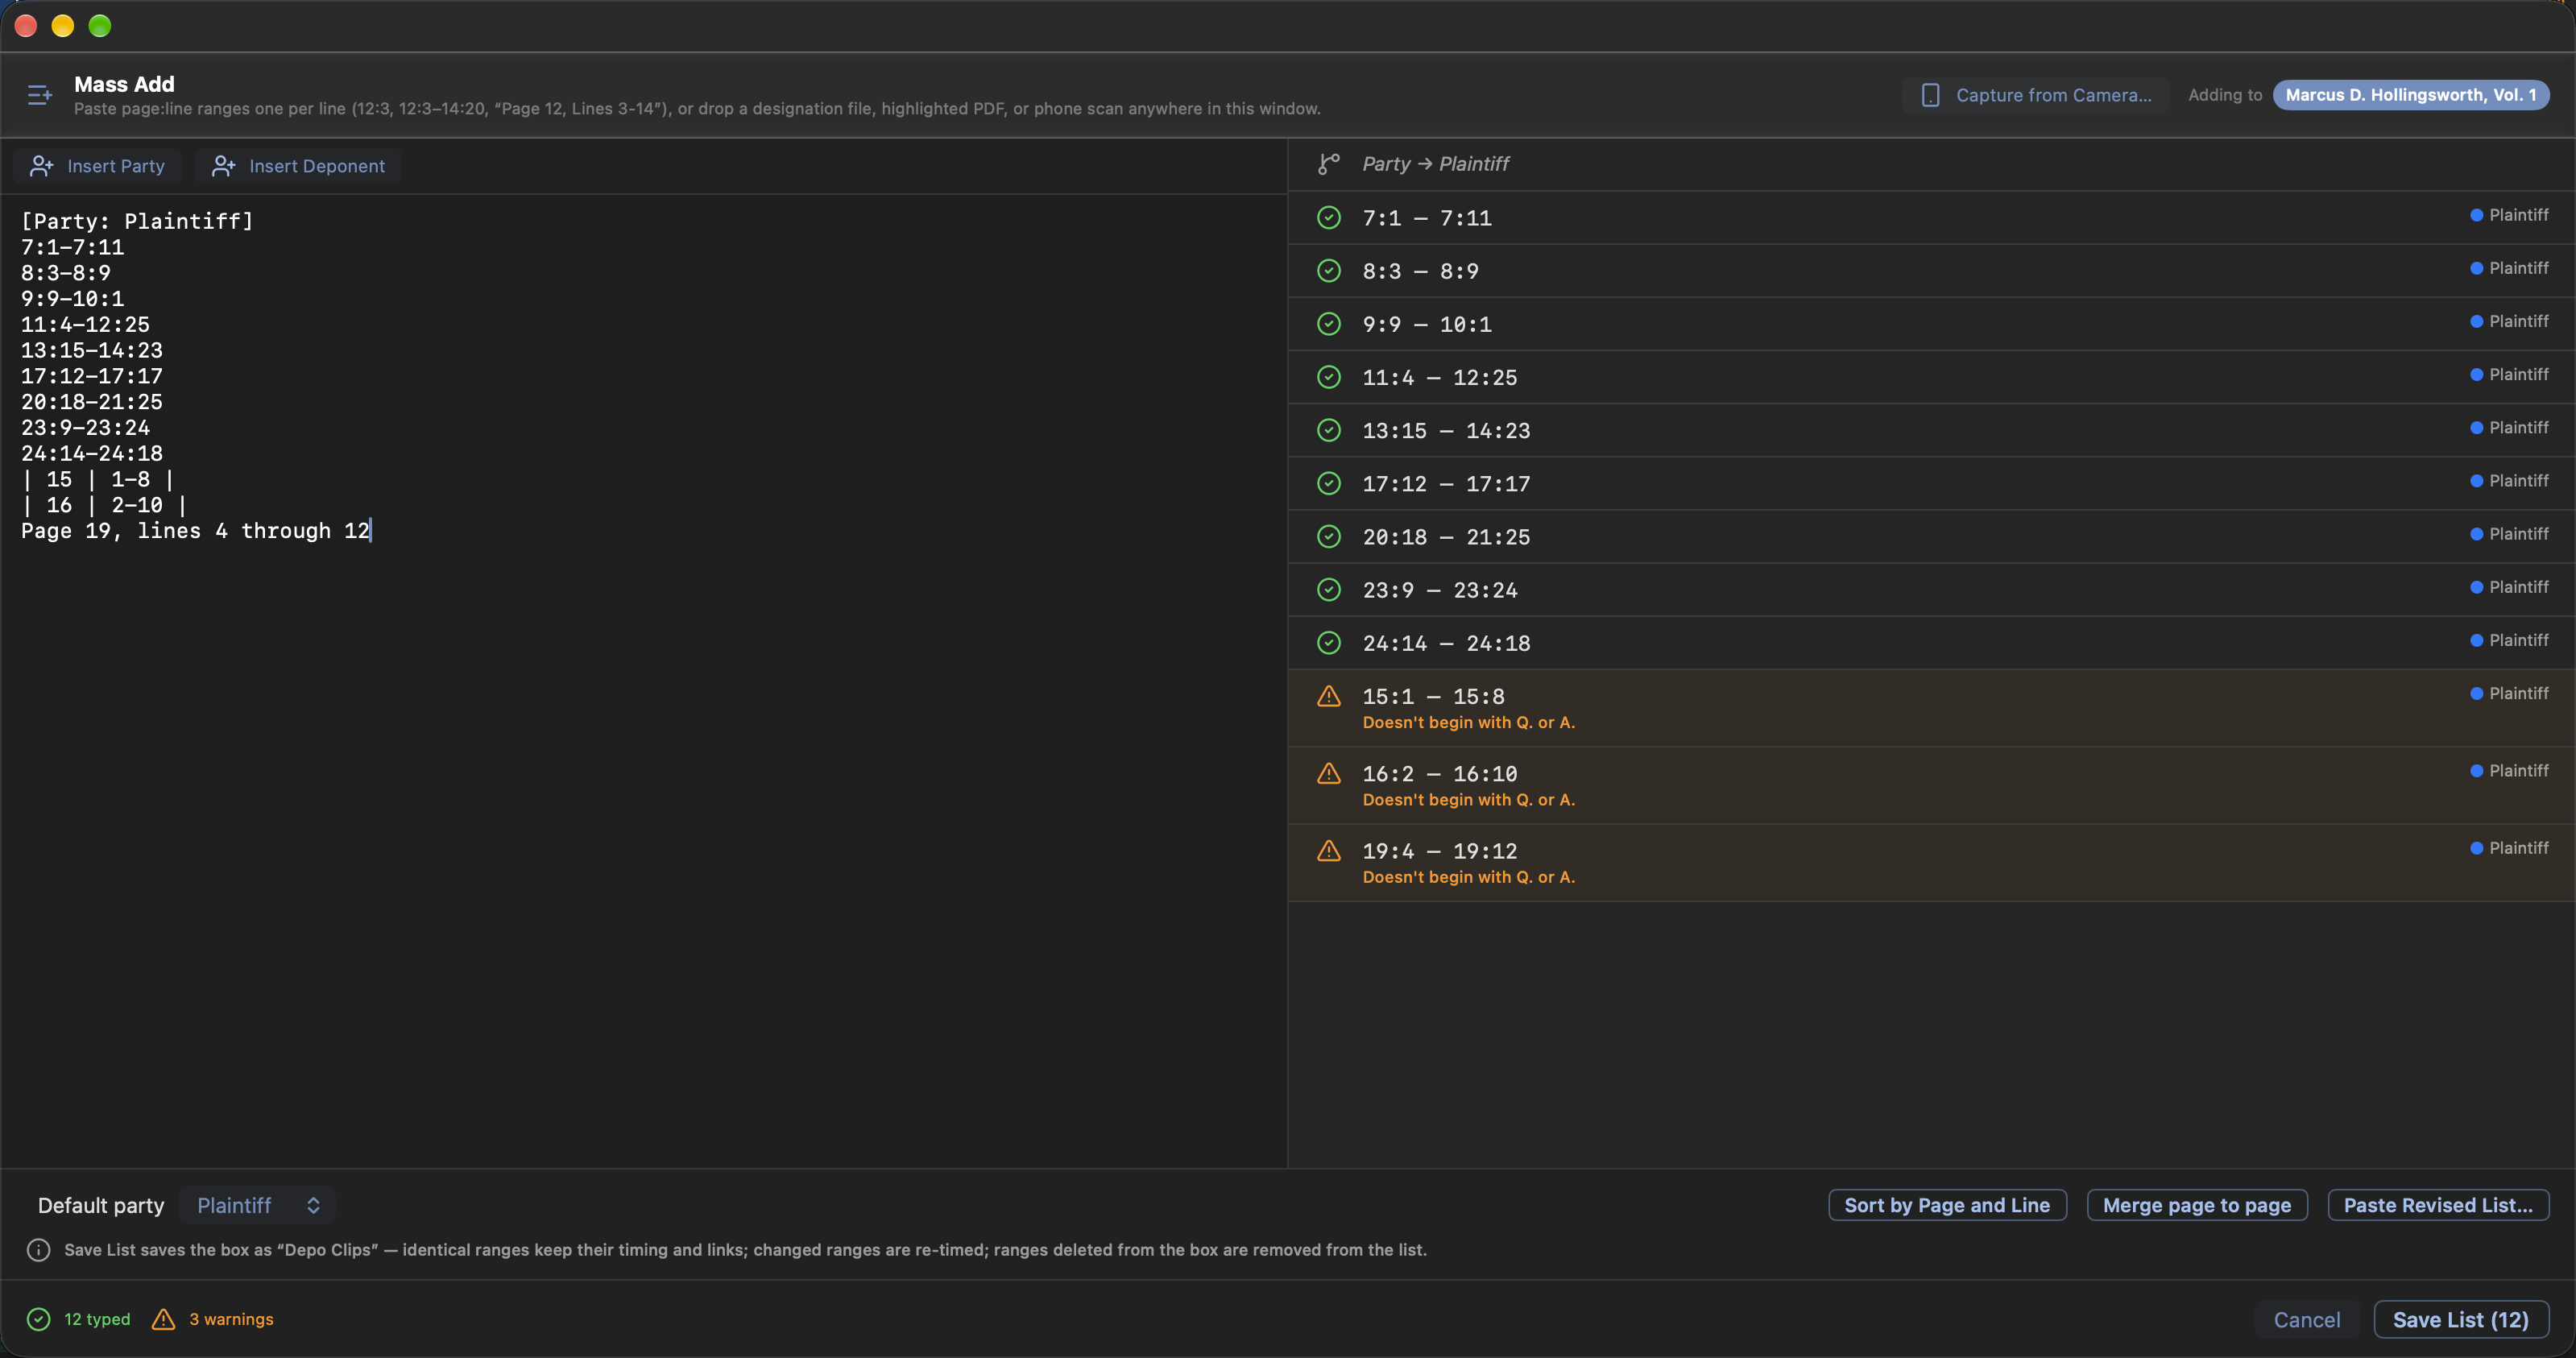
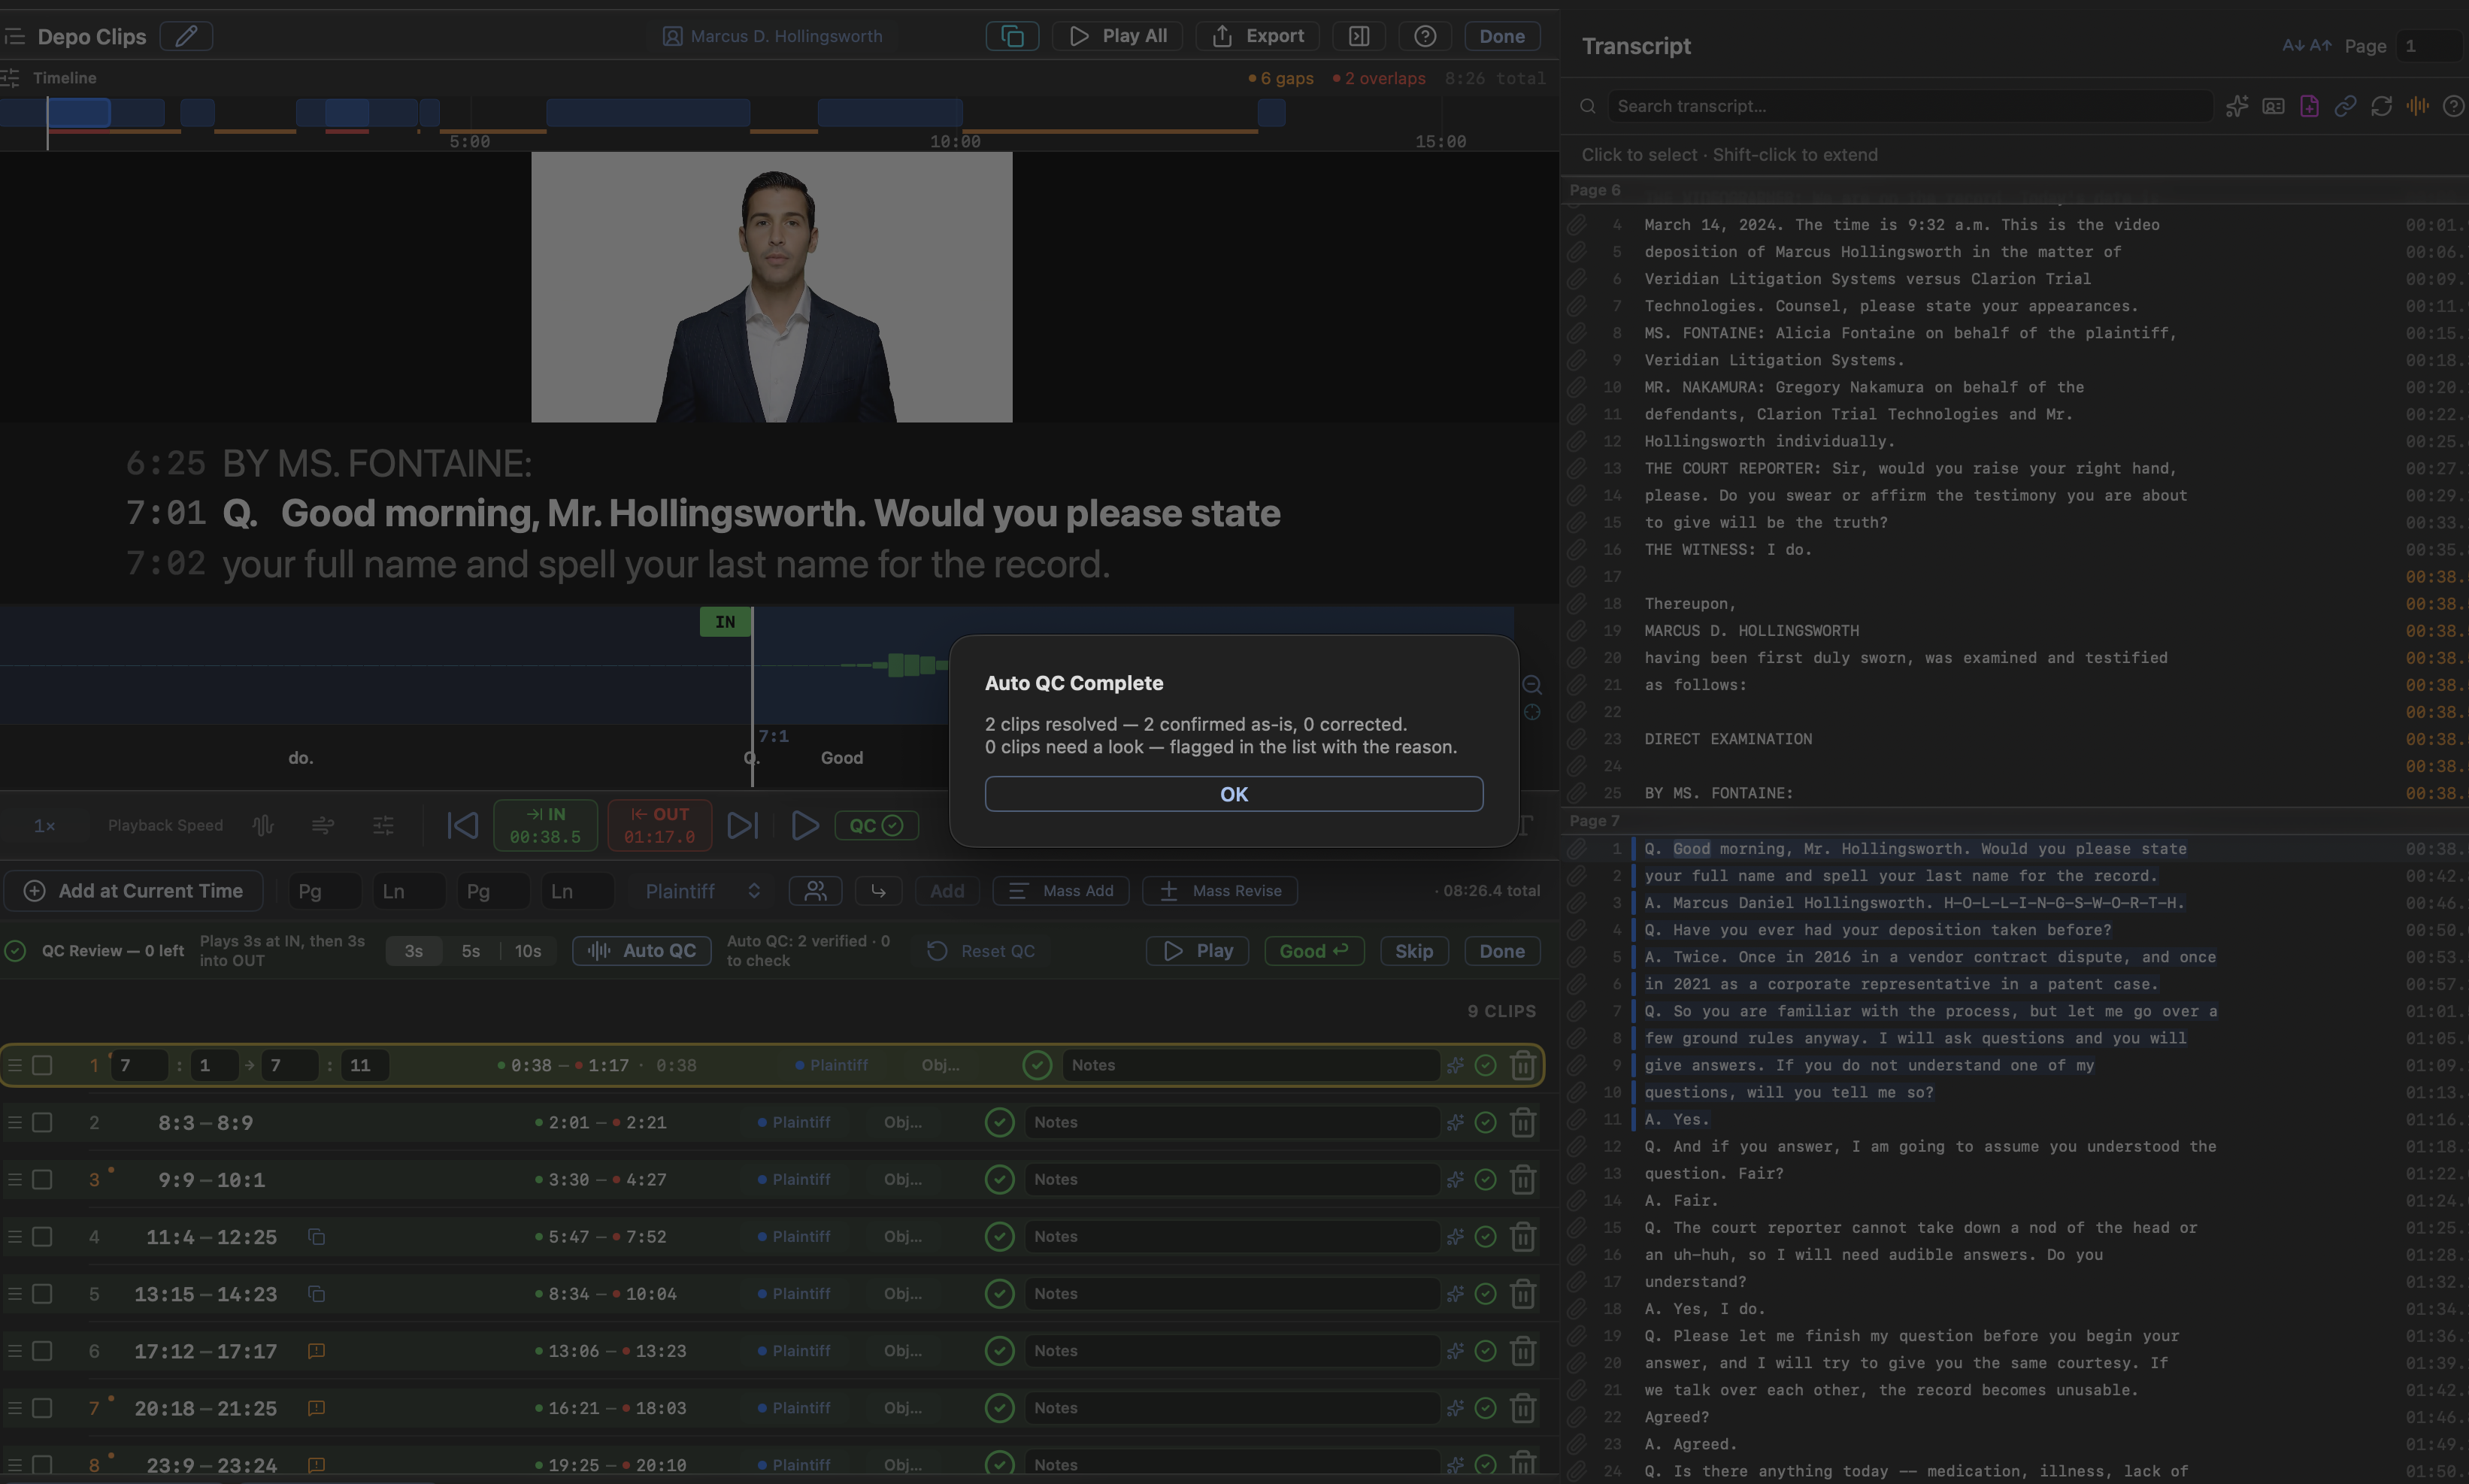
### The window
The editor is a floating window, so it is exempt from the app's global hotkeys: its own handlers own J/K/L, I/O, N/P, Space, and the arrow keys while it has focus. The playhead is saved to the deposition when the window closes and restored the next time you open the editor on that witness.
The deposition picker in the center of the toolbar shows which depositions are already on this list and adds any other in the case — the first added becomes the primary, the rest secondaries — which is how one list carries several witnesses' testimony. Only the focused deposition's clips can have their times edited; the rest show their IN and OUT buttons disabled until you switch to them. ⌘⌥0 shows and hides the transcript pane.
Warning: Remove This Deposition also deletes every clip in the list belonging to that deposition. Copy those clips to another list first if you need them.
### Creating clips
There are four ways in, and they all end up in the same list.
- Select transcript lines and press ⌘↩, or use Create Clip in the selection bar or on the row right-click menu (Create as… picks the party at the same time).
- Type a page:line range into the add bar's four fields, pick a party, and press Add or Add Counter. Times auto-fill from the sync data, and an exhibit is auto-linked if the transcript carries an exhibit marker inside the range.
- Press Add at Current Time for a 30-second clip starting at the playhead, with its page:line derived from the sync.
- Mark I and O during playback.
Clicking any word in the transcript plays from that word.
Partial-line clips. When a selection's start or end falls inside a line, a Partial Clip sheet asks how the trimmed excerpt should read: capitalize the first word or preface it with an ellipsis, and close it with a period, a question mark, or an ellipsis, with a live preview. Cancel abandons the creation rather than leaving a half-made clip behind.
Volume crossings. A range that crosses a video-volume boundary — however you enter it — splits automatically into one clip per volume, and the pieces are linked, so the whole designation plays as one run and exports as one file. Right-click → Unlink separates them.
On Macs with Apple Intelligence, the sparkles button on a clip row proposes a short label from that clip's testimony, on device, into its notes. Suggest All Labels in the overflow menu does the same for every note-less clip of the focused deposition in one pass, behind a banner you can stop at any point.
### Paste a designation list
The fastest way in from paper. The Mass add button in the add bar opens a window with a paste box on the left and a live validation column on the right — one row per line, checked as you type.
| Form | Meaning |
|---|---|
12:3 | Page 12, line 3 — a single line. |
12:3–14:20 | Page 12 line 3 through page 14 line 20. |
27:5-9 | Page 27, lines 5 through 9. |
Page 12, Lines 3-14 | The same range, spelled out. |
Page 5, Line 1 through Page 11, Line 25 | Cross-page, spelled out. |
12 │ 3-14, one row of a pasted table | A table copied out of a PDF, Word, or Markdown pastes as rows with a bar between the columns: page in the first column, lines in the second (or page, from, to in three). Separator and header rows are skipped. |
1 │ 7:1 │ 7:9 │ Plaintiff │ Hearsay, a Word designation table | Rows copied out of a Word, Excel, or Pages table, or a dropped .docx holding one, read one clip per row. Two page:line columns are the start and end, a row-number column is ignored, a column naming one of the case's parties sets that clip's party, and a column holding objection grounds (Hearsay, Foundation, Form…) marks the clip Objected with the grounds in its notes. Any other column goes to the notes. |
[Party: Defense] | Every range below this line belongs to that party. |
[Depo: Smith, Vol. 2] | Every range below this line designates that deposition. |
Several ranges on one line import as a single linked clip. Insert Party and Insert Deponent write those header lines for you, so one paste can mix parties and designate several witnesses' testimony into the same list, each range validated against its own transcript. Multi-volume witnesses need no headers at all: a range whose pages fall outside the current volume but inside exactly one other volume of the same deponent is routed there automatically (the row says so), and Apply brings that volume — and its video — into the list. The target deposition is named at the top of the window.
A backwards range, a range past the end of the transcript, and a line that is not a range in any accepted form are errors, and are skipped on apply. An overlap with an existing designation, a range with no video time yet, a range that does not begin with Q. or A., and a header naming a party or deposition the case does not have are warnings, and import anyway. Trailing text the parser cannot read is kept in the clip's notes rather than dropped silently. The footer holds a default party for rows above any header, Sort by Page and Line, and Merge page to page, which joins consecutive page-to-page ranges only when they belong to the same party.
Warning: The paste box is pre-seeded with the list's current designations, and Apply replaces the whole list — ranges in the list but not in the box are dropped. Edit the seeded text rather than replacing it wholesale unless a full substitution is what you want.
### Importing a highlighted PDF
A designation list served as a highlighted transcript PDF imports directly: drop it on the clip editor window, on the clip list, or on the Mass Add window. Highlights are read as quads and matched against the transcript text, which is what lets word-level trims carry into the clips instead of rounding everything to whole lines.
Mass Add then shows a card with one row per highlight color and a party picker beside it — defaults assigned by hue, yellows to plaintiff, blues to defense, greens to the court — plus how many clips start or stop mid-line and how many highlights were skipped. Highlights over page numbers, headers, and footers are skipped by design, so a skip count roughly equal to the page count means the highlighter swept the margins, not that the import failed.
### Scanning marked-up paper
Handed a paper transcript marked by hand, click Capture from Camera… in Mass Add. The Capture Designations window opens — the Document Camera without the jury switch (see Chapter 8, Scanning a document with a camera, for the rhythm). Put the phone on a stand, turn on Auto, and turn pages: each is photographed at full resolution once it holds still, straightened and turned upright, and shown in the strip so a page your hand covered can be removed and taken again — hundreds of pages go in without touching the Mac. Import as Designations (⌘⏎) sends the whole stack down the highlighted-PDF path below; keep Mass Add open while you capture, because that is who receives the pages — if it was closed, the panel keeps them and tells you. A scan made in Notes or Files and AirDropped over, or any photographed PDF dropped on the window, takes the same path.
The importer reads the pixels: highlighter bands become highlights of that color, with mid-line starts and stops kept as word trims; an ink bracket in the margin designates every line it spans; an ink underline designates the words above it. Pen marks appear on the card as a dark swatch with their own party picker. Scan in color on a dark surface so the page edges are found and the highlighter keeps its hue — a black-and-white scan loses the highlights. Ruled margins, cell borders, and header lines are ignored; a bracket that runs the full height of the page reads as one of those, so highlight a whole page instead.
Handwritten designations. A page with no highlighter or bracket marks at all — a legal pad with 12:4-13:10 down the margin, a sticky note reading p. 12 l. 4 to 13:10, an associate's list photographed on the way to court — is read as handwriting instead. The ranges land in the paste box on the left, one per line in the 12:4-13:10 form, where they parse and validate like anything typed there; read them against the page before Apply, because a pen's 1 and 7 are the recognizer's to guess. Every common spelling is understood: colons, dots or slashes between page and line, the legal-pad parens — 6(24)-7(12), 57(3-12), 66(21)-25 — a dash, "to", "thru" or "through" between the ends, 12:4-10 for a same-page range, page 12 line 4 – line 10 spelled out, and a bare 14:7 for a single line. Two ranges joined by c/w (cut with) become one clip, as they do when typed; two ranges on a line without it become two clips. A pad is read column by column, left to right, so a second column bracketed down the right side follows the first, and the notes in the margin are left out. A line the recognizer doubts — a page out of sequence with its neighbours (a designation list runs in transcript order, so a 46 between 64 and 67 is a misread), a range written backwards, stray marks around the numbers, or a line it could not read at all but which has the shape of a designation — arrives with a trailing (?) and shows a warning triangle with a note in the list, so the doubtful lines are the ones to check first. The same reading runs on a JPEG, PNG or HEIC dropped straight on the Mass Add window, and on a camera capture whose pages carry no marks. Print, by the way, works too — a typed designation sheet reads the same way.
### Refining clips
Every clip row shows its ordinal, range, party, IN and OUT times, objection state, include state, and notes. One click on the page:line opens four fields to edit it in place; they commit on ⏎ and re-derive the clip's times from the sync data.
The waveform. Selecting a clip auto-zooms the waveform to it, so you can see exactly where the audio in and out points sit. Click to seek. Drag the IN or OUT marker to move that boundary — it snaps to the nearest sync-line boundary within half a second, and the change is written on release. Show full waveform returns to the whole volume.
Linked-document preview. When the clip you are editing links a document, the video preview shows the jury's picture-in-picture layout instead of the plain video: the document fills the frame with the video floated in a corner. A Video corner picker sits under it — click a quadrant to move the float and watch it land, so you can place the video where it does not cover the part of the document that matters. When the document comes from a transcript link, the corner is saved on that link, so the transcript's right-click Video Position shows the same choice; a clip that carries its own link keeps the corner on the clip. Either way it is the one corner the jury sees and the Playback window previews, and moving it in the Playback window moves it here too. Linking a second document on a line that already starts a link replaces that link, so one line never holds two. On the jury display, linking a document animates the video zooming from full screen down to that corner and then reveals the page; turn this off for an instant switch in Settings ▸ General ▸ Jury Display ▸ Animate picture-in-picture.
The transport. The play button plays from the playhead and stops at the clip's OUT, which is how you audition a clip as the jury will see it; with no clip selected it just plays. Around it sit a speed menu, a Level audio toggle (the waveform button), and IN and OUT stamps at the playhead (⌥-click either to snap to the nearest word boundary). Right-click → Auto-Fill Times re-derives one clip's times from the sync data.
Level audio evens out a loud attorney against a quiet witness as the video plays, so you don't ride the volume by hand. It is a live compressor on the playback audio, non-destructive: it never changes the file, only what you hear right now, and it is off until you turn it on. It works alongside the per-deposition boost.
Reduce noise (the wind button beside it) cleans up the recording as it plays: a high-pass filter takes out low rumble and HVAC hum, and a gate pulls down steady hiss and room tone between words. Like leveling, it is a live, non-destructive filter, off by default, and the two can run together. It is not a spectral "AI" denoiser, but it handles the ordinary deposition problems well.
EQ (the sliders button) opens a three-band tone control — Low, Mid, and High, each ±12 dB — for audio that sounds muffled or boxy. Raise High to bring back the clarity a distant or covered microphone loses; the changes are audible as you drag. Flat resets it. Like the others it is a live, non-destructive filter that never changes the file, and it can run together with leveling and noise reduction.
Badges to read. A partial-line badge names the trimmed words. An objection badge lists categories detected in the testimony — "Form", "Hearsay" — and says outright that they are auto-detected and need verifying; they are heuristics to check, not rulings. A low-confidence badge counts the lines with estimated sync timing, and disappears once the clip is QC-verified. On a multi-witness list, a capsule names each clip's source deponent.
The waveform strip. Under the video, the audio waveform carries the transcript text at the moments it was spoken, drawn only from lines that were matched to the audio directly. A stretch of waveform with no words over it means speech the matching could not place, not silence, and it is the first place to look before trusting a cut there.
The timeline. Above the video, a timeline draws designations in their party color, counter-designations in the lane below, and sustained clips in red dashes, with a summary bar counting gaps, overlaps, and total runtime. Tap a bar to open that clip and mount its volume, or empty canvas to seek.
Undo. ⌘Z and the Undo/Redo buttons hold full-list snapshots — adds, splits, merges, deletes, reorders, batch operations, a whole Auto QC pass, a Mass Add apply. The stack is session-scoped and discarded when the window closes.
### Splitting, merging, and excising
Right-click a clip → Split at Playhead cuts it in two where the video is sitting; Merge with Next joins it to the clip below and joins their notes. In the transcript, right-click a line inside a clip for Split Clip Above This Line (this line starts a new clip) or Split Clip Below This Line (this line stays put, the next one starts the new clip).
Select lines in the middle of a designated passage and Remove Lines from Clip cuts them out — what is left stays designated as two clips around the hole, which is what a sustained objection in the middle of an answer usually calls for.
Sort by Page:Line in the bottom bar reorders the whole list into transcript order and renumbers it. Worth doing before any export: file names, the reports, and the Keynote deck all follow list order.
### Linking clips
Check the boxes on two or more adjacent clips and Link combines them into one linked clip. A linked run exports as a single file, counts as one clip in every total, moves as a unit when dragged, and collapses into one row with a chevron to expand its members. Use it for testimony that has to play as one uninterrupted excerpt — a question and its answer split across a page break.
The batch bar that appears with any checkbox selection also holds Copy, Cut, Set Party, Set Objection, Include, Exclude, counter on and off, and Delete. Every batch action is recorded as a single undo snapshot.
### What plays, and what doesn't
Three per-clip states decide whether a clip reaches the jury, and the list makes each one visible at a glance.
- Include in Playback / Exclude from Playback — the switch for a clip you want to keep in the list but not play. Excluded rows render at half opacity.
- Mark as Counter-Designation — tags the clip as the other side's, badged *counter* in the list and in the playback queue.
- Set Objection — none, objected (yellow), sustained (red), or overruled (green). A sustained clip is skipped by every playback path and by every export; objected and overruled play normally, and List Check flags anything objected but not yet ruled on before you walk into court. Right-click a single clip for the same four choices, and rule on it from Playback Mode as the judge speaks.
The counters beside the add bar report the clip count, the total runtime excluding sustained clips, the counter-designations, and the sustained clips in red.
Warning: Deleting a clip raises no confirmation dialog. The five-second Undo toast and ⌘Z are the only recovery paths, and both die when the window closes.
### Parties
Every clip carries a party, colored down the left edge of its row and into the timeline lanes. Manage Parties names the parties in your case and picks each one's color, so a mixed list reads as Plaintiff / Defendant / Cross at a glance. Each party's stored identifier — its name lowercased with underscores — is what a [Party: …] header in Mass Add matches against, and what a .dce exchange carries. Set Party on a right-click assigns one, or several selected at once.
### Batch cleanup
The More clip operations menu runs list-wide fixes, each recorded as one undo snapshot.
| Operation | What it does |
|---|---|
| Sync Times | Re-derives every clip's IN and OUT from its own deposition's sync data. The right repair after a re-sync or a realign, and safe on a multi-witness list. |
| Tighten Clips | Snaps every IN and OUT to the speech engine's word boundaries, leaving a short tail. |
| Trim Silences from Clips | Splits any clip that spans five seconds or more of silence into a head and a tail. |
| Merge Consecutive Pages | Joins page-adjacent ranges that belong to the same party. |
Auto-Fill Times in the bottom bar is the narrower tool: it fills clips that have no times at all, from the primary deposition's sync.
### Copy and paste
Clips cut, copy, and paste like text — within a list, between lists, between depositions, and between editor windows, on an app-wide clipboard that lasts for the session. A pasted clip keeps everything: times, range, party, include state, notes, counter flag, objection, linked exhibit with its page and snapshot, video corner, clear markers, and word-level trims. It keeps playing its original video, and a foreign deposition is registered as a secondary on the destination list. Revision marks deliberately do not travel, so a copy never inherits another list's review state. Right-click a list to copy or paste all of its designations at once; dragging entries onto a different list is a true move, not a copy.
A list from other software arrives as its own file: Import Clip List (.dce)… on the Clips & Playlists Add menu reads it and opens it in the editor, resolving each clip's deposition by identifier, then by name and volume, then by name alone, and stopping with a clear message when it cannot. Implausible page and line numbers are skipped rather than imported as broken clips, and ranges that straddle a volume boundary are split.
### Subtitles on clips
Captions come from the clip list, not from the raw transcript, and what you set here carries into playback, onto the jury display, and into burned-in exports alike.
Rewriting one caption line. Right-click a transcript line → Edit Subtitle Text… to override what the caption *says* without touching the transcript: retype the line, or leave it blank to drop it from the captions entirely. The same window turns individual words into highlights — tap the word chips, pick a highlight color and a text color, and those words render emphasized as the subtitle scrolls. The override travels into playback, the jury display, exported video, and the Clip Report, where emphasized words print bold on yellow. The transcript row gains a pencil badge, and Reset Subtitle to Original undoes it. Use it for the mis-transcribed word everyone in the room can hear, and for putting the emphasis where your argument is.
Find & Replace Captions (the arrows button in the transcript search bar) fixes a recurring transcription error across every caption in the deposition in one pass, with whole-word and case-sensitive options, and without changing the verbatim transcript or any report drawn from it.
Caption styling. The Caption styling… button on the transport opens the Subtitle Style window — the same controls as Settings ▸ Captions. It sets caption font size, the page:line stamp size as a fraction of it, background opacity, whether the current line is bold, and whether captions scroll smoothly or jump. The same panel sets the trim padding — the breathing room left around a clip once Tighten Clips trims silence away. Every caption setting applies wherever captions render — the editor preview, the impeachment player, the jury display, and exported video — and applies live, including to a jury display that is currently broadcasting, so set it during setup or between witnesses rather than mid-block.
### Linked exhibits
Link Exhibit to Selection… attaches a document to a passage of testimony: while those lines play, the exhibit fills the jury screen and the video shrinks into a corner. The picker is search-first, built for a case with thousands of exhibits: type an exhibit number or name to find the document, pick the page from a grid of page thumbnails, and a live preview shows the jury's picture-in-picture, the page with the video floated in the corner you choose, so you can place it clear of the part that matters before you commit. A 2×2 control moves the corner, a checkbox hides the video for document-only, and a version menu appears when the exhibit has saved markup snapshots.
Two shortcuts reach the same picker. A paperclip in each line's gutter opens it for that one line — faint when the line has nothing linked, filled when it does, so a glance down the gutter shows which testimony already carries an exhibit. The Link Exhibits workbench (the link icon in the transcript toolbar, or right-click a deposition in the Depositions tab → Link Exhibits…, since linking belongs to the transcript, not to any one clip list) is for linking many at once: the transcript down the left, the search picker and live preview on the right, and a running list of what you have linked. Click a line, find the document and page, place the video, Add Link, and it steps to the next line so a stack of exhibits goes in in one sitting. The whole run works from the keyboard: ↑ and ↓ walk the lines, typing in the search field and pressing ⏎ links the one document that matches and steps on, ⌘⏎ links whatever is already picked, and ⌘Z — or the undo button beside the session count — takes back the last link, clear marker, or End Exhibit Here. The right side follows the jury: click a line that is already linked (filled paperclip) and it shows the document, page, version, and video placement it carries; click a later line and it shows the document still in force there, or nothing past a CLEAR marker, with a note saying which; Back returns to the exhibit list. Or skip the button: drag a document from the picker, a page from its page grid, or a saved snapshot straight onto a transcript line and it links there — an exhibit dragged in from the main window's Exhibits list lands the same way, on page 1. A faint purple rail runs down every line where a document is showing, from the link to its end or clear, so coverage reads at a glance. Or skip the mouse: ↑ and ↓ move the active line and ⌘⏎ adds the link and steps on, so a stack of links goes in from the keyboard. Or let the record do it: Auto-Link… in the header lists every line where the transcript marks or admits an exhibit, matched by number to the exhibit in the case; uncheck any you doubt and press Link, and each goes in on page 1 for you to adjust. Right-click a line where a document is up for End Exhibit Here: the document stays through that line and comes off after it. Saved snapshots are listed under their exhibit in the picker (camera glyph, with the page they mark), and a link that names one shows the page with those marks to the jury during playback. Right-click a line for Clear Document Here: the document leaves the jury screen at that line and video returns full screen, the line wears an orange CLEAR tag, and the same menu removes it. The workbench is its own window, so the transcript stays usable behind it. Mark Up…, under the jury preview beside the video toggle, turns the document card into the presenter on that page with the workspace's drawing tools — Select, Highlight, Draw, Text, Line/Arrow/Ruler, Shape, Callout, Redact, Erase — each with the same right-click options as the workspace toolbar (color, thickness, text size, line and shape kind, callout style, redaction fill, erase all); Focus is there too — a region staged here is written to the exhibit, ready to fly to at trial — and the laser appears greyed, because this pane mirrors nothing to a jury display. A name field (pre-filled with the line and exhibit) and Save Snapshot sit beneath. Saving files the marks as a snapshot of the exhibit and picks it as the Version for the line, ready for Add Link; Back returns without saving. Marks clear when you turn the page, as in the workspace, so mark one page and save.
Linking also files the exhibit for you. Every document linked to a deposition's transcript is added to a binder named for that witness and date (for example, "Sarah Apex — 2026-03-10") in the Binders tab, created the first time you link to that deposition. Unlink an exhibit — remove the link, not a clear marker — and it drops out of that binder again, while staying in the case. So the witness's binder always mirrors exactly the exhibits their testimony refers to, with no separate step.
A linked run draws a span bar down the left edge of the transcript, covering every line the document is actually up for. It starts on the line that links the exhibit and runs until another link replaces it or a clear marker takes it down — not to the link's own end line, because playback keeps an exhibit on the jury display past the range it was attached to. The linking line carries a brighter cap, so two exhibits linked back to back read as two spans rather than one.
Right-click inside a linked run to change the Video Position, to End Exhibit Here so the link stops at that line, or to Remove Entire Exhibit Link. Clear Document Here plants the opposite marker: at that line the document comes off and the video goes back to full screen. Each clip row summarizes how many links and clears it carries; hover the document icon for a thumbnail of the linked page. A link belongs to the clip it sits in: while that clip plays the document stays up until a clear marker, but when playback moves to another clip — by auto-advance or a skip — the document comes down unless that clip carries a link of its own, so link the document on each clip that should show it. Edits made in the clip editor while the Playback window is running follow along: time edits take effect on the next clip boundary, and clips added, removed, or reordered rebuild the queue with the playing clip kept. Annotate while it plays: the linked page in the Playback window is a live canvas — hold W over it for the tool wheel, pick Highlight, Draw, Text, Line, Shape, Callout, Redact, or Erase, and mark the page; the second display shows each mark the moment the stroke finishes. The pop-out preview (the picture-in-picture button in the panel's header) is the same live page: draw there too, and hold W over it for the wheel. The panel's header names the armed tool with its color (and says "hold W for tools" until you have picked one), ⌘Z undoes the last mark, and the eraser button clears the page. While sending, a status pill beside the send button reads live, holding a frame, or not mounted — the first thing to check if the second display ever looks stuck. These are session marks for this playback only and nothing is written to the exhibit unless you press the camera button in the panel's header, which files them as a snapshot named for the clip and page; a link that names a snapshot starts from that snapshot's marks.
The toolbar's linked-document button hides every link for the whole list in one click — red for hidden, cyan for shown — which is the fast way to run a designation without its documents when the court has not admitted them yet. Exports honor links only when Include linked documents is on.
### The transcript pane
The right pane is the same transcript, synchronized to the video, with three toggles that are off by default and remembered once set: speaker badges puts a Q, an A, a C for court personnel, or a named attorney's surname beside each line; exhibit mentions flags the lines where an exhibit is marked for identification or admitted; and sync confidence highlights the lines whose timing was interpolated rather than matched.
Rows carry their own decoration: a silence capsule on gaps of five seconds or more, a Vol. N capsule where a new video file starts, a timestamp that turns orange when interpolated, a pencil where the subtitle was edited, and a highlighter where words were emphasized. Designated words wash in the owning party's color, so you can see what is already cut while you read. While the video plays, the line under the playhead washes and the word being spoken carries a darker wash of its own that walks along the line as the witness talks, so you can hear a cut point coming.
### Find testimony about anything
The sparkle toggle in the transcript search bar switches search from words to meaning: type "brake maintenance schedule" and up to five ranked testimony passages appear with their page:line ranges. Click one to select it, ⌘↩ to designate it.
### QC Review
The QC button steps through unverified clips and auditions each endpoint — your pick of 3, 5, or 10 seconds at the IN and the same into the OUT, right in the review banner. ↩ marks a clip good and advances, R replays, ↓ skips, ⎋ ends the review. The button is orange while any clip still needs QC and green once every clip is signed off.
Auto QC listens for you instead. It runs speech recognition over each unverified clip's IN and OUT windows and compares what it hears against the designated words: endpoints that land correctly are confirmed, endpoints that are off are moved to the right place, and endpoints it cannot judge get a ⚠ badge naming the reason, such as "IN is 4.2 s from the designated words — check the sync here". Endings are measured off the waveform: Auto QC finds where the last designated word fades back to the room's own background sound and puts the OUT a tenth of a second after it, so a final "t" or "s" is kept and the clip doesn't run on into the pause. A confirmed ending never cuts that word and never trails it by more than about a third of a second. When the next speaker comes in with no pause, the OUT goes in the brief gap between the two words; when the words run straight together, or the closing word is too faint to measure, the clip is flagged for you instead of guessed. One thing it does even when it cannot judge an ending: if the clip runs on for nearly a second past the last word anyone speaks, it cuts that dead air back to the same short tail a clean clip gets. The waveform is what proves the silence is there, so the trim can never clip a word — and the clip still carries its ⚠ badge, because knowing the tape went quiet is not the same as knowing which words the designation ends on. It reports verified, fixed, to-check, and skipped counts at the end. The whole pass is one undo snapshot, so ⌘Z reverses every moved endpoint in a single step. It checks every deposition's clips in the list in one pass. Reset QC beside it clears every clip's sign-off, confirmed IN/OUT points and Auto QC flags after a confirmation, so the list can be checked again from scratch; right-click a clip → Reset QC does the same for one clip. Neither touches the clip's times, and both are one undo step. When a clip's in or out point sits more than three seconds from where the current sync places its words — the usual sign of a clip made before a re-sync — the pass listens where the sync says the words are and moves the point there on a match. A re-sync itself now moves every clip of that deposition by exactly how far its lines moved, keeping any hand tuning, and sends the moved clips back to QC.
When the pass finishes — or you stop it — a dialog totals the run: how many clips were resolved (confirmed as-is or corrected) and how many still need a look. Flagged clips keep their ⚠ reason in the list.
Verified clips wear a green check and a green wash on the row. The check clears itself if the clip is edited afterward, so a stale checkmark is impossible.
### List Check
The shield button runs a read-only lint over the list before court; it reports and never changes anything. It finds video exhibits missing from the case and video files missing from disk, clips with no times, objections not yet ruled on, sustained clips that will be skipped, clips a revision marked removed but left included, missing linked exhibits, overlapping time ranges, IN or OUT points that cut into a word, lines with estimated sync timing, and how many clips are not QC-verified. Each finding carries guidance and a Show button that selects the offending clip behind the popup. Excluded clips are not linted, so excluding a clip is a legitimate way to clear a finding.
### Revisions
When an amended list arrives, Mass Revise (the ± button beside Mass Add) handles the whole revision in one pass: paste the struck ranges into the REMOVE box and the new ranges into the ADD box — both understand the same forms as Mass Add. Removes run first, then adds. Every input line produces a preview row naming exactly what will happen — a clip deleted, trimmed, split in two, changed, absorbed into an added range, or created new — with a summary counting each kind before anything is touched.
By default the revision applies to a copy of the list, with each change badged Added, Changed, or Removed for review. A checkbox edits the original in place instead, behind a confirmation that spells out the damage.
Warning: An in-place Mass Revise cannot be undone by ⌘Z or by anything else. It is the one operation in the editor with no recovery path. Leave the revision checkbox on unless you have a copy of the list or a .dce export to fall back on.
A list carrying revision marks shows a review banner with the change counts, an Export Report… button for a PDF of the changes, and Accept Revision, which clears the marks and permanently deletes the struck clips (undoable, but only until the window closes). Add Revision on a clip list's context menu clones the list and files it under the source, which is how to preserve the served-on-date version. Compare Revisions on the Clips & Playlists toolbar puts any two lists side by side with every add, trim, and strike marked, and exports a PDF of the changes only or every row. Rows are matched by start page:line, and only a user-meaningful difference counts as modified — re-running Sync Times on one side does not flag every clip as changed.
### Playback keys
Space plays and pauses. J and L jog reverse and forward through 1×, 2×, 4×, and 8×; K hard-pauses. Arrows step a frame, ⇧-arrows a second, Home and End jump to the ends of the volume. I and O mark in and out at the playhead, ⌘↩ creates a designation from the selection, and ⎋ clears it. N and P jump to the next and previous designation, ↑ and ↓ select the previous and next clip, ⌘↑ and ⌘↓ reorder. ⌘F focuses transcript search; ⌘⌥0 shows and hides the transcript pane. The full map is under the ? button. Every handler bails while a search or text field has focus, so you can type "J" into a search without jogging the video.
### Playing the list
Play All on the toolbar runs every included, timed designation straight onto the jury display, driven by a bar in the workspace. When you want a queue in front of you, a transport you can stop between clips, and switches for what the courtroom sees, use Playback Mode — the next chapter.
### Exports
The Export button opens one popup covering everything the list can produce. Video exports as separate MP4s (one per clip, a linked run counting as one) or as one combined file, at 480p through original resolution, with a progress strip under the toolbar tracking the run.
Burn subtitles into video burns the captions permanently into the picture, following the clip list — per-line overrides, word emphasis colors, and the results of Find & Replace Captions all appear. Show page:line in subtitles adds the stamp, and is reachable only while burn-in is on. Include linked documents burns each clip's linked exhibit in jury style, the document full-frame with the video in its corner, honoring hide-video links and clear markers.
Warning: Burned captions cannot be turned off downstream. There is no separate caption track — the text is part of the picture, so the court, opposing counsel, and any third-party playback system receive it permanently. Use the Courtroom preset when the file needs to be clean.
Smaller files (HEVC/H.265) roughly halves size at the same quality but can fail to play on older Windows PCs and third-party systems, so every courtroom preset leaves it off. Right-click a single clip → Export Clip as Video… writes just that clip, pre-named to match the batch pattern, so a re-cut replacement drops straight into a folder you have already delivered.
Clips that are excluded, sustained, or missing times are skipped by the exporter — run List Check first to see which. The report formats, the export presets, and the exchange files are covered in Reports and Exports.
Playback Mode
Right-click a clip list → Separate into Individual Clips to make one new list per clip — a linked run stays one clip — each named after the list and the clip's page:line range and slotted right under it; the original is untouched. Right-click a clip list → Play in Playback Mode to play a clip list for the jury end to end, from an attorney-side window built to drive it: the queue down the left, the video and its captions in the middle, the linked exhibit on the right, and a row of switches across the top deciding exactly what leaves your screen. On a clip that links a document, the middle preview composes the two the way the jury sees them — the document with the video floated in its corner — and a corner picker in the exhibit panel header moves the float live, on air if you are broadcasting. It is the review room the night before and the console you run the designations from in court. The item is disabled unless the list is playable — it needs a primary deposition and at least one clip that is included, time-coded, and not sustained.
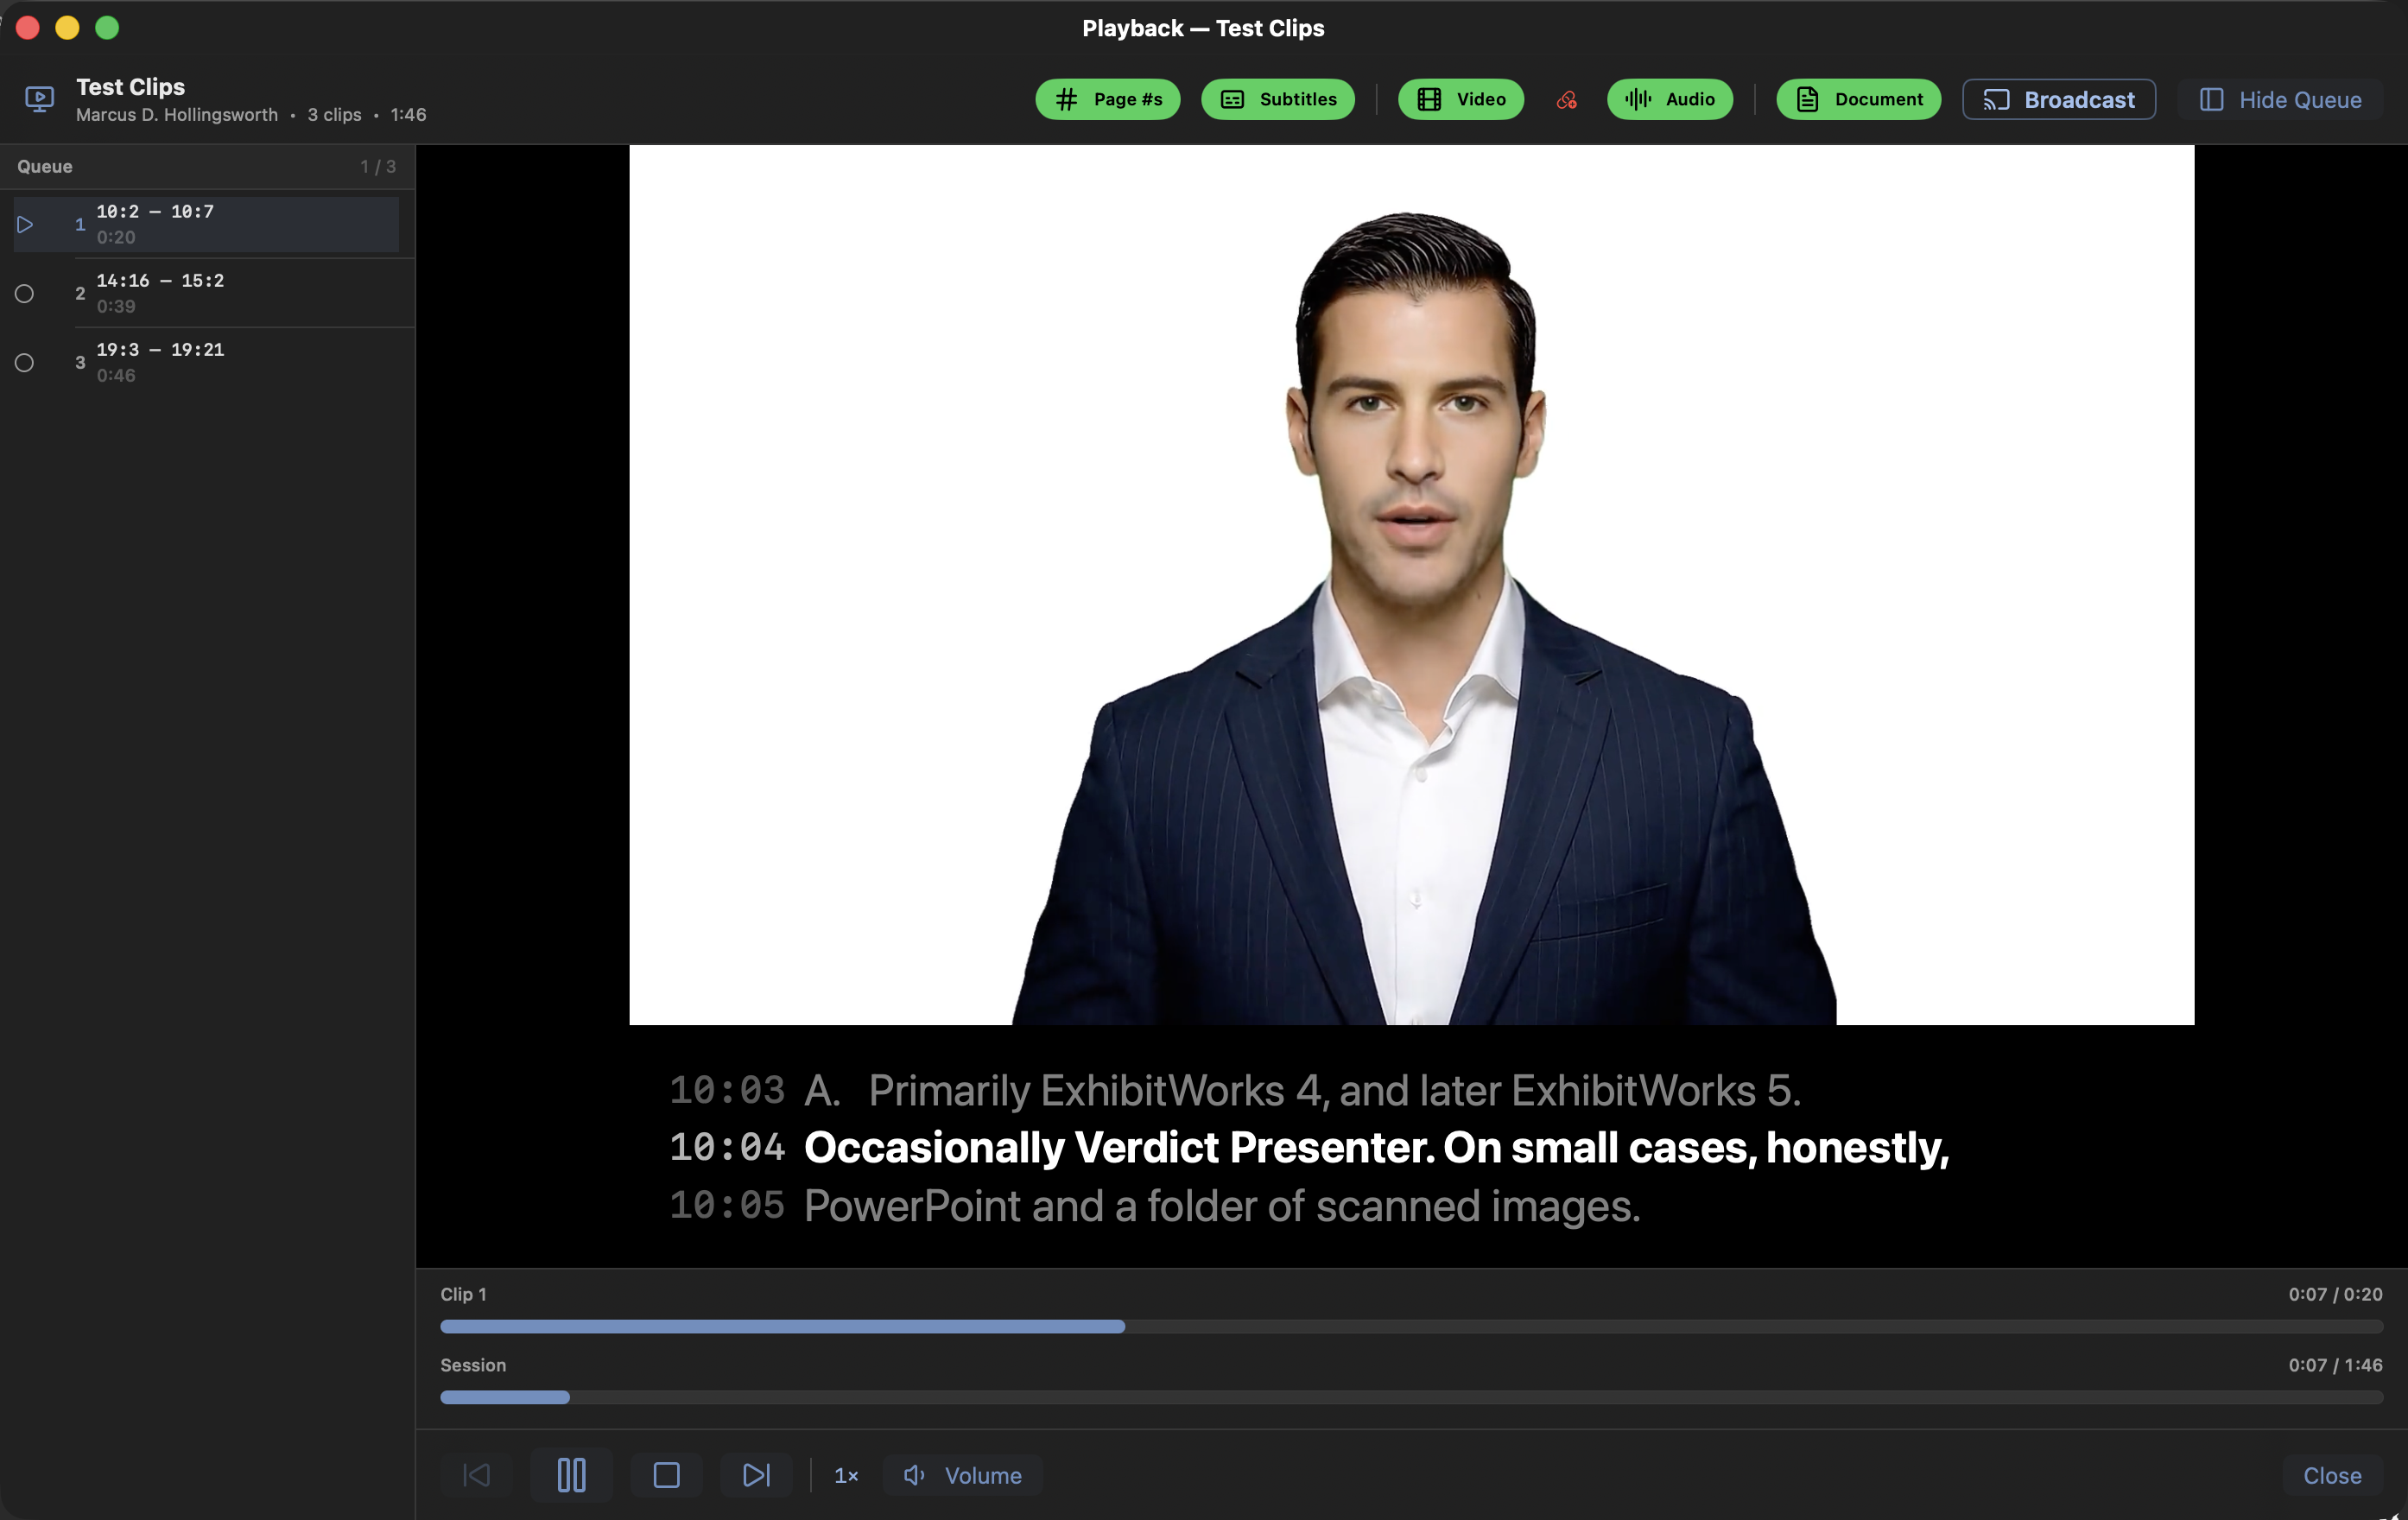
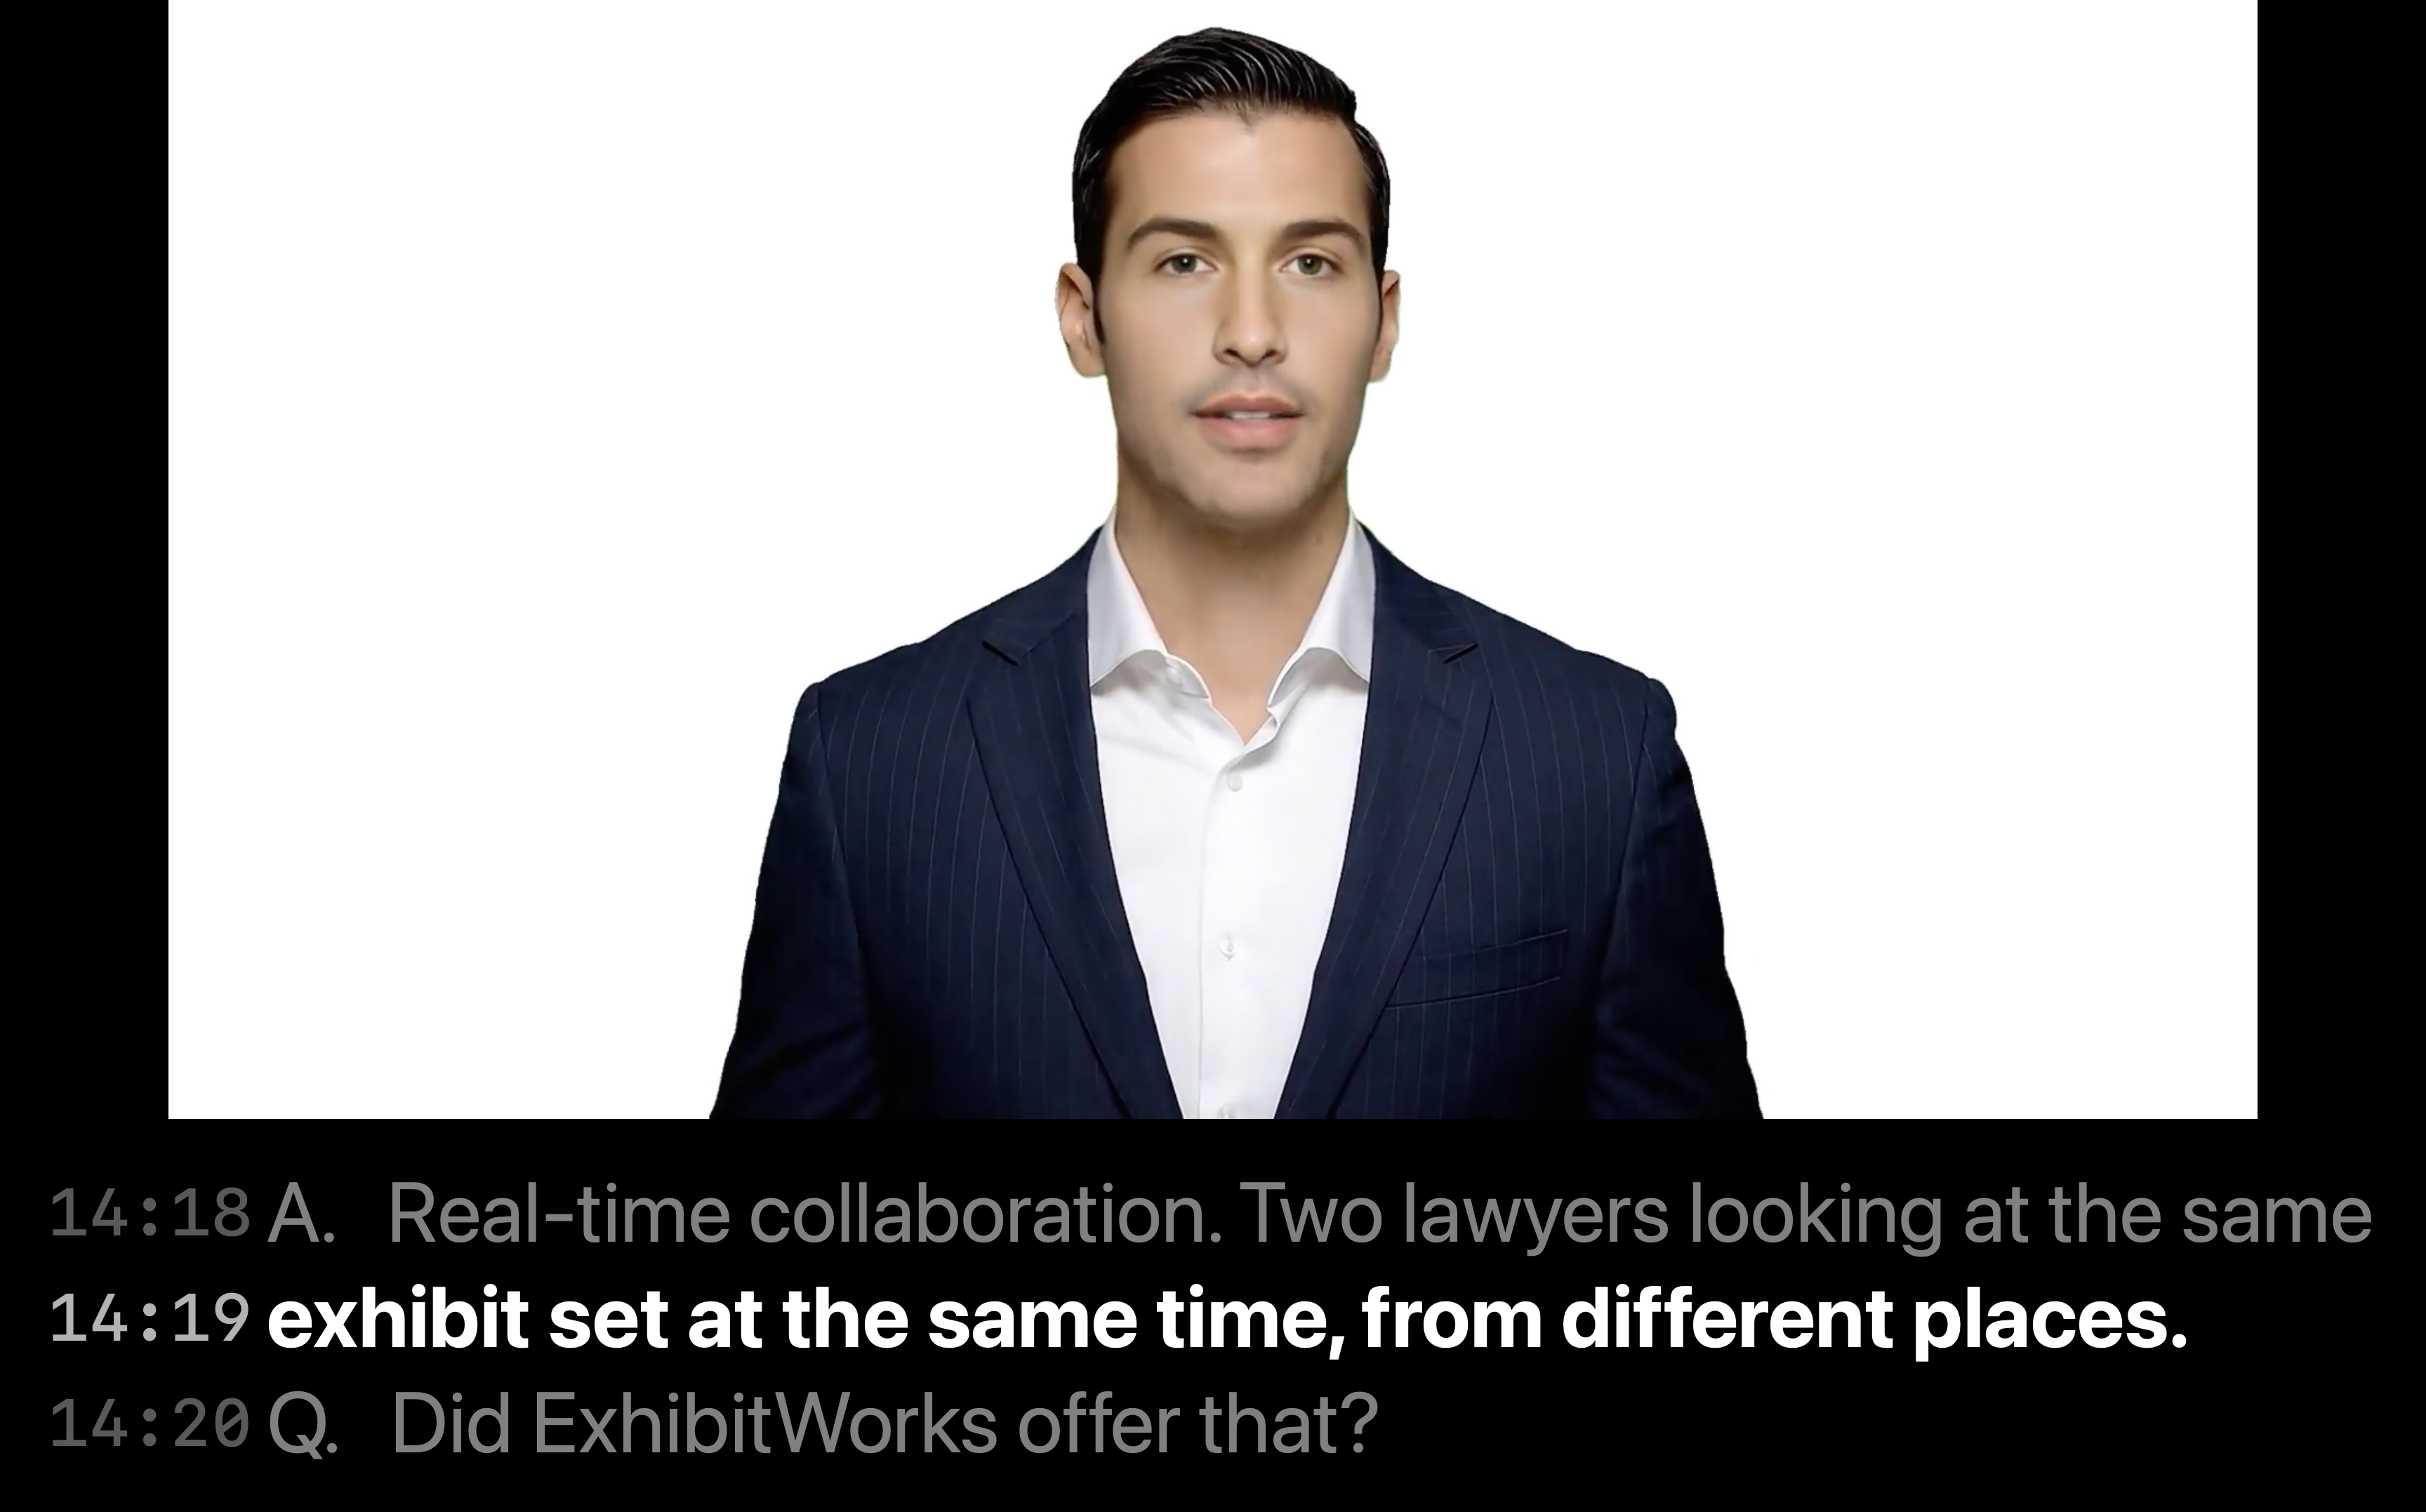
### The window
The header names the list, its deponent, the clip count, and the total running time. Down the left is the queue — every playable clip in order, numbered, with its page:line range, its length, a *counter* tag where one applies, and a document icon on the clips that carry a linked exhibit. Multi-witness lists badge each row with the deponent it came from. Double-click any row to jump there; the current clip stays highlighted and the queue scrolls to keep it centered. Hide Queue gives the video the whole window.
Under the video runs the same synced caption band the jury gets, page:line stamps and all — and it is clipped to the designation. Lines from before the clip's first word, or after its last, never appear, on your screen or theirs. Two bars track Clip and Session, so you always know both how far into this clip you are and how much of the day's designations remain. Both are draggable: drag the Clip bar to move within the clip on screen, or the Session bar to go anywhere in the day's designations — it steps over sustained clips exactly as playback does, so the bar measures what the jury will actually see rather than what is in the list. The move lands when you let go rather than while you drag, so the jury is not hauled through the footage with you, and it leaves playback paused if it was paused, so you can find a spot before anyone is looking. Before the first Play, dragging stages the playhead and Play starts from there.
Only clips that are included and time-coded are queued — the queue is the truth of what will play. A clip carrying a sustained objection keeps its place in the queue, greyed and struck through, and is skipped: playback steps over it, Next and Previous do too, and the clip count and runtime in the header leave it out. If nothing qualifies, the window says so instead of opening empty; run Check List in the clip editor to see which clips are disqualified. A deposition with no video attached reports that instead, and the fix is a volume in the Edit Deposition sheet.
Each queue row shows the clip's notes under its range when it has any, so you can see the topic of a clip before you jump to it. Rulings from the bench. A clip carrying an objection shows an Objected / Sustained / Overruled switch under its range in the queue. Sustain the clip that is playing and playback moves at once to the next clip that still plays, or ends the session if none is left; sustain a queued clip and it greys out in place. Overrule it and it plays again. Right-click any queue row to lodge an objection, or to clear one. Rulings are written to the clip list itself, so the clip editor, the reports, and the exporter see them immediately. A sustained row will not play on a double-click; flip the ruling first.
Unlike the clip editor and the impeachment player, this is an ordinary window rather than a floating one, so the app's global keys still work over it.
### Transport
Previous, play/pause, stop, and next; playback speed from 0.5× to 2×; and a Volume popover holding that deposition's audio boost, −6 to +18 dB, plus a Level audio switch. The boost belongs to the deposition, not the session — it persists between launches and applies to exports too. On a list mixing several witnesses it follows the deposition the current clip belongs to, so setting the level on one witness does not change the next. Level audio compresses the playback in real time to even out loud and quiet speakers, Reduce noise cuts rumble and steady background noise with a high-pass filter and a gate, and EQ is a three-band tone control (Low / Mid / High, ±12 dB) for muffled audio — raise High for clarity. All three are non-destructive live filters that never change the file and apply to whatever plays, including the jury broadcast.
Stop returns to the top of the list. Clips advance on their own, and a designation that crosses a video volume — or a list that designates several witnesses — swaps volumes and depositions without you doing a thing.
### Broadcast designations to the jury display
Broadcast sends the running playback to the jury display. If the jury view is not up yet it first asks which screen, with the same Displays picker as the control bar, and starts the moment you pick one. The title bar takes the red presenting tint and the summary reads "Playing deposition clips". Stop Broadcast puts the jury back on whatever it was showing before. Closing the playback window ends the broadcast too, and Esc on the jury side stops it from anywhere. Broadcast is an explicit send, so it lifts a blackout if one is on — and blackout, in turn, stops a running broadcast, exactly like it stops everything else. The two are never on at once, so the presenting indicator can always be believed.
What the courtroom sees depends on the clip. With no linked exhibit, the video fills the screen with the caption band beneath it. With a linked exhibit, the document fills the space above the caption band and the video shrinks into the corner that clip specifies. The caption band itself never moves: it is one full-width strip on the bottom edge in both layouts, and with captions off the document takes the full height. The jury never sees the queue, the progress bars, or your exhibit panel, and page:line reaches them only when the Page #s switch is on.
### The five toggles
Five pills sit along the header — green for on, red for off. They gate the jury feed only; your own window keeps showing everything, including page:line, so you can always see what you are about to turn back on.
| Toggle | Green | Red |
|---|---|---|
| Page #s | page:line stamp beside each caption line | stamps hidden |
| Subtitles | running caption band on the jury display | no captions |
| Video (⌘⇧V) | the jury sees the video frame | frame blanked; audio and captions keep running |
| Audio | sound plays | muted — one audio path, so your window goes quiet too |
| Document | the linked exhibit is shown | exhibit held back, video goes full screen |
The chain link between Video and Audio couples them, so one click blanks the picture and cuts the sound together — the objection button. Break the chain and they move independently.
Warning: Audio mutes the shared player, so muting takes your sound as well as theirs. When you need to cut the picture but keep listening, break the link and use Video alone.
### Resume where you left off in a designation list
Playback Mode remembers your place in every list, so a long designation block can be worked through across several sittings. With Auto-resume where you left off on (Settings ▸ General) it bookmarks the start of each clip as it begins, and reopening the list picks up at the clip you were on, silently — an ordinary quit and a crash both resume from the same place. With it off, opening a bookmarked list asks first: Resume loads at the bookmarked clip and time, Start from Beginning clears the bookmark. Neither starts playback; press Play when you are ready.
Closing the window offers to save the spot, and that alert intercepts both the Close button and the red window button, so a spot cannot be lost by closing the window the ordinary way.
### The exhibit panel
When the playing clip has a linked exhibit, a panel beside the video shows that exhibit's page. The button in its header pops it out into its own window with no controls — park that on a second monitor and keep the video and the controls in front of you. The panel is yours alone; what the jury sees is governed by the Document switch.
### Annotate during playback
Annotate the document while the deposition plays. The page in this panel is a live canvas, not a still picture: hold W over it for the tool wheel, pick a tool, and mark the page while the testimony runs — each mark reaches the jury display the moment the stroke finishes. The pop-out window is the same live page, so annotation can happen on the second monitor. The panel header names the armed tool, ⌘Z undoes the last mark, and the eraser button clears the page. These marks last for this playback only; the camera button in the header files them as a snapshot if you want to keep them.
### The designation playback bar
A list can also play without opening Playback Mode at all. The green Play button on a clip-list row in the Depositions tab and Play All in the clip editor both run the list straight to the jury display, driven by a bar in the workspace: the party color and label, the list name, the clip position, elapsed, total and remaining time with what plays next, a subtitles toggle, a caption-style button, and previous, play/pause, next, and stop. N advances, P returns to the previous designation, and Esc stops designation playback.
Choose the bar for a short block you are driving between questions, and Playback Mode for a long block where you want the queue, the exhibit panel, the switches, and a bookmark.
Impeachment Player
To impeach a witness with their deposition, select the testimony in the transcript and run Impeach… — from the button in the transcript header, from the row right-click menu, or from the transcript background. A dedicated player opens with the clip cued, live page:line captions, and its own transport, independent of whatever the jury display is doing until you choose to show it. The window title names the deponent and the range, and opening it records the impeachment in the presentation history even though no clip was saved.
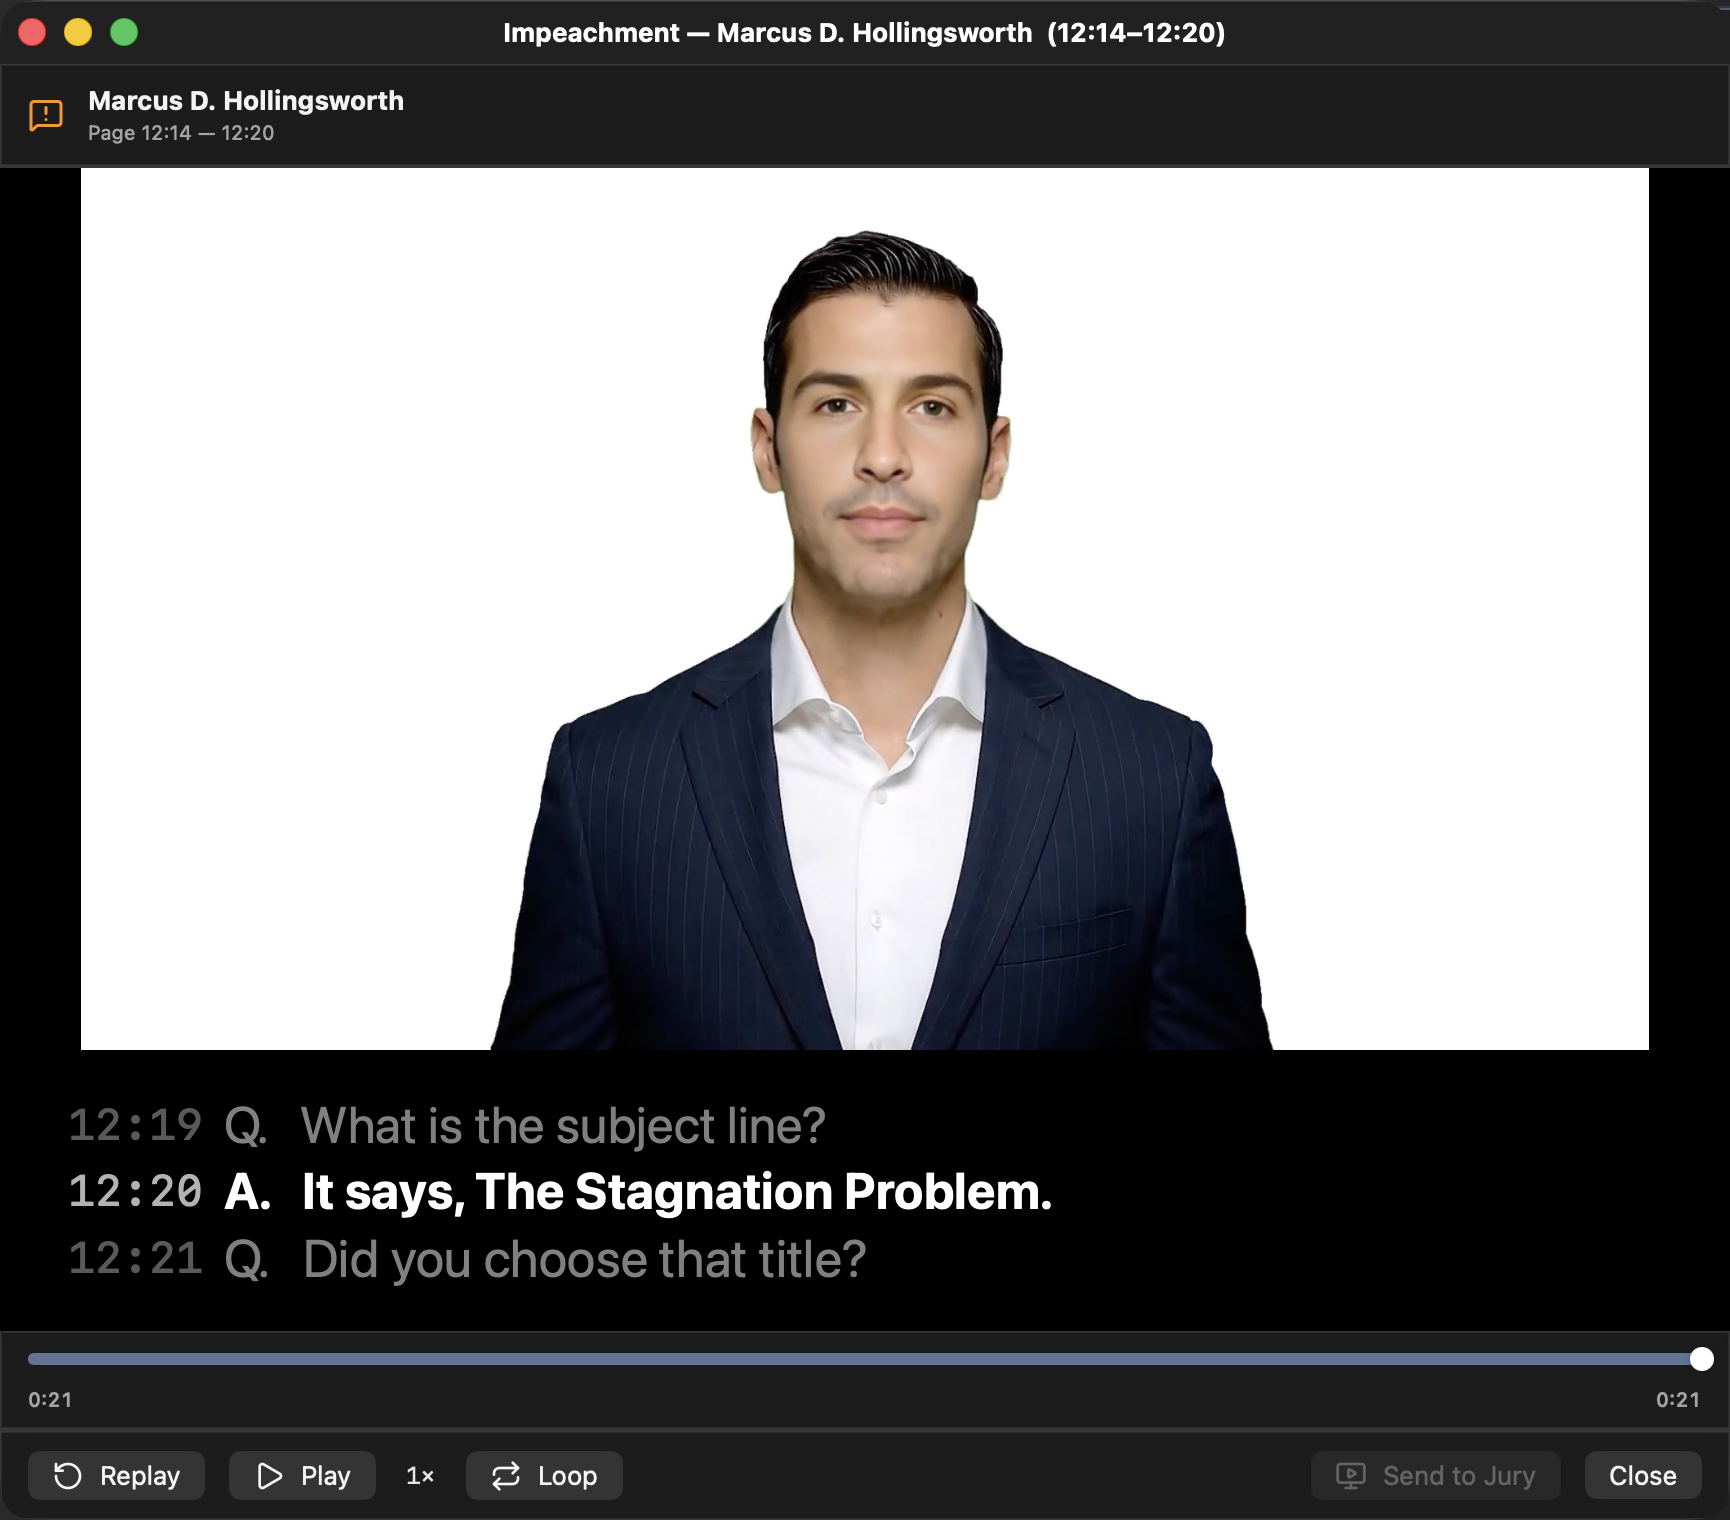
### The controls
Its controls are the ones you want with a witness on the stand: Replay runs the range again from the top, Loop keeps it running while you make the point, plus a speed menu, a scrubber, and Send to Jury — nothing reaches the courtroom until you press that, and it stays disabled while the jury display is closed. Beside it, a Subtitles switch decides whether the courtroom reads the testimony as captions under the video; your own caption strip below the picture is always on either way. Flip it at any time, including mid-answer. The captions are held to the impeached passage, so the band stops at the end of the range rather than running on into whatever was said next, and a range that crosses a volume boundary reads straight through the seam.
Playback pauses on its own at the end of the range unless Loop is on, and the clip is not unloaded, so Replay restarts instantly. The deposition's audio boost is applied before the first frame. The scrub bar previews locally while you drag and commits the seek only on release, so scrubbing never throws stray frames onto the jury display. A selection that crosses a volume boundary plays straight through the seam.
The window is a floating editor window and owns its keys: Space plays and pauses, K hard-pauses, L and J jog forward and reverse, arrows step a frame, ⇧-arrows a second, and ⎋ closes. Workspace shortcuts — publish, blackout, tab switching — do not fire while it has focus; click the main window first to use them.
Warning: Closing the player does not clear the jury display. If Send to Jury was used, the jury keeps showing the stream, frozen on the last frame. Cut the feed with Blackout (⌘⇧B) or publish other content before you close the window.
If Impeach… beeps and nothing opens, the deposition is missing one of the three things it needs: a sync, a resolvable time range, or an attached video. Check the sync report and the volume list — see Depositions and Transcripts.
### Text-only impeachment
Prefer the words to the video? Impeach with Text Only, on the same right-click menu, puts the selected testimony itself on the jury display — a white card with the quote and a deponent, date, and page:line cite along the bottom. It needs no video and no sync, so it works on any transcript, which makes it the fallback for a stenographic-only deposition and for reading testimony into the record.
While the card is up, a red IMPEACHMENT chip in the presentation control bar and a stop row in the Workspace Modes badge both end it, and ending it restores whatever the jury display was showing beforehand. Blackout, closing the jury display, and starting designation playback all end it automatically. The command beeps and does nothing when the jury display is closed or in Blackout.
### A citation from the bench
When the exhibit open in the presenter *is* a synced deposition transcript, the presenter toolbar carries a Play deposition range button. It asks for a start page, a start line, an end page, and an end line, then plays that range on the jury display without leaving the document. That is the path to use when a citation arrives verbally — from the bench or from opposing counsel — and the right witness is already on screen.
Scanning a clip's barcode also plays that designation through the impeachment player — see QR / Barcode Recall.
Playlists and Binders
Two organizing surfaces sit beside the evidence. Playlists are ordered runs of exhibits — build a playlist tonight and step through tomorrow's direct in the order you planned it. Binders are folders of shortcuts to anything in the case: exhibits opened at a specific page, and clip lists, each carrying attorney-only notes. Make a witness binder for a deponent, a binder for a motion, a binder for a trial day. Binders live on the fifth sidebar tab (⌘5); playlists live under Exhibit Playlists in the Clips & Playlists tab. Nothing is copied into either one. Both point at evidence that already lives in the case, so deleting a row removes the shortcut and leaves the exhibit where it was.
### Build a playlist
Open the Clips & Playlists tab and choose Add ▸ New Exhibit Playlist…, then name it. Selecting the playlist opens its detail pane, where Add at the bottom opens the Add Exhibits sheet: multi-select rows showing each exhibit's type icon, number capsule, name, page count or "Audio", and its admission label in green, amber, or red. Select All and Select None sit in the footer beside a running "N selected" count; Add Selected commits.
Exhibits can also be pushed into a playlist from the Exhibits tab. The Add to Playlist picker on an exhibit's context menu lists every existing playlist plus a New Playlist name field with Create & Add, so a playlist can be started from the exhibit you happen to be looking at.
| Control | Function |
|---|---|
| Title | Double-click to rename; ⏎ commits |
| Previous / Next with "N/M" | Steps the current position through the playlist; disabled at the ends |
| Entry row | Numbered circle (filled for the current item), type icon, exhibit-number capsule, name, and "Start at page N". Click one to route the detail pane to that exhibit at its start page |
| Drag, swipe, context menu | Reorders or deletes entries |
| Present | Opens the current exhibit in the presenter — see Presenting to the Jury |
Playlists queue exhibits only: documents, video, audio. Deposition designations queue through clip lists instead, covered in The Clip Editor and Playback Mode.
### Make a witness binder
The Witness Binder menu in the Binders toolbar lists every deposition in the case, and appears only once the case has one. Pick a deponent and Evidentiary assembles a folder named "⟨Witness⟩ — Witness Binder" holding that deposition's transcript, every clip list built from it, and every exhibit those clips link — de-duplicated and ordered by exhibit number. It is the fastest way to walk into a cross with one folder that has everything the witness touched.
Note: The result is a snapshot, not a live view. Linking another exhibit to a clip after the binder is built does not update the binder. Run Witness Binder again for that deponent to assemble a current copy.
### Build a binder by hand
New Binder in the bottom toolbar asks for a name, suggesting "Binder N", then creates the binder and selects it; rename it later from the hover control or the context menu. With a binder selected, Add Item opens a popover titled "Add Item to ⟨folder⟩".
| Control | Function |
|---|---|
| Segmented Exhibit / Clip List | Chooses the item type |
| Exhibit picker | Every non-media exhibit in the case |
| Page N of M stepper | Bookmarks the page the item opens at; multi-page exhibits only |
| Clip List picker | Each list as "⟨deponent⟩ — ⟨list⟩" |
| Notes (attorney only) | Free text, never shown on the jury display and never included in a publish |
| Add | Files the item; disabled until something is chosen |
Dragging is usually faster than the popover.
| Drop | Result |
|---|---|
| Exhibits from the Exhibits sidebar onto a folder row | Added as shortcuts; the files are not re-imported |
| A clip list dragged by its scissors handle | Appended as a clip-list item |
| External files or a Finder folder onto a folder row | Opens the import sheet with an "Adding to ⟨folder⟩" chip, and the new exhibits land in that folder |
| Anything onto the dashed Drop items here for a new binder row | Prompts for a name, then builds the folder with the dropped items in it |
Dragging over the Binders tab button for a moment springs the tab open so you can continue the drag into a folder. The tab button itself never takes the drop — it is a waypoint.
Binder membership can also be set from wherever the evidence lives: Add to Binder on a single exhibit's context menu, the binder button on the multi-selection action bar, and Add to Binder on a clip set's context menu all offer New Binder… plus every existing binder. The Exhibit Info inspector (⌥⌘I) has a read-only Binders section listing the folders an exhibit belongs to.
### Working a binder
A folder row carries an expansion chevron, a folder icon, the name, and an item count; clicking the row selects the binder and opens it, so its exhibits and clips list underneath. Right-click it for Open in Presentation Creator, Rename…, Set as Target Binder, and Binder Color (ten choices), with Delete at the bottom. Color is worth using — a red folder for the motion binder and a blue one for tomorrow's witness reads faster than names do under pressure.
Clicking an exhibit item opens that exhibit at its bookmarked page, and items with notes carry a notebook badge. If the underlying evidence has been deleted from the case, the row reads "Missing exhibit" or "Missing clip list" in red rather than failing silently.
Note: Deleting a folder or an item removes the binder entry only. The exhibits and clip lists it pointed at stay in the case.
The Binders sidebar has a Finder-style keyboard cursor: ↑ and ↓ step through folders, then items, then expanded pages; → expands or dives in; ← collapses. Focusing an exhibit item opens it in the detail pane, but clip-list items deliberately do not auto-open, so arrowing past one will not throw a clip editor window on screen mid-examination. Press ⏎ or click when you want it. A button at the top of the panel switches between Detailed View (rows with page thumbnails) and List View (compact text); the label names the mode you are switching to. Binders default to the compact list, stored separately from the Exhibits sidebar's setting.
### Presenting a binder
Present sits next to Add Item and steps through the selected folder in item order, sending each item to the jury display. An exhibit item publishes its bookmarked page — and if the item names a saved snapshot, that snapshot's annotations are rendered into the published page. A clip-list item starts designation playback of that list. Either way, any playback already running is stopped first. The button is disabled when the folder is empty or the jury display is closed.
While a binder is presenting, a script bar appears in the status stack with the binder name, the current item label ("Exhibit (page N)" or "Deposition Clips"), the position as "N of M", ‹ ⌘← and › ⌘→ to move, and Stop. Script Presentation also shows in the Workspace Modes badge in the title bar with its own Stop.
Warning: Present publishes each exhibit page to the jury display directly — there is no staging step and no separate Publish press. Review the folder's contents and each exhibit's admission status before you start.
### Build a slide deck
File ▸ New Presentation… (or Window ▸ Presentation Creator, or right-click a binder ▸ Open in Presentation Creator) opens the Presentation Creator: a window for putting exhibit pages and deposition clips in order and turning them into a slide deck — Keynote, PowerPoint or PDF. Keynote does the building, so it must be installed. A presentation is a binder, so it saves with the case, appears under Binders, and can also be run live from there.
- Pages. Choose Exhibits, pick an exhibit (a pen after its name means it has saved annotation versions), then click pages (shift-click for a range) and choose Annotations — the clean page or any saved version; pages that carry marks in that version show a pen badge, and each page's Bates number sits under it. Add Pages puts each picked page on its own slide at the end; press the + on one page to add just that one; or drag pages straight into the slide list, between the slides where they belong (dragging a picked page brings every picked page).
- Clips. Choose Clips, pick a clip list, then add single clips with + or the whole list with Add All. A whole list stays in step with the list: add, trim or reorder its clips and the next build follows.
- Title slides. Title Slide at the top of the slide list adds a slide with one large line on the background — a section heading or a point to land — and you type its text right in the list. Title slides are for Keynote only; running the binder live in Evidentiary skips them.
- Order. Every slide in the right-hand list shows a small preview of what it will look like — the page on the chosen background with its marks and sticker; click a preview for a larger look. Drag slides to reorder them; the pen button switches a page's annotation version, and × removes a slide. The count in the bottom bar says how many slides the deck will have (a whole clip list counts one per clip) and how many items make them.
- Background. Background in the bottom bar sets what every slide sits on: Black (the default), White, or Custom with a colour of your choosing. Clip titles, dates and names are white on a dark background and black on a light one. In Keynote the background is its own picture behind each page or clip, so you can change or remove it there later without touching the exhibit.
- Options. Options in the bottom bar holds the rest, and every setting is kept with the presentation: Exhibit label in the corner puts "24 PTE-024 · p. 1" at the bottom-left of each page slide as an editable text item; Transcript text and Page:line stamp choose what is burned into each clip; Clip size is the clip video's size (Original, 1080p or 720p); and Deliver as is Keynote (the deck opens there for you to save), PowerPoint or PDF — for those two, after the build you choose where to save the file, and the deck stays open in Keynote as well.
- Create. Create Slide Deck draws each page as large as it fits on a 16:9 slide in that background, exactly as the jury sees it — turned the way you turned it, with its court sticker and the chosen annotations — and places each clip with its title, date, page:line and deponent. Every slide carries presenter notes with the exhibit and page (and Bates number), or the clip's citation. The deck opens in Keynote for you to review and save. Keynote must be installed, and the first build asks for permission to control Keynote.
### The Target Notebook
One binder at a time can be the Target Notebook: the running log of what actually went in front of the jury. Set it with Set as Target Binder on the binder's right-click menu (Stop Capturing to This Binder turns it off), and a red REC badge marks the binder while capture is on. Setting a new one clears the flag everywhere else.
| Trigger | What is logged |
|---|---|
| Publish of a PDF or canvas exhibit | The exhibit and the published page |
| ⇧B, Add Page to Target Notebook | The exhibit and page currently staged — not the jury's page |
| Playing a designation list on the jury display | The clip list |
Entries de-duplicate, so flipping back to a page already captured adds nothing and replaying a list does not pile up rows. Turn it on for a hearing and the record of the day builds itself.
Note: Only the explicit Publish action on PDF and canvas exhibits is captured. Page flips in Live mode and Office exhibits are not logged automatically — use ⇧B for those. With no Target Notebook set, both the automatic capture and ⇧B are silent no-ops. ⇧B is the default binding and is rebindable in Settings ▸ Hotkeys.
QR / Barcode Recall
Every exhibit and every clip in the case has a scannable recall code. Print an exhibit with that code stamped on it, plug a USB barcode scanner into your Mac, and any page of the paper copy pulls the exhibit back onto your screen. It is a paper-to-screen shortcut for the podium, built for the moment opposing counsel names an exhibit you are already holding in your hand. There is no on-screen control and nothing to configure — the codes are generated when you print or export, and the scanner is read by the app whenever Evidentiary is frontmost.
### Print an exhibit with its recall code
Two commands live under PDF Tools on an exhibit's context menu.
| Command | Result |
|---|---|
| Print with QR Code… | Builds a stamped copy and opens the standard print dialog with it, scaled to fit and auto-rotated |
| Export PDF with QR Code… | Saves a stamped copy, default name "⟨label⟩ (QR).pdf" |
The stamp is a 40-point QR code — about 14 mm, comfortably scannable from paper — knocked out on white in the bottom-left corner of every page, opposite the Bates corner, with the exhibit label printed beside it. Page rotation is honored, so it lands bottom-left as printed no matter how the page is stored. Nothing existing is moved or covered, and exhibits with no redactions are copied as vectors, so quality is unchanged.
Note: If the exhibit carries redaction marks, the stamped copy is flattened first and the redactions are burned in. The paper handed to the judge, the witness, or opposing counsel can never show what the screen hides.
Both commands stamp in the background, so the print dialog or the save panel is the only interface they present, and a failure sounds the system alert tone rather than opening a dialog. Neither is available for Office documents.
### Codes on lists and reports
| Where | What it produces |
|---|---|
| Exhibit List Export ▸ Columns ▸ QR recall codes (PDF only) | One code per row on the printed exhibit list, in a fixed slot at the trailing edge. Default off |
| Clip Report (PDF) from the clip editor | One code per clip, automatically |
The exhibit-list toggle stays visible in the Text and Excel formats but those outputs ignore it — choose PDF if you want scannable codes. Deposition rows on the list carry no code. The exhibit list export itself is covered in Reports and Exports.
### Use a barcode scanner in court
Any USB barcode scanner in keyboard-wedge mode works. There is no driver, no pairing step, and no scanner setting inside Evidentiary.
- Keep Evidentiary frontmost. A scan is keystrokes, and keystrokes go wherever keyboard focus is.
- Click into the sidebar or the viewer first — not into a text field. The scan check runs after the text-field guard, so a payload scanned while a notes field, filter box, sheet, or alert has focus is typed into that field instead of recalling anything.
- Scan a code on a printed exhibit or exhibit list and that exhibit is staged in your viewer. It is not published. Publish it as usual once you have it.
- Scan a code on a printed clip report and that designation plays in the impeachment player — see Impeachment Player.
Note: Because a scan stages rather than publishes, a mis-scan is a private mistake. The jury display keeps holding the last publish until you press Publish.
### How it works, and why it is safe to leave on
A recall code carries one of two payloads: an exhibit identifier that stages that exhibit, or a designation identifier that plays that clip. A keyboard-wedge scanner types the payload as a rapid burst of keystrokes and finishes with Return. Evidentiary buffers those keystrokes for as long as they still form a plausible payload, then acts on the Return. Anything that is not a payload falls through untouched to the normal hotkey layer at the first impossible character.
Two behaviors matter with a jury in the box. Keystrokes are only held together while they arrive less than 0.30 seconds apart, so a longer pause resets the buffer and ordinary typing is never absorbed into a scan. And the scan check runs before every hotkey block, so a scan can never jog video, flip a page, or fire an annotation tool.
Note: Codes carry the case's own internal identifiers. A code printed from one case does not resolve in another, and an exhibit or clip that has since been deleted does not resolve either. An unrecognized scan beeps and nothing changes.
### Scanner setup
- Set the scanner to keyboard-wedge mode, often listed as "HID keyboard" or "keyboard emulation".
- Configure it to append a Return or Enter suffix. Without it, the payload never commits.
- Set it to a US keyboard layout so the
:characters transmit correctly. - Typical scanners emit 10 to 50 ms per character, well inside the 0.30 second window. A scanner configured with a deliberate inter-character delay may fall outside it.
- To test away from the courtroom, scan into any text editor. The payload should read
VK:E:orVK:C:followed by a 36-character identifier, then a new line.
Siri and Voice Control
Evidentiary registers eight shortcuts with Siri, Spotlight, and the Shortcuts app, so the surfaces most often wanted with both hands full can be reached by voice: the guide, the pre-trial check, a new designation, a new playlist, and the courtroom four — present an exhibit, set the jury mode, open or close the jury display, and start a designation list. Run the app once and the phrases work whenever your Mac can hear you. Every phrase must include the app name — that is how Siri routes the request.
| Shortcut | Category | Needs an open case |
|---|---|---|
| User Guide | Help | No |
| Pre-Trial Check | Trial | No |
| Create Clip | Clips | Yes |
| Create Playlist | Playlists | Yes |
| Present Exhibit | Trial | Yes |
| Jury Mode | Trial | Yes, with the jury display open |
| Jury Display | Trial | Yes |
| Play Clips | Clips | Yes |
All eight also appear in the Shortcuts app under Apps ▸ Evidentiary, where they can be run by click or wrapped into a larger shortcut, and — because macOS runs App Shortcuts from Spotlight — typing "Present Exhibit 12" or "Blackout" into ⌘Space offers them as actions. User Guide and Pre-Trial Check bring Evidentiary to the front. The case shortcuts answer "Open a case in Evidentiary first, then try again." when no case is open.
### Ask how to do anything
Say "Hey Siri, how do I sync a deposition transcript in Evidentiary" and the guide opens at Depositions and Transcripts. "Show me how to…" and "How to…" work the same way, and "Evidentiary help" or "Open the Evidentiary user guide" opens the guide at its chapter list.
| Say | Chapter opened |
|---|---|
| get started | Getting Started |
| import and manage exhibits | Exhibits |
| redact an exhibit | Exhibits |
| search exhibits | Quick Search and the Command Palette |
| present exhibits to the jury | Presenting to the Jury |
| compare two exhibits side by side | Side-by-Side Compare |
| show exhibits in Multi-View | Multi-View |
| sync a deposition transcript | Depositions and Transcripts |
| create deposition clips | The Clip Editor |
| QC check my clips | The Clip Editor |
| play a designation list for the jury | Playback Mode |
| impeach a witness | Impeachment Player |
| build witness binders | Playlists and Binders |
| use barcode recall | QR / Barcode Recall |
| use voice control | Siri and Voice Control |
| export reports | Reports and Exports |
| use keyboard shortcuts | Keyboard Shortcuts |
| troubleshoot problems | Troubleshooting |
Two topics share a chapter by design — "QC check my clips" and "create deposition clips" both land in The Clip Editor.
### Dictate a clip
"Hey Siri, make a clip from Smith in Evidentiary" starts a designation by voice. The deponent name is matched tolerantly in both directions, so "Smith" finds "John Smith, M.D." and the reverse. Siri then asks "What range? For example, page 12 line 5 through page 14 line 20." and you answer naturally.
| Spoken | Result |
|---|---|
| "page 12 line 5 through page 14 line 20" | 12:5 – 14:20 |
| "12:5 to 14:20" | 12:5 – 14:20 |
| "12 5 14 20" | 12:5 – 14:20 |
| "page 33 line 7" | 33:7 – 33:7 |
| "14:20 to 12:5" | Normalized to 12:5 – 14:20 |
Siri transcribes spoken numbers as digits, so the parser reads the digit runs: four numbers make a full range, two make a single-line clip. Three numbers are rejected as ambiguous, and a page or line of zero is rejected.
The designation lands in that deposition's first clip list — a list named "Voice Designations" is created if there is none — with IN and OUT times filled from the sync. If the transcript is not synced yet, the clip is still created and the times fill in later. A range that crosses a video-volume boundary is split into one clip per volume, exactly as every other creation path does. Editing what you dictated is covered in The Clip Editor.
| Situation | Siri answers |
|---|---|
| Clip added | "Added S:L to E:L for ⟨name⟩ — clip N in ⟨list⟩." |
| Clip added, transcript not synced | The same line plus "Times will fill in once the transcript is synced." |
| Range not understood | "I couldn't find page and line numbers in ⟨range⟩." with the example repeated |
| Deposition not in the case | "That deposition isn't in the open case." |
Thirteen phrases are registered for this one action, because there is no single way courtroom people say it: "Create a clip", "Make a clip", "Make a clip from ⟨deposition⟩", "Add a designation", "Add a designation for ⟨deposition⟩", "Make a depo edit", "Make depo edits", "Edit a depo", and the same three in "deposition" and in "depot" — Siri hears the spoken word "depo" as "depot", which is pronounced identically, so both spellings are registered. Add "in Evidentiary" to any of them.
Note: Deponent names are donated to Siri at launch, when a case is opened or created, and a few seconds after any change is saved. A deposition imported mid-session becomes speakable in "Make a clip from ⟨name⟩" shortly after the import finishes.
### Playlists and readiness by voice
"Hey Siri, create a playlist in Evidentiary" or "Make a new playlist in Evidentiary" asks "What should the playlist be called?" and creates an empty exhibit playlist at the end of the list. A blank name answers "The playlist needs a name."
"Hey Siri, run the pre-trial check in Evidentiary" — or "Is Evidentiary ready for court" — brings the app forward and opens the Pre-Trial Check window. The same window is on the Help menu and in the command palette.
### Present, switch modes, and start designations by voice
"Hey Siri, present Exhibit 12 in Evidentiary" (or "Show the jury Exhibit 12 in Evidentiary") brings the app forward, stages that exhibit, and publishes it if the jury display is open; with the display closed it stages the exhibit and says so. The exhibit is matched by its label, so "12", "P-12" and a fragment of its name all resolve, and Siri asks "Which exhibit?" when the phrase carried none.
"Set the jury display to Blackout in Evidentiary", "…to Staged…" or "…to Live…" — and the shorter "Black out the jury in Evidentiary" — switch modes exactly as the control bar's buttons do, and answer "The jury display isn't open." when it is not. "Open the jury display in Evidentiary" and "Close the jury display in Evidentiary" do what they say.
"Play ⟨name⟩ in Evidentiary" starts that designation list on the courtroom screen, the same as Play in Clips & Playlists; it is matched by name, and Siri asks which one when the phrase carried none. The same four actions are what a Stream Deck key or a Shortcuts automation can trigger, so one Shortcut can black out the courtroom screen, switch the Focus and dim the lights in one press.
### One limitation, and the way around it
Siri cannot take free-form numbers inside the opening phrase itself, so a range always arrives as the follow-up answer — two exchanges, still fully hands-free. For a one-step version, wrap either action in the Shortcuts app with preset or prompted values and name the shortcut whatever you prefer to say.
### If Siri does not respond
Siri must be turned on in System Settings ▸ Apple Intelligence & Siri. Beyond that, confirm registration before testing by voice again.
- Open the Shortcuts app and look under Apps ▸ Evidentiary. All four tiles should be listed. Typing "Evidentiary" into Spotlight shows the same shortcuts below the app.
- Keep exactly one copy of Evidentiary on the Mac, in the Applications folder. Extra copies — an older build in Downloads, a copy on an external drive, an unexpanded archive — register the same app identity more than once, and macOS can bind the phrases to a copy that is no longer there. Remove the extras, empty the Trash, then launch the Applications copy once so it re-registers.
- Include the app name in the phrase. "Make a clip" alone does not route to Evidentiary; "Make a clip in Evidentiary" does.
- For "Make a clip from ⟨name⟩", the deposition must exist in the open case. If it was imported moments ago, wait a few seconds for the name to be donated, or reopen the case.
Reports and Exports
Everything the case knows can leave it as a file. Export reports for the court and opposing counsel, hand the clerk an admitted-exhibits report at the end of the day, write clip video and designation reports out of the clip editor, and pass sync or clip data to another system in a format it can read. This chapter is the index: what each output contains and where the button is.
### The admitted-exhibits report for the clerk
The Admission Board — the gavel button in the Exhibits toolbar — shows every exhibit as one editable row, and its Export Clerk Report… writes the reconciliation document. The save panel defaults to "Exhibit Admission Report.pdf", and the file extension picks the format.
| Format | Contents |
|---|---|
| A formatted report grouped by status, ready to hand to the clerk or across the aisle | |
| CSV | Give the filename a .csv extension. One row per exhibit with Ex. No., Description, Bates Range, Witness, Type, Status, Basis, Note, and Status Changed |
This is the end-of-day report: what was admitted, conditionally admitted, rejected, excluded, or withdrawn, on what basis, with the sponsoring witness and the time each status last changed. Statuses themselves are set in the Exhibits tab and on the board — see Exhibits.
### The exhibits-shown record
File ▸ Export Exhibits Shown Record… writes a PDF of what actually went in front of the jury: the permanent first-shown date stamped on each exhibit, the count and the pages shown this session, and a chronological log of the session's presentations. First-shown timestamps are recorded permanently with the case, so this report is reliable months later. It answers a different question from the clerk report — not what came in, but what the jury saw and when.
### The exhibit list
Export List in the Exhibits toolbar opens the Exhibit List Export window, which builds a filing-ready inventory. Every choice in the window persists, so the next export starts where the last one left off.
| Section | Options |
|---|---|
| Include | Documents (on), Audio / video exhibits (on), Depositions (off). Turning off all three disables Export… |
| Columns | Exhibit number, Bates number range, Date added to database, Date first shown in jury view, and QR recall codes (PDF only). A description column is always present and always last |
| Format | PDF (letter portrait, headed with the case name, each section titled with a count), Text (fixed-width columns for filing and email), or Excel (one flat grid with the section name as a leading Category column, quoted per RFC 4180) |
Rows are ordered by exhibit number the same way the sidebar sorts, so the export matches what is on screen. Deposition rows come from the deposition record: the deponent's name, "(N volumes)" when there is more than one, and the date taken. A write failure leaves the window open and posts the reason in red beneath the form.
Note: The export is a snapshot of the case at the moment you run it. Re-run it after a day of rulings rather than editing the exported file.
### A flattened copy of an exhibit
The presenter toolbar's export button writes a flattened PDF of the open exhibit in two variants: Published Marks Only… — the version of the page the jury actually saw — or All Marks (Including Drafts)…. This is the correct hand-off format for the court and for opposing counsel, because annotations that live as separate overlay objects inside the case become ordinary page content in the export.
Warning: Blur redactions are burned into the exported file as real pixelation. The obscured content is gone from the output and cannot be recovered from it. That is the intent of the format — verify you exported the variant you meant before sending it. The copy in the case is unchanged either way.
### Clip video
The clip editor's Export button opens a popup with a Video section (present when the deposition has video) and a Reports & Data section (always present). The button is disabled while the list is empty or an export is already running.
| Control | Function |
|---|---|
| Separate clip files / One combined file | One MP4 per clip into a folder you choose, named <list>_NN_<label>.mp4 in list order; or a single MP4 end to end |
| Burn subtitles into video | Renders the caption text permanently into the picture |
| Show page:line in subtitles | Adds the page:line stamp under the burned captions; reachable only while burn-in is on |
| Resolution / Quality | Original, 1080p, 720p, 480p (default 720p) and High, Medium, Low (default Medium) |
| Smaller files (HEVC/H.265) | Switches the codec from H.264 to HEVC. Default off |
| Include linked documents | Burns each clip's linked exhibit into the frame the way the jury sees it. Default off |
| Also build Keynote deck | Builds a Keynote presentation alongside the clips; separate-files mode only |
| Number the clip files in order | On by default: each separate file starts with its list position (01 12-1 to 12-9 Smith 2026-08-01.mp4). Off drops the position (12-1 to 12-9 Smith 2026-08-01.mp4), for software that orders clips its own way; a range cut twice becomes (2). The Keynote deck follows either way. Separate-files mode only |
A Preset picker bundles the settings in one move: Courtroom 720p (720p H.264, no burned text, for third-party playback systems), High Quality 1080p (burned subtitles with page:line), and Email / Mobile (480p medium, for iPad review). Every preset leaves HEVC and linked-document burn-in off.
Warning: Any manual change to resolution, quality, HEVC, linked documents, or page:line silently flips the preset back to Custom. The setting you nudged is kept — only the label changes — but the popup is no longer describing a known-good courtroom bundle. If you want a preset's exact configuration, pick the preset last.
Warning: Burned subtitles cannot be turned off downstream. There is no separate caption track; the text is part of the picture, so the court, opposing counsel, and any third-party system receive it permanently. For a clean video, use Courtroom 720p.
Warning: Leave HEVC off for anything that will play on hardware you do not control. It halves file size at the same quality, but older Windows PCs and third-party trial-presentation systems may not play it. A file that will not open in front of the jury is worse than a large file.
Clips are skipped by the exporter when they are excluded from playback, carry a sustained objection, or have no IN/OUT times — run the list check in the clip editor first to see what will not make it into the output. Video rotation applies to playback only; it does not carry into exported clips.
To fix one clip after a batch, right-click that clip row and choose Export Clip as Video…. The save panel is pre-named to match the batch pattern, so the replacement drops straight into the earlier export folder, and it uses the current settings in the Export popup.
While an export runs, a progress strip shows a bar, the status, a time estimate, and a cancel button; the toolbar's activity ring and the Dock icon show the same progress, and if you are in another app when it finishes, a notification banner says so and reveals the file when clicked. In separate-files mode, Evidentiary checks the destination folder and warns before overwriting anything; Cancel abandons the export entirely and nothing is written.
### Designation, clip, full, and revision reports
Four PDFs and one text file describe a clip list at different depths, all from the Reports & Data section of the same popup. The two PDFs you reach for most — Export Clip Report… and Export Full Report… — are also on a clip list's right-click menu in the Clips & Playlists sidebar, which opens the list in the editor and goes straight to the save panel. Both are greyed on a list with no designations in it.
| Report | Contents |
|---|---|
| Designation Report (text)… | Each designation's page:line range, IN/OUT times, party, and notes, with [COUNTER], [OBJ: …], and [EXCLUDED] tags and totals. The only one that lists excluded clips — the working document for meet-and-confer |
| Clip Report (PDF)… | Title page with deponent, date taken, list name, and party legend, then the transcript text of each included designation. Emphasis words print bold on yellow to match the live subtitle. Carries a QR code per clip |
| Full Report (PDF)… | The same title page, then the whole transcript in condensed form with every included designation highlighted in its party's color. A list that designates several deponents or volumes gets one condensed section per deposition, each highlighting only its own ranges. Partial-line clips highlight only the designated words |
| Revision report (PDF), from Compare Revisions ▸ Export Report… | Changed, added, and removed clips with their prior ranges |
The two PDFs include only clips marked for playback; excluded clips do not appear.
Note: When the transcript is machine-generated, both PDFs carry a disclaimer on the title page and an amber banner across every page after it: "MACHINE-GENERATED TRANSCRIPT — NOT CERTIFIED. VERIFY AGAINST THE VIDEO RECORD." Report pages get separated in binders, so the warning travels with each sheet.
The revision report has two doors. When a list carries revision marks, a Revision review banner appears above it with counts, and its Export Report… writes the PDF and reveals it in Finder. Export it before you accept the revision — accepting clears the marks and permanently deletes the struck-through clips. The Compare Revisions window has its own Export Report… that first asks whether to include unchanged rows, then writes a PDF with ORIGINAL and REVISED cards, tinted sections per status, and a summary line reading "N modified · N deleted · N added · N unchanged · runtime A → B".
### Exchange formats
| Format | Carries | Where |
|---|---|---|
.tws — Evidentiary Word Sync | A deposition's line-level and word-level timings, sync status, deponent metadata, exhibit markers, and video filename hints | Right-click a deposition ▸ Export Sync ▸ Evidentiary Sync (.tws)…, or the Edit Deposition sheet. Import from the Depositions toolbar, the context menu, or by dropping the file |
.dce — Evidentiary Depo Clip Export | A clip list: page and line ranges, party, objection status, inclusion, counter flag, notes, and exhibit links. Never transcript text, never video | Clip editor ▸ Clip List (.dce)…, or a clip set's context menu. Import from Clips & Playlists ▸ Add ▸ Import Clip List (.dce)… |
| Sync XML | The onCue schema: one element per video volume, then one per transcript line with prefix, text, page, line, video start and stop, and a synced flag | Right-click a deposition ▸ Export Sync ▸ Sync XML…, or the clip editor's Export popup when the deposition has sync |
Both Evidentiary formats carry an Evidentiary icon in Finder; double-clicking one, or dropping it on the Dock icon, imports it into the open case — a .tws as a new deposition, a .dce into Clips & Playlists.
.tws is the full-fidelity sync format between Evidentiary users. On import, sync entries are replaced wholesale, deponent metadata fills blanks only and never overwrites a name or date you set, and exhibit markers are kept only where the receiving case has that exhibit.
.dce grows an accessory checkbox in the save panel when the list contains partial-line clips: Flatten partial-line clips (for third-party presentation software), off by default. Left off, word-level trims round-trip intact between Evidentiary users; turned on, partial-line clips collapse to whole-line times so older systems can read the file. On import, a .dce is matched to a deposition by exact identifier, then deponent name plus volume, then deponent name alone.
Note: Sync XML always flattens partial-line clips to whole-line times — the schema has no place to record a word-level trim. Where word-level precision matters, use .dce with flattening off. A Sync XML export failure is logged rather than alerted, so confirm the file exists on disk afterward.
Warning: The .tws container is compressed and scrambled, not encrypted. Treat a .tws file as you would any unprotected work product.
### Hand a synced deposition to someone without Evidentiary
EvidentiaryVideo is a separate, free companion player for a deposition's synced video and transcript. A colleague, an expert, opposing counsel, or a witness can review synced testimony on a Mac or a Windows PC with no license, no case package, and no installation of Evidentiary itself.
The hand-off is two steps: export the deposition's sync as a .tws file, then send it together with the deposition's video files, keeping them in one folder. The player opens a .tws from File ▸ Open…, from a drag onto the window, or automatically when the .tws and its videos sit in the same folder as the player.
Note: A .tws carries timings and metadata, not video. Without the video files beside it, the player opens the transcript and shows a "Video file not found" overlay with a Locate Video… button.
| Control | Action |
|---|---|
| −10s / +10s | Skip back or forward ten seconds |
| Play / pause | Space also works |
| Seek slider | One continuous timeline across every volume in order |
| Speed | 1×, 1.25×, 1.5×, 2× |
| Transcript panel | Every line; click one to seek the video there |
| Search field | "Search text or page:line" — ⌘F focuses it, Enter next hit, Shift+Enter previous, ⎋ clears |
Lines belonging to a volume with no video attached are marked visually, so it is clear why clicking them does not move the picture. Scrolling by hand reveals a Resume auto-scroll button that recenters on the playing line. ← and → step five seconds, and every key is ignored while a text field has focus, so typing a search query never moves the video.
### Everything else
| Output | Where |
|---|---|
| Slide deck (Keynote, PowerPoint or PDF) from pages and clips | File ▸ New Presentation… — see *Build a slide deck*. |
| Keynote deck from a clip list | Also build Keynote deck in the Export popup, or Export to Keynote… on a clip set's context menu. One slide per clip, fixed at original resolution and high quality, with the deponent name and the clip's notes carried through |
| Deposition report (CSV) | Depositions ▸ Add ▸ Export Depo Report…. Date synced, deponent, depo date, and length, for depositions with video volumes. The file to hand a trial coordinator who needs video time by witness |
| Sync health report | The Report button in the Edit Deposition sheet. On-screen accuracy, per-volume alignment, gaps, backwards timings, and truncation warnings, with Copy Report to the clipboard |
| Diagnostics log | Help ▸ Export Diagnostics…. The last hour of application log as a timestamped text file, saved where you choose and revealed in Finder |
Note: When presenting from Keynote in the courtroom, the jury window drops its window level while Evidentiary is inactive so Keynote can present over it.
Keyboard Shortcuts
Press ⌘/ anywhere for the live keyboard shortcuts sheet. It always shows your current bindings, including any you have changed, so it is the one reference that cannot go stale. Thirty-six workspace actions are rebindable in Settings → Hotkeys; the fixed navigation keys, the menu shortcuts, and the clip editor's own key map are not.
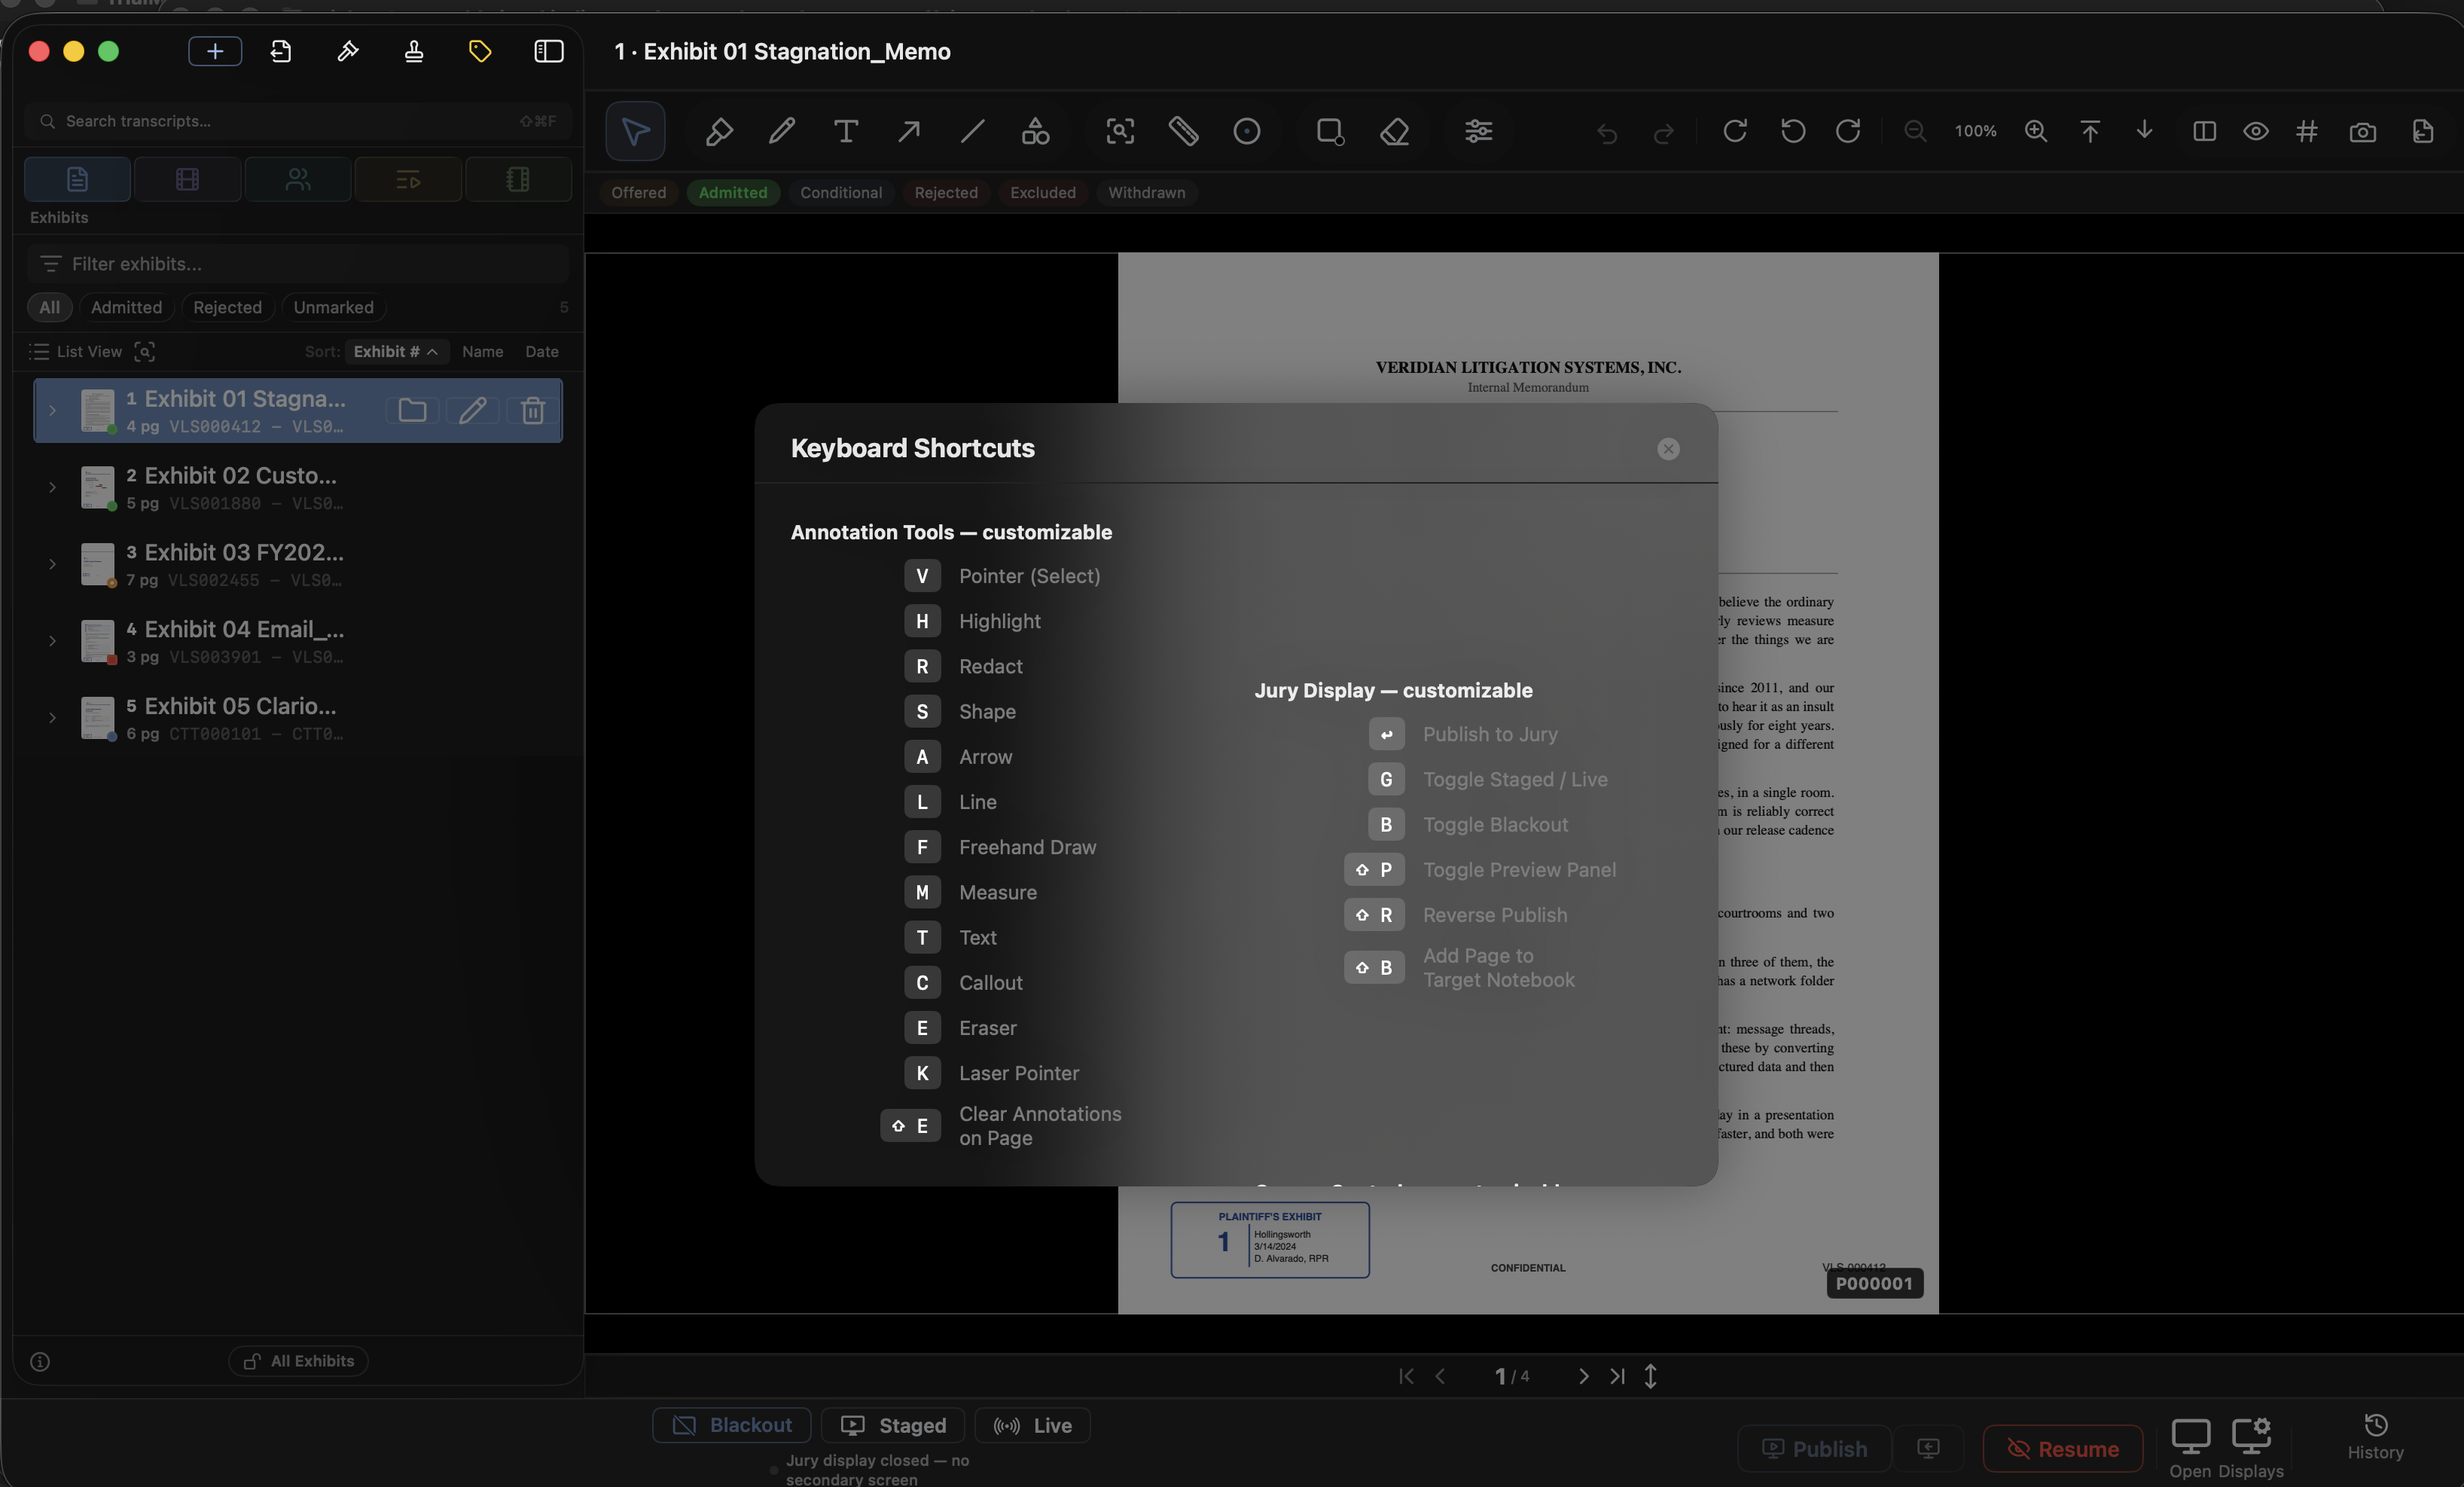
### The shortcuts worth memorizing
| Key | Does |
|---|---|
| ↩ (Return) | Publish staged exhibit |
| Space | Play / pause video |
| Space-Space | Quick Search + command palette |
| ⌘Z / ⇧⌘Z | Undo / redo — marks in staging, clip edits in the clip editor |
| ⇧⌘J | Open jury display |
| ⇧⌥⌘J | Close jury display (⌘⎋ also works, from anywhere) |
| ⌘1 – ⌘5 | Switch sidebar tab (Exhibits … Binders) |
| B (or ⇧⌘B) | Blackout |
| G | Flip Staged ↔ Live (⇧⌘S / ⇧⌘L pick one directly) |
| \ | Side-by-side split (enter with this page and the next) |
| Tab | Switch focused split pane |
| ⌘⇧V | Blank the jury's video in Playback Mode (audio and captions continue) |
| ← → | Page turns (frame steps in the clip editor) |
| = / - | Zoom the staged page in / out |
| J / K / L | Shuttle video back / pause / forward |
| ⌘F | Find on the staged document |
| ⇧⌘F | Search all transcripts |
| ⌘S | Save markup snapshot |
| ⇧⌘T | Trial Mode on / off |
Warning: Space never publishes. The single-tap and double-tap detector always consumes Space, and Publish to Jury is bound to Return. Do not train yourself to reach for Space while the jury is watching.
### Rebindable hotkeys
These are the actions listed in Settings → Hotkeys, in the four categories the pane uses. Only the key is rebindable — where a ⇧ is shown, the Shift modifier belongs to that action and cannot be removed.
Annotation Tools — thirteen actions, live whenever an exhibit is on the canvas.
| Action | What it does | Default |
|---|---|---|
| Pointer (Select) | Returns to the resting selection tool. | V |
| Tool Wheel | A radial picker opens under the pointer while you hold W: glide onto a tool and release to arm it; release anywhere else and it just closes. Every tool keeps its own color, and each wedge whose tool draws in a color is tinted with that tool's color, strongest at the hub and fading to grey at the rim, so the wheel shows what each tool will draw with before you pick it; the icons themselves stay plain. The hub shows the color of the tool in question — the last colored wedge you crossed, or the armed tool — with the app's eight swatches around it (yellow, orange, red, pink, green, blue, black, white). Glide over a tool, move into the hub, and click a swatch while holding: that tool takes the color. The armed tool recolors at once; any other keeps it for the next time it is picked, here or by its hotkey. Colors are remembered across launches, and a color chosen in the markup bar counts too, since every tool comes back in whatever color it last drew with. Right-click a wedge to arm that tool and open the same options its markup-bar button offers — line, arrow, or ruler and thickness on Line; rectangle, ellipse, or triangle, fill, opacity, and blend on Shape; text size on Text; Follow and Smart on Highlight; the fill on Redact; the Callout, Focus, and Laser popovers, including the laser's Magnifying Glass — hung off the wedge so the wheel stays visible; opening one keeps the wheel up after you let go of W, until you pick a tool, click elsewhere, or press Escape. Two keys work while the wheel is up without opening anything: [ and ] step the line thickness down and up, and M swaps the laser between the dot and the Magnifying Glass (the laser wedge wears whichever is on); the badge under the wheel names what changed. The wheel opens with the armed tool's wedge ringed, and the trackpad ticks as the pointer crosses into a wedge or onto a hub swatch (macOS plays that tick only with Force Click and haptic feedback turned on in System Settings ▸ Trackpad). Every wheel offers the same eleven wedges — Select, Highlight, Draw, Text, Line, Shape, Callout, Focus, Laser, Redact, Erase — over the staging page, the jury display's page, a Link Exhibits page, and the Playback window's linked page. A tool that cannot do anything on the page you are on is greyed rather than missing, so the wheel's shape never changes under you: in Link Exhibits the laser is greyed, since nothing there is mirrored to a jury, and hovering it says so. The digits 1 through 9 arm a wedge outright while the wheel is open, counting clockwise from Select at the top, and the name badge under the wheel shows each wedge's number. Settings ▸ Hotkeys can make the wheel stay open until you pick — a tap opens it and a second tap picks — for when holding a key and steering at once is awkward, and Tool wheel springs open turns the open-and-close animation off for a flat cut. Reduce Motion flattens it either way. | W |
| Highlight | Drag to highlight a region of the page. | H |
| Redact | Drag to draw a destructive redaction box. | R |
| Shape | Rectangle, ellipse, or triangle — the last kind you used. | S |
| Arrow | Drag from A to B to draw an arrow. | A |
| Line | Same gesture as Arrow, no arrowhead. | L |
| Freehand Draw | Free-form pen drawing. | F |
| Measure | Drag to measure a distance on the page. | M |
| Text | Click to place a text label. | T |
| Callout | Drag a region to magnify in a callout box. | C |
| Eraser | Click an annotation to remove it. | E |
| Laser Pointer | Live pointer dot, or a magnifying glass (circle, rounded square, or rounded rectangle) in Magnifying Glass mode; with the dot, hold the button to draw a line that fades on release — the magnifying glass never draws; hold Shift to move either one straight across or straight up and down; commits no mark. | K |
| Clear Annotations on Page | Removes every annotation on the current page, undoable. | ⇧E |
Jury Display — six actions. These are live in every context and never share a key with anything else.
| Action | What it does | Default |
|---|---|---|
| Publish to Jury | Pushes the staged page to the jury (Staged mode only). | ↩ |
| Toggle Staged / Live | Switches between publish-on-demand and real-time mirror. | G |
| Toggle Blackout | Cuts the jury display to black. | B |
| Toggle Preview Panel | Shows the jury preview panel. | ⇧P |
| Reverse Publish | Pulls the jury's current exhibit and page back into your viewer. | ⇧R |
| Add Page to Target Notebook | Files the staged page in the Target Notebook. | ⇧B |
Video Playback — six actions, live only while a video is loaded.
| Action | What it does | Default |
|---|---|---|
| Shuttle Back 5s | Skips the loaded video back five seconds. | J |
| Pause Video | Pauses only; Space toggles. | K |
| Shuttle Forward 5s | Skips forward five seconds and resumes. | L |
| Set Video Start Point | Marks the current time as the start point. | I |
| Next Designation | Jumps to the next designation during clip playback. | N |
| Previous Designation | Jumps to the previous designation. | P |
Canvas Controls — fifteen actions, live while an exhibit is mounted.
| Action | What it does | Default |
|---|---|---|
| Toggle Side-by-Side Split | Enters the two-page split with this page left and the next page right — the same split as right-click Compare ▸ Compare with Next Page — or leaves it. | \ |
| Switch Focused Split Pane | Moves focus to the other pane (split only), or to the next Multi-View section. | ⇥ |
| Next Page in Second Pane | Loads the left pane's next page into the right — a two-page spread in one press (split only). | ⇧N |
| Toggle Multi-View | Enters Multi-View with this exhibit in section 1, or leaves it. | ⇧\ |
| Bring Up / Back to Overview | Brings the selected Multi-View section up to fill the screen, or sends it back to the overview (Multi-View only). | U |
| Rotate 90° Counter-Clockwise | Rotates the current page. | [ |
| Rotate 90° Clockwise | Rotates the current page. | ] |
| Nudge Rotation Counter-Clockwise | Fine deskew, 1° at a time. | ⇧[ |
| Nudge Rotation Clockwise | Fine deskew, 1° at a time. | ⇧] |
| Zoom In | One zoom step in. | = |
| Zoom Out | One zoom step out. | - |
| Zoom and Pin Top of Page | Fits page width, pinned to the top. | ⇧= |
| Zoom and Pin Bottom of Page | Fits page width, pinned to the bottom. | ⇧- |
| Toggle Continuous Scroll | Switches the staged exhibit between one page at a time and one scrolling column. | ⇧S |
| Freeze Scroll | Freezes the scrolling column where it sits, page break included; press again to resume. | ⇧F |
Note: K and L each appear twice — once as a tool, once as a video shuttle key. That is deliberate. See Which layer wins, below.
### Rebind hotkeys
Rebinding happens in Settings → Hotkeys (⌘, then the Hotkeys tab). Each row shows the action, a one-line description, and a binding pill with the current key.
- Click the pill. It changes to "Press a key…".
- Press the key you want. The first bare press commits, and it applies immediately and survives relaunch.
- ⎋ cancels without changing anything.
- Presses holding ⌘, ⌥, or ⌃ are swallowed and never bind — that protects your menu shortcuts.
- Setting a key back to its factory value removes the override. A reset arrow appears on any row you have customized.
Shift can be part of a press, but the modifier itself is fixed per action: an action whose factory binding is ⇧E stays a shifted action no matter which letter you give it. Several actions share a base key and are split this way — ] and ⇧], = and ⇧=, R and ⇧R, B and ⇧B, E and ⇧E, N and ⇧N, P and ⇧P. Rebinding one member never moves the Shift.
Warning: If the key you record already belongs to an action that is not allowed to share it, that action is unbound rather than duplicated. Its pill reads "—" and a footer warning names it. An unbound action has no keyboard route at all — the on-screen buttons still work, but the muscle memory does not. After any rebinding session, scan the pane for a "—" pill before trial.
### Fixed keys
Not rebindable. These appear in the ⌘/ sheet under "Navigation — fixed".
| Key | Action |
|---|---|
| ← or ↑ | Previous page |
| → or ↓ | Next page |
| Home / End | First / last page |
| Page Up / Page Down | Previous / next page — what a presenter clicker sends; off under Settings ▸ General ▸ Presenter Remote |
| F5 | Opens the jury display, or goes Live once it is open (a clicker's start button) |
| . (period) | Toggles Blackout while the jury display is open (a clicker's blank-screen button) |
| 0–9 then ↩ | Page jump — digits collect into a "Page N" pill, Return commits, clamped to the document |
| ⎋ | Cancels a page-jump buffer in progress, or sends a brought-up Multi-View section back |
| Space (single tap) | Quick Look the selected exhibit (play/pause when a video is loaded) |
| Space (double-tap) | Quick Search and command palette |
| Space (single tap) | Play / pause the loaded video |
| ⇥ | Switch focused side-by-side pane, or the next Multi-View section |
| ⌘-scroll or two-finger swipe | Flip the page on both displays, one page per gesture |
| ⌃-drag | Pan a zoomed canvas |
| ↑ / ↓ (scrolling column) | Half a screen up / down |
| ⌥↑ / ⌥↓ (scrolling column) | Whole page up / down |
| ⌘Z / ⌘⇧Z | Undo / redo |
| Double-click a committed mark | Erase it |
| Double-click a Multi-View section | Bring it up |
In the Exhibits, Media, and Binders sidebars, ↑ and ↓ walk a cursor through rows and expanded pages, → expands a row or dives into page 1, and ← collapses. The arrow keys yield to the sidebar whenever your last click was in the list; otherwise they page the presenter.
### Menu shortcuts
| Menu | Item | Shortcut | Available |
|---|---|---|---|
| Evidentiary | Settings… | ⌘, | Always |
| File | New Case… | ⌘N | Always |
| File | Open Case… | ⌘O | Always |
| File | Close Case | ⌘⇧W | Case open |
| File | Lock Evidentiary | ⌃⌘L | Case open |
| File | Save Markup Snapshot… | ⌘S | Only with a PDF presenter on screen |
| File | Import Files… | — | Case open |
| File | Import Production… | — | Case open |
| File | Export ▸ Exhibit List · Admitted Exhibits · Exhibits Shown Record | — | Case open |
| File | Pre-Trial Check… | — | Case open |
| File | Quick Look | ⌘Y | Case open |
| File | Print Exhibit… | ⌘P | Case open |
| Edit | Undo / Redo | ⌘Z / ⌘⇧Z | Targets the focused pane, then the active canvas |
| View | Exhibits · Media · Depositions · Clips and Playlists · Binders | ⌘1 – ⌘5 | Case open |
| View | Open Jury Display | ⌘⇧J | Disabled when already open |
| View | Close Jury Display | ⌘⌥⇧J | Jury open |
| View | Identify Displays | — | Needs external displays |
| View | Blackout | ⌘⇧B | — |
| View | Staged | ⌘⇧S | — |
| View | Live | ⌘⇧L | — |
| View | Show / Hide Sidebar | ⌃⌘S | Case open |
| View | Show / Hide Toolbar | — | Case open |
| View | Customize Toolbar… | — | Case open |
| View | Presenter Notes | ⌘⌥N | Toggle |
| View | Side-by-Side Compare | ⌘\ | Case open |
| View | Multi-View | — | Case open |
| View | Enter / Exit Trial Mode | ⌘⇧T | — |
| Edit | Copy Jury Image | ⌘⇧C | Jury open |
| Video | Play, skip, designation, start point, and rotation items | — | Only with a loaded video |
| Help | Keyboard Shortcuts | ⌘/ | Always |
Two behaviors worth stating. Close Jury Display also answers to ⌘⎋ from anywhere. And the Video menu carries no bare-key equivalents on purpose: the global monitor owns J, K, L, N, P, I, and Space, so the menu would be advertising keys it cannot honor. The menu shows only shortcuts it can legally display, which is why an action bound to Return, Tab, or an arrow key never appears next to a menu item.
⌘\ enters side-by-side from single view, and inside a split it loads the focused pane's next page into the *other* pane — press it repeatedly to walk one side forward while the other holds still.
### The clip editor
The clip editor is a floating editor window. It is exempt from the global key monitor and owns every key below. All of these are fixed.
| Key | Action |
|---|---|
| Space | Play / pause |
| J | Reverse jog, cycling 1× → 2× → 4× → 8× |
| K | Hard pause (rate 0, jog reset) |
| L | Forward jog, cycling 1× → 2× → 4× → 8× |
| ← / → | Step one frame |
| ⇧← / ⇧→ | Step one second |
| Home / End | Start or end of the current volume |
| I | Mark IN — anchors at the sync line under the playhead |
| O | Mark OUT — sets the anchor if none exists |
| ⌘↩ | Create a designation from the transcript selection |
| ⎋ | Clear the transcript selection, or end QC Review if it is running |
| N / P | Next / previous designation — seeks and scrolls |
| ↑ / ↓ | Step the selection through clips, wrapping at the ends |
| ⌘↑ / ⌘↓ | Move the selected clip up or down the list |
| ⌘Z / ⌘⇧Z | List-level undo / redo |
| ⌘⌥0 | Show / hide the transcript sidebar |
| ⌘F | Focus the transcript search field |
| ⌘G / ⇧⌘G | Next / previous match, wrapping |
While QC Review is running, ↩ marks the clip good and advances, R replays the current endpoint audition, ↓ skips the clip, and ⎋ ends the review. Every key handler bails out while the search field has focus, so typing a query never triggers playback.
Warning: ⌘Z is list-level — adds, deletes, splits, merges, sorts, moves, links, pastes, and wizard applies. It will not restore a mis-set IN or OUT time; re-stamp the point or run Auto-Fill Times to recover one.
### Impeachment player and Playback Mode
The impeachment player is also a floating editor window with its own keys: Space plays and pauses, K hard-pauses, L and J cycle forward and reverse jog through 1× → 2× → 4× → 8×, ← and → step a frame, ⇧← and ⇧→ step a second, and ⎋ closes the window.
Playback Mode is a plain window, so the global monitor keeps firing over it — Space, the arrows, J/K/L and the Escape ladder all behave as they do in the workspace. It adds two keys of its own: ⌘⇧V blanks the jury's video frame while audio and subtitles continue, and ⎋ closes, routing through the save-your-spot prompt.
### Which layer wins
Almost every "my shortcut did not fire" report is explained by the order the global monitor uses. A keystroke passes straight through, untouched, when the front window is the clip editor or the impeachment player, when a text view or text field has focus, when a sheet or modal is on screen, or when a barcode scan burst is in progress.
Once it gets past those, the layers are checked in order: page-jump digits first, then the Jury Display layer, then the no-modifier canvas commands, then the Video layer (only while a video is loaded), then the Annotation Tools and Canvas Controls layers (only while an exhibit is mounted), then the shifted actions.
The Video layer is allowed to shadow a tool key, and only in that direction. In practice that is two collisions: K is Pause Video while a video is loaded and Laser Pointer otherwise, and L is Shuttle Forward while a video is loaded and Line otherwise. With no video mounted, both fall through to their tools. Jury Display actions never share a key with anything, in any layer.
Escape ladder. ⎋ is taken by the first condition that applies: cancel a page-jump buffer, stop designation playback, stop video designation playback, send a brought-up Multi-View section back, clear the staging area, then fall through to the system. Windows that own their keys have their own ladder — Close in the impeachment player and in Playback Mode, end QC Review or clear the selection in the clip editor, Cancel in any sheet or popover. ⌘⎋ sits outside the ladder entirely and closes the jury display from anywhere.
Settings
Open Settings with ⌘,. It has five tabs — General, Captions, Import & Export, Hotkeys, and Subscription — and stays reachable even when a subscription prompt is on screen. Settings are application-wide, not per case: a change here applies to every case you open on this Mac. The window is always dark and opens on General.
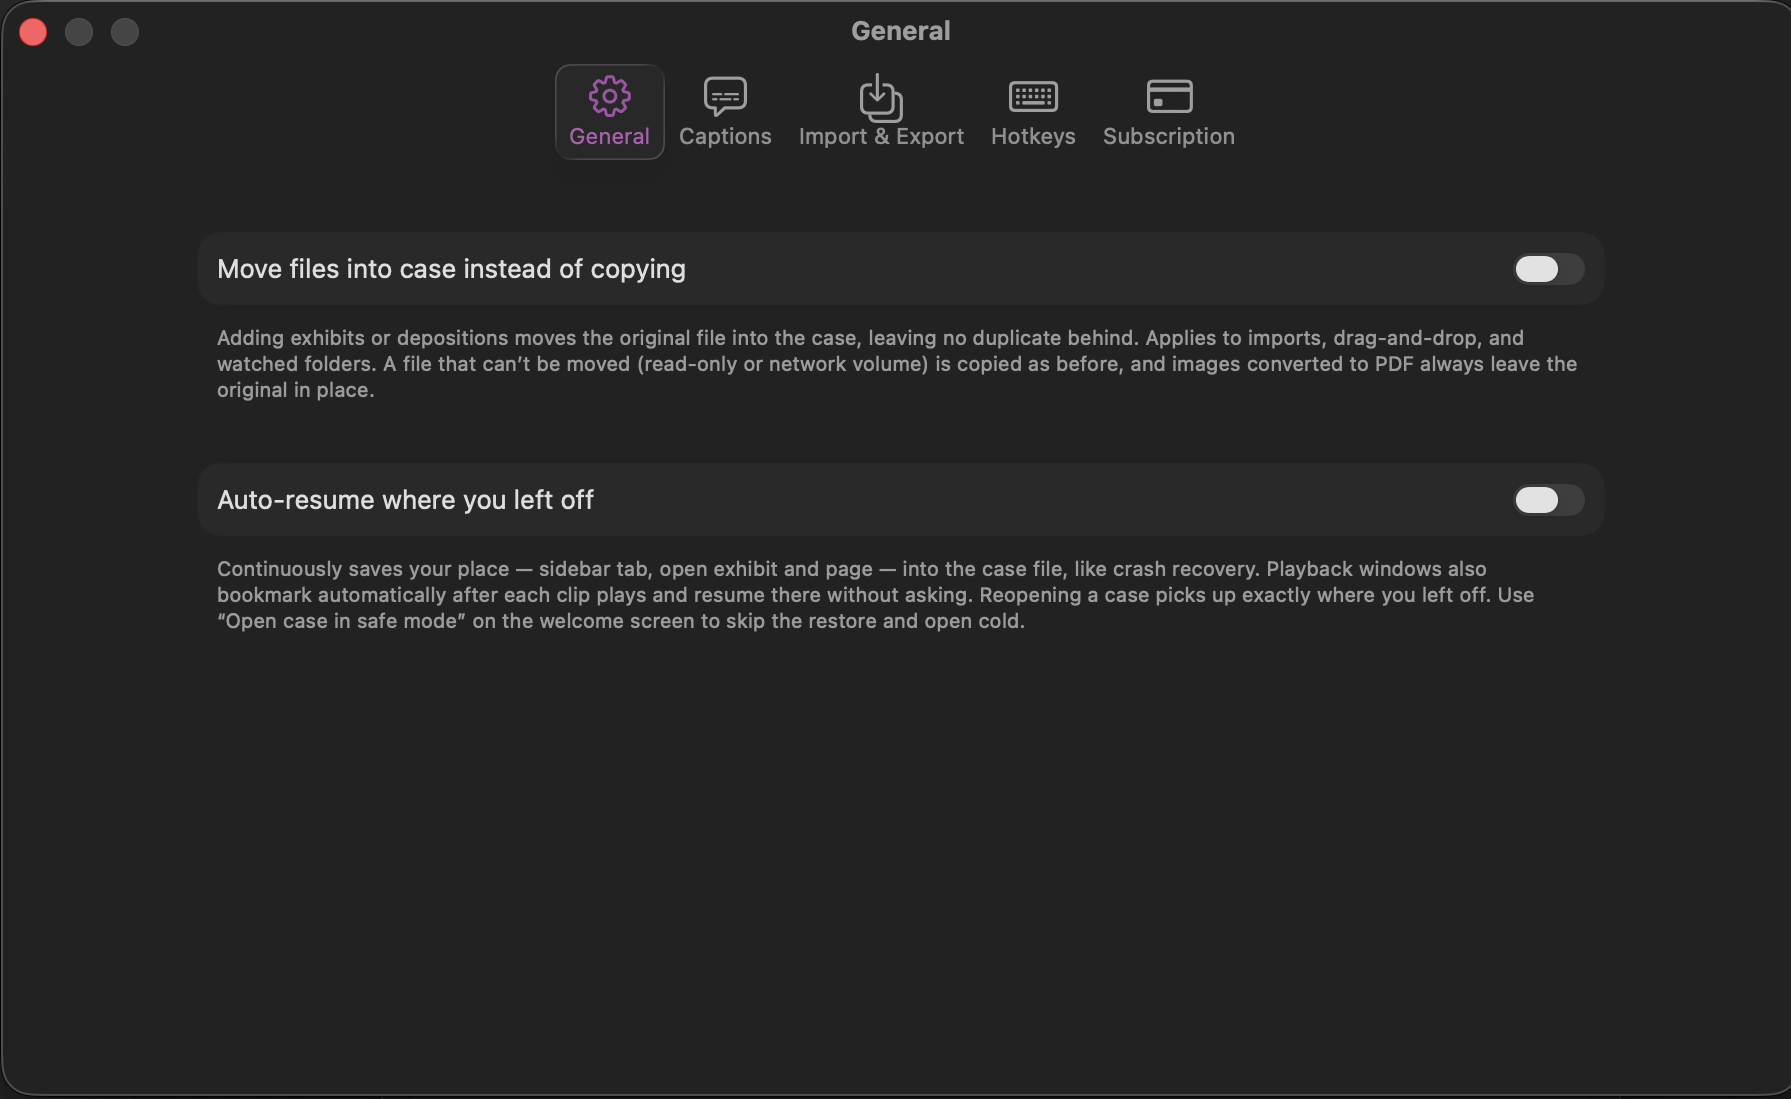
### General
Two groups of backdrop controls, then the toggles.
- Jury Display sets what the jury sees behind the page and whenever nothing is published: a Background color (black by default), an optional Background image chosen with Choose… (a firm logo, a seal) that sits centered on the color, and Tile the image edge to edge to repeat it instead. Remove takes the image away. The picked file is copied into the app's support folder, so the original can move. Four switches follow. Animate picture-in-picture and Animate Compare and Multi-View on the jury display (both on) let the jury see a page glide into place instead of cutting. Show media captions on the jury display (off) puts a transcribed video's captions in the caption band. Blur unreviewed faces while a video plays (off) is the safety net described under Redact an exhibit.
- Staging Area is your own screen: Canvas background is the color around the page's letterbox bars and while an exhibit loads (black by default, never seen by the jury), and Open exhibits in continuous scroll makes the scrolling column the default view for every multi-page exhibit instead of paged turns. Info and sticker panels puts the inspector column Beside the staging area (the default) or Over it.
- Shortcuts when the jury display opens and closes name two Shortcuts from the Shortcuts app that Evidentiary runs at those moments. A sandboxed app cannot switch a Focus itself, so a Shortcut that turns on Do Not Disturb, and a second that turns it off, keep Messages banners off the jury screen. The Pre-Trial Check reminds you until the first is set.
- Presenter Remote maps the keys a Logitech or Kensington clicker sends: Page Down and Page Up turn pages, the start button (F5) opens the jury display or goes Live, and the blank-screen button (.) toggles Blackout. On by default; turn it off to give Page Down back to the lists.
- Lock after hides your screens behind a lock card after 5, 10, 15 or 30 minutes with no keyboard or mouse input anywhere on the Mac — for a podium laptop left open at recess. Touch ID, Apple Watch or your account password unlocks it; the case stays open underneath, and the jury display keeps showing whatever mode it was in. Never (the default) turns it off. File ▸ Lock Evidentiary (⌃⌘L) locks right away. Photograph failed unlock attempts (off by default) has the Mac's built-in camera take one picture when someone presses Unlock and keeps it if the attempt fails or is cancelled — a successful unlock throws it away. The pictures live in Evidentiary's own folder, never in a case; they are listed right below the setting with the date and what went wrong, with Show in Finder and Clear All. Turning the setting on asks for camera access, and the lock card says that failed attempts are photographed.
Each group carries a one-line note and a Learn more… link that opens this chapter; the full explanations live here rather than in the window.
Then six toggles. Fade between exhibits, Find exhibits in Spotlight and Presenter remote turns pages are on out of the box; the other three are off.
- Auto-resume where you left off keeps your place — sidebar tab, open exhibit, and page — written into the case continuously, and restores it once per case open. A tab that is not currently available is dropped from the restore. Turning it off does not erase places already saved; it stops capture and restore, and turning it back on picks up from whatever was last recorded. When it is on, the welcome screen grows an Open case in safe mode checkbox that skips the restore for one open without deleting the saved place. Playback bookmarks are separate and prompt on their own (see Playback Mode).
- Fade between exhibits crossfades your viewer when you switch exhibits instead of cutting. Your screen only: the jury always switches instantly, and the system Reduce Motion setting turns the fade off as well.
- Find exhibits in Spotlight puts each exhibit's label, name, Bates range and page count into the Mac's own index, so ⌘Space finds "Exhibit 12" or a Bates number and opens the case at that document — even when Evidentiary is not running. Depositions (by deponent) and clip lists (by name) are indexed alongside, always as names only: a hit opens the transcript or the clip editor. The index is local to this Mac and nothing is uploaded. Include document text adds the words inside the exhibit, so a phrase you remember finds the page; it is off by default, because the index outlives the open case and anyone at an unlocked Mac can search it. Removing a case from Recents removes it from Spotlight with it, and Remove Evidentiary from Spotlight clears everything the app has indexed.
- Move files into case instead of copying decides what import does with the original: leave it in place and copy into the case (the default, and the safest), or relocate it into the case package. Three exceptions apply. A file that cannot be moved — read-only media, a network volume — is copied instead. An image converted to PDF on import always leaves its original where it was. And the same checkbox sits at the top of the Pending Imports sheet, where it mirrors this setting in both directions: flipping it mid-import changes the global default.
### Captions
How synced testimony is drawn wherever it appears — operator playback, the jury display's caption band, the impeachment player's subtitle strip, the clip editor preview, and subtitles burned into exported clips. A live preview strip at the top of the pane shows a page:line stamp over sample testimony at your current settings.
| Control | Range | Default |
|---|---|---|
| Font size | 14–64 | 28 |
| Page:line size | 0.5–1.0 | 0.78 |
| Bold current line | On / Off | On |
| Smooth scrolling | On / Off | Off |
| Background opacity | 0–1 | 0.7 |
| Auto-trim: pad around clip | 0–1.0 seconds | 0.3 |
Page:line size is a ratio, not a point size — the stamp renders at the caption font size multiplied by this value, so raising one raises both. Smooth scrolling glides lines up as testimony advances instead of jumping. The caption band under a video exhibit clamps background opacity to a 40% floor, so dragging the slider to zero still leaves a readable scrim there. Pad around clip is not a caption setting at all: it is the breathing room Tighten Clips leaves at each end after removing silence. Reset to defaults returns all six values at once.
This is the same control set as the Caption styling… button in the clip editor and the caption-style button in the designation playback bar — change it in either place and it changes everywhere, live, including on a jury display that is currently broadcasting. Set caption size during setup or between witnesses, not mid-block. What a caption *says*, and which words are colored, is set per line in Edit Subtitle Text… and always wins over anything here.
Caption styling does not reach the transcript viewer or the clip editor's transcript pane. Those have their own text-size stepper.
### Import & Export
Starting values for two dialogs you would otherwise only meet in the middle of a task. Both directions are live: changing a value in the import sheet or the export popup writes it back here.
Exhibit Import — how the number is read off the filename (Space, Dash, Underscore, a custom prefix the number follows, or None to import as the filename), whether leading zeros are stripped, and whether Bates numbers are auto-detected, with the digit count and whether to read them from the document itself, plus whether scanned pages are OCR'd on import. Space, strip-zeros on, Bates detection off, and OCR off are the factory values. These are only a starting point: every import still previews the derived numbers and refuses to proceed while a duplicate remains, so nothing set here can push a collision into the case.
Clip Export — the profile, resolution, quality, whether page:line is shown, whether linked exhibits are burned in, and HEVC.
| Profile | What it sets |
|---|---|
| Courtroom 720p | 720p, high quality, no burned-in subtitles — for third-party playback systems |
| High Quality 1080p | 1080p, high quality, burned-in subtitles with page:line |
| Email / Mobile | 480p, medium quality — small files for email or iPad review |
| Custom | Keeps whatever is currently set |
Picking a profile fills in the rest. Touching resolution, quality, HEVC, linked-exhibit burn, or the page:line toggle afterward snaps the profile back to Custom, so the label never claims something the settings do not do. All three named profiles leave HEVC and linked-document burn off.
Warning: Leave Encode as HEVC (H.265) off for anything leaving your Mac. It halves file size at the same quality, but older Windows PCs and third-party trial-presentation systems may not play it — and silent audio on the other side is the usual symptom.
### Hotkeys
The pane lists all forty-one rebindable actions under four category headers — Annotation Tools, Jury Display, Video Playback, Canvas Controls — each row carrying a binding pill you click to record a new key and a reset arrow that appears once you have customized it. The footer's Reset All to Defaults is destructive, disabled when nothing has been customized, and confirms before it runs. Two switches sit above the list. Tool wheel stays open until you pick opens the wheel with one tap of its key and picks with a second, for when holding a key and steering at once is awkward. Tool wheel springs open (on) animates it; turn it off for a flat cut. The full catalog, the recording rules, and what happens when a new key displaces an existing one are in Keyboard Shortcuts.
### Subscription
Your plan status, the purchase and Restore Purchases controls, Manage Subscription…, and the legal links live here. See the Subscription chapter.
### Controls that live elsewhere
A few settings stay with the feature they belong to rather than moving into this window, and each remembers its state between sessions: the Callout and Laser tool option popovers, the transcript text-size stepper, and the sidebar's list-density and sort choices. Each is covered in its own chapter above.
Subscription
Evidentiary is sold through the Mac App Store as a single auto-renewing subscription, Evidentiary Pro. There are no feature tiers — one subscription unlocks trial presentation, deposition sync, clip designation, and everything else in this guide.
### Pricing and plans
There are two plans, monthly and yearly, with the yearly discounted. Current pricing is delivered by the App Store in your local currency, so the authoritative answer to how much Evidentiary costs is always the price shown on the buttons themselves — on the launch paywall if no subscription is found, or in Settings → Subscription (⌘,) at any time. The cheapest plan is listed first. A plan you already own reads "Subscribed ✓" instead of a price. If no plans load at all, the section shows the underlying error or "Subscriptions unavailable. Check your network connection and try Refresh." — check the network and press Refresh.
### Billing, cancelling, and changing plans
Billing is handled entirely by Apple against your Apple Account, not inside Evidentiary. Subscriptions renew automatically until cancelled.
- To cancel your subscription — use Manage Subscription… in Settings → Subscription, which opens your App Store account's subscription page, and cancel there. Every feature keeps working until the paid period ends; nothing is locked mid-trial.
- To change plans — the same page. Switching between monthly and yearly is an App Store operation.
- To see receipts or request a refund — also the App Store, through your Apple Account's purchase history.
- Restore Purchases — use it after reinstalling, moving to a new Mac, or signing into a different Apple Account. It asks the App Store to re-deliver an entitlement you already own.
- Refresh — in the Status section. Re-runs the entitlement check without touching the purchase flow. This is the quickest confirmation after a renewal or a plan change made elsewhere.
Entitlement changes arrive live. A purchase, renewal, refund, or cancellation processed while the app is running lands without a relaunch, and Settings stays reachable from behind the paywall so a restore can be troubleshot before you get into a case.
Note: There is no redeem-code or offer-code field anywhere in Evidentiary. Promotional and volume codes are redeemed in the App Store itself; the entitlement then appears here after Refresh or Restore Purchases.
### Terms and privacy
Terms of Service opens the bundled terms in a window — the same text filed as the App Store license agreement — from Settings → Subscription, from the paywall, or from the Help menu. The Privacy Policy link opens the published policy in your browser. What the app does and does not process on your Mac is covered in Privacy, below.
Privacy
Is your data private? Yes, and the design behind that answer is short: every form of automated analysis in Evidentiary runs on the Mac in front of you. No transcript, no exhibit, no audio, and no video is uploaded anywhere for processing. There is no Evidentiary server to mirror anything to. Evidentiary sends no telemetry and has no analytics.
Where your case data lives. Everything belongs to the .trialcase package you chose: exhibits, transcripts, markup snapshots, admission records, notes, and presentation history. If you save that package in iCloud Drive or Dropbox, your cloud provider syncs it under your own account and terms — that is a choice you make by where you save the case, and the app warns once when it detects one of those locations.
Speech, sync, and diarization. Auto-Sync, Batch Sync, the rough AI transcript, and Auto QC all run through speech models bundled inside the application; speaker separation uses locally converted diarization models. Audio never leaves the machine, and syncing works with the network switched off.
Apple Intelligence features. Ask Evidentiary, Smart Summary, and AI clip-label suggestions use Apple's on-device foundation model. Each degrades rather than reaching out: Ask Evidentiary falls back to chapter links, Smart Summary reports that Apple Intelligence is unavailable, and the label-suggestion controls hide themselves. None of them contact a server.
Search and text extraction. Semantic search over transcripts and OCR'd exhibits uses the operating system's on-device language embeddings. OCR runs locally through the Vision framework. Objection detection is a local keyword scanner that strips nothing on its own — it only raises a badge for you to verify.
What does use the network. Four things, all of them explicit: the App Store handling subscriptions, purchases, and Restore Purchases; the Online User Guide menu item; the Privacy Policy link; and Manage Subscription… handing off to your App Store account. The bundled guide, Ask Evidentiary, the interactive tour, the changelog, the licenses window, and the terms window are all local and work offline. No network service listens on your Mac, and Evidentiary never requests local-network permission.
Diagnostics. Help → Export Diagnostics writes an hour of application log to a file you choose and reveals it in the Finder. It is written locally and transmitted only if you choose to send it, and it records application activity, not document content.
Voice control. Siri phrases are handled by App Intents. Speech recognition for Siri itself is governed by your macOS Siri settings; the intents Evidentiary registers operate on the open case locally.
Warning: The .tws sync exchange format is obfuscated, not encrypted for security. Treat anything you email as a .tws file as unprotected work product.
The bundled speech-recognition and speaker-diarization models are open-source components; their attributions and full license texts are under Help → Third-Party Licenses.
Troubleshooting
This chapter is arranged by symptom. Before any of it, the preventive step: Help → Pre-Trial Check… runs twelve checks over the open case and names the exhibit, deposition, or playlist behind every finding — exhibits with no number, no admission status, or a missing source file; conditional admissions still to connect up; depositions missing a deponent, a date, a transcript, or a video volume; designations with no time range; empty playlists; media this Mac cannot decode; and cloud files that have not downloaded. Run it the evening before, on the machine that will sit at counsel table; the decode check opens every media exhibit, so it takes as long as your video is large. It verifies the case, not the room — pair it with Test Pattern on Jury Display from its footer and one real publish to the courtroom monitor.
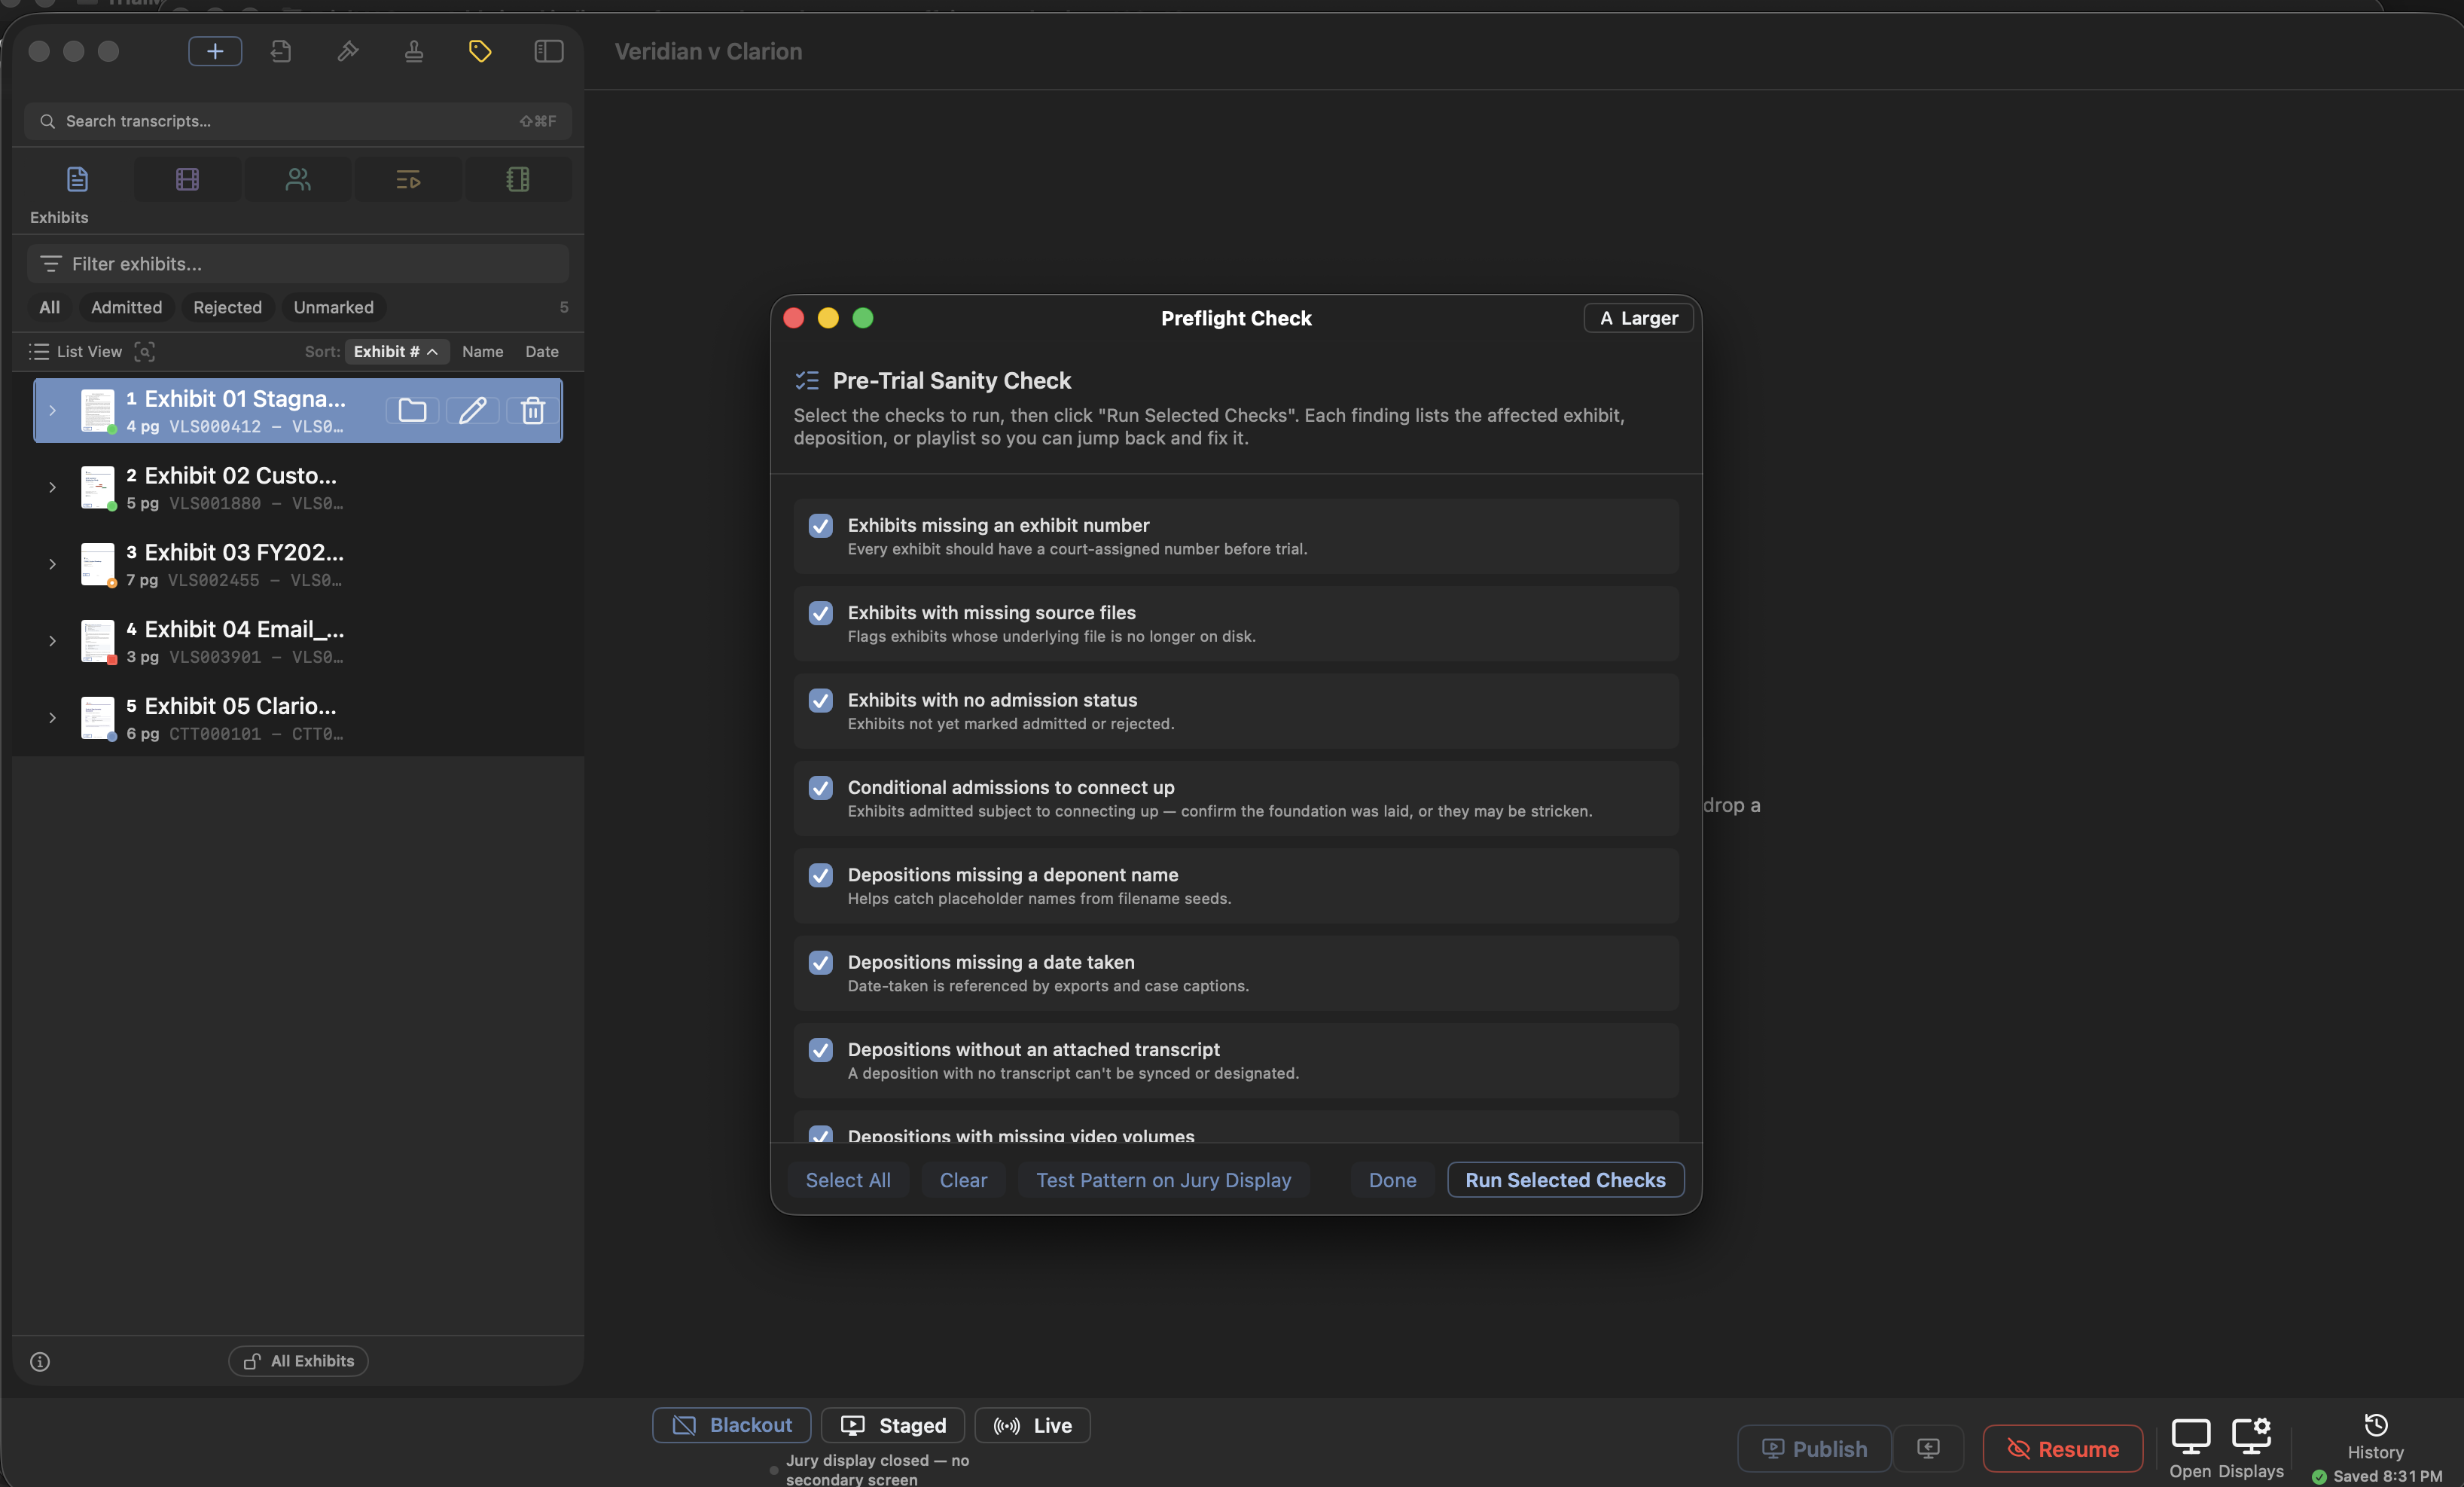
### Displays and the jury window
The jury window opened on the wrong display. Evidentiary keeps your primary display — the one with the menu bar — private and sends the jury feed to the external screens picked in Displays. Make your working display the primary one in macOS System Settings → Displays, and use Identify Displays (View menu) to flash a numbered card on every screen reading "This Mac", "Jury", or "Private". To keep one particular second monitor private without changing your primary, open Jury display options (the gear beside Open Jury) and click that display in the monitor map. This Mac's own display can never be assigned as a jury output.
Nothing is on the second monitor, but the app says the jury display is open. The monitor has been parked as Private. Run Identify Displays — if the courtroom projector shows a "Private" card, re-enable it in the display picker.
There is no second monitor at all. Opening the jury display warns that the jury view will take over your main screen. Open Anyway proceeds; ⌘⎋ closes it from anywhere.
A courtroom display flickered, changed resolution, or briefly lost signal. Evidentiary heals the jury view on its own — it resizes to a display's new resolution, and if a projector or cable drops out mid-presentation it re-opens and restores the published exhibit the instant the picture returns. When the last jury display goes, the jury view closes rather than landing on your own screen, so you keep working while you sort the cable out. Exhibits always keep their proportions, letterboxed on black, so nothing stretches on a 4:3 screen.
The picture on the projector looks stretched. Show the Test Pattern from the display picker or the Pre-Trial Check footer. The circle must be perfectly round; an oval means the display is stretching the picture. Fix the aspect setting on the projector, not in the app.
Nothing publishes. Confirm the mode. Publish is disabled unless the jury display is open *and* the mode is Staged. In Live the jury already mirrors your screen; in Blackout the feed is cut.
Keynote or PowerPoint will not present over the jury window. It does not need to be closed. The jury window drops to a normal level whenever Evidentiary is not the front application, and restores its shielding when you come back.
### Playback and codecs
A video will not play, stutters, or fails during clip export. Run the Pre-Trial Check with Video and audio decode preflight selected. It decodes a sample frame from every media exhibit and names the unsupported codec, the missing video track, or the decode error before the file fails in front of the jury.
A file that fails preflight. Right-click the exhibit and choose Optimize Video for Playback…, or open Edit Deposition and use the sparkles button on the volume row. Both re-encode to a clean H.264 MP4 and preserve clip times and transcript sync. Keep Back up the original(s) first on until you have confirmed playback. If optimization itself fails it reports why — unreadable file, no video track, not enough free disk space (roughly three times the original), encoder unavailable, or a duration drift that made the swap unsafe.
Audio plays on your Mac but is silent on a Windows PC. Re-export with Encode as HEVC (H.265) off, and leave it off for anything handed to the court or opposing counsel.
A file no re-encode can fix. If a video was copied from a network share or cloud folder and the transfer was truncated, the file's index runs past the end of its actual media data. No optimization pass repairs that. Re-copy from the original source.
### Cloud files and placeholders
Evidentiary warned that the case is in a cloud-synced folder. Move the .trialcase package to a local folder — Desktop, Documents outside sync, an external drive. iCloud Drive, Dropbox, OneDrive, and Google Drive can swap files for download-on-demand placeholders, a stall you do not want mid-trial. A Don't warn again for this case checkbox suppresses the notice once you have decided.
A case or an exhibit opens to an error or an endless spinner. The file is a placeholder that has not downloaded. Evidentiary shows a download sheet with byte progress, or "Waiting for the file provider…" while the provider wakes up; Cancel or ⎋ aborts the open and leaves the previously open case untouched. If it fails, check that the Mac is online and the provider is running and signed in. You can also force it from the Finder: right-click the case → Download Now, let it finish, then reopen.
Warning: Do not rely on a cloud folder to download files on demand in a courtroom. Copy the case to the trial machine's local disk, or force a full download and pause syncing, then re-run the cloud check in the Pre-Trial Check to confirm nothing is still a placeholder.
### Sync and timings
Auto-Sync fails with an audio error. Three causes look alike. Re-run the sync once — a first-run failure is often the speech engine warming up. A message about free disk space (or, in older builds, "Failed to specialize the model") means the Mac is too full for the sync's scratch: about 115 MB per hour of video for the audio it decodes (deleted afterwards), plus, the first time on a Mac, roughly half a gigabyte to set up the speech models. The message states the figure for that sync; free that much and run it again. If it persists, run Optimize Video for Playback… on the volume, which fixes undecodable audio codecs. The third cause is a truncated file, which needs a fresh copy from the source.
Sync accuracy looks low. Front and back matter — appearances, certifications — never match audio and are excluded automatically. For interpreted testimony, enable Translator Present before syncing. Checking Run 2nd pass for added accuracy and syncing again buys back the stretches the first pass could not place, at the cost of a longer wait. Edit Sync on the transcript can rescue difficult stretches by hand.
Sync finished but the timings look wrong. Open Report in the Edit Deposition sheet. It is recomputed each time it opens and names the specific failure: a volume with no video attached, transcript running past the audio, audio starting after the transcript begins, a probable gap or sidebar, or timing running backwards at a given page:line. Copy Report puts a plain-text version on the clipboard for the videographer or court reporter. If it lists more than twenty gaps, the sync itself failed — re-running Auto-Sync beats triaging line by line.
Individual lines show an amber strip. That line's timing was interpolated from its neighbors rather than word-matched to audio. Play it before cutting a clip there. The clip editor shows the same condition as a low-confidence badge.
Partial-line clips drift. The deposition was synced before word-level timings existed. Use Add Word Timings in the Edit Deposition sheet.
A clip plays the wrong footage. Check the deposition's video volumes are in the right order in Edit Deposition — clip timings are anchored to volume order. If this appeared right after a realignment, verify a clip at a volume boundary: realignment shifts displayed page:line numbers while sync entries keep their raw numbers, which in a multi-volume deposition can route a lookup to the wrong volume. Reset Realignment undoes a bad offset.
A designation is missing from Playback Mode's queue. Only clips that are included and carry in and out times are queued; a sustained clip is queued but greyed and skipped. Check the clip's Include switch; Sync Times or Auto-Fill Times will fill in missing times; and flip the ruling in the queue if you did not mean to sustain it.
Playback Mode opened partway down the list. It resumed a saved spot. Press Stop to jump back to clip 1 — that also clears the bookmark for next time.
### Transcripts and exhibits
A scanned PDF imported as an exhibit instead of a transcript. The file is a scan or an unusual layout that page:line parsing could not read, so navigation, sync, and designations are unavailable for it. In order of reliability: ask the court reporter for an ASCII .txt transcript, which imports one-for-one; failing that, a text-based (not scanned) PDF. The Edit Deposition sheet's Convert PDF to TXT… button produces a standard ASCII file from a text-based PDF.
Opening a transcript shows an OCR progress panel. The PDF has no text layer, so Vision is recognizing it. It happens once; later opens are instant. Let it finish — it cannot be dismissed.
A red banner says the transcript is machine-generated. That transcript came from the AI rough-transcript feature and is not certified. Verify it against the video; syncing a real transcript replaces it. If Q and A speakers are reversed, use Swap Q and A Speakers on the transcript row context menu.
The transcript's page numbers are one off. Right-click the line that is wrong → Realign Page/Line… and type what it should be; the whole transcript shifts with it. Reset Realignment puts it back.
An exhibit will not OCR, or search cannot find its text. Run OCR on it first (right-click → Run OCR). Semantic search and the redaction assistant only read OCR'd documents.
An exhibit shows a quarantine badge. The file was quarantined, by you or by import safety checks. Right-click it → Mark as Safe to move it back, or review the file first in the case package's Quarantine folder in the Finder.
Side-by-side will not turn pages, and picking an exhibit exits compare. The split page lock is on — look for the Pages locked pill on the stage and click the lock button to release it.
The barcode scanner types into a search box instead of recalling. Click out of the text field first. Scans are ignored while you are typing in a field so they cannot corrupt your text.
Keynote export fails. Keynote must be installed, and macOS asks once for permission to control it. Approve it, or re-enable it in System Settings → Privacy and Security → Automation.
### Hotkeys, Siri, and stale builds
A hotkey does not fire. Work through these in order. Is a text field focused — a search box, a page-jump field, an input inside a sheet? The global monitor passes every keystroke through untouched in that case; click the canvas or press ⎋ first. Is a sheet or modal open? Is the front window the clip editor or the impeachment player, which own their keys entirely? Is a video loaded, so K pauses instead of arming the laser and L shuttles instead of arming the line tool? Is an exhibit mounted at all, since tool and canvas keys need one? Did a rebind unbind something — check Settings → Hotkeys for a pill showing "—". And are you holding ⌘, ⌥, or ⌃, which are never treated as tool or jury hotkeys? Your live bindings are always visible at ⌘/.
An amber triangle sits beside the admission pill at the left of the toolbar. You are running an older build than one this Mac has launched before — usually a stale copy left open, or a second copy in Downloads. Click the triangle for both build numbers. A stale copy behaves exactly like a fix that did not take, so check this before reporting that something is still broken. If the older build is deliberately the one you want, the popover has a button to stop the warning.
Siri phrases do nothing, or Siri cannot find the app. This is almost always Launch Services, not Siri: macOS has registered more than one copy of Evidentiary — usually an older build in Downloads, on the Desktop, or inside a mounted disk image — and the duplicate registrations cancel each other out. Keep exactly one copy, in /Applications, delete or archive the rest, then log out and back in so Launch Services re-scans. To confirm, open the Shortcuts app and search for Evidentiary: four tiles should appear — User Guide, Pre-Trial Check, Create Clip, and Create Playlist. If they are there, the problem is the spoken phrase, not the installation (see Siri and Voice Control).
A fix that "did not work." Confirm you are running the build you think you are. An older copy left open from a previous session, or launched from a second location on disk, behaves exactly as it always did. Quit every running copy, check the version in About Evidentiary, and confirm Help → New Additions and Fixes lists the change you are looking for.
A case opens to a broken or stale position. Reopen it with Open case in safe mode checked on the welcome screen. The case opens cold, auto-resume stays on and re-captures from there. Uncheck the box once things look right.
### Still stuck
Open Ask Evidentiary (Help menu) — type the question and it answers from this guide with a link to the section. For a bug, Help → Export Diagnostics writes the last hour of application log to a timestamped file you save and reveals it in the Finder. Do it promptly: the window is one hour and useful entries age out. Send it with the exact alert text and what you were doing at the time. The file records application activity, not transcript or exhibit content.